


Tiny Pottery That Fits Together: Make a Miniature Nesting Bowl Set

There is something especially satisfying about a collection of tiny objects that does more than look lovely. I want these miniature nesting bowls to belong together in two ways: as a softly colored botanical set, and as little shapes that settle one inside another. A teal bowl, a sage bowl and a dusty-rose bowl make the heart of the stack, with smaller ivory and terracotta bowls completing the family.
For a broader comparison of clay choices, my miniature ceramics and pottery guide explores other tiny vessels and finishes. Here, the challenge is a matched set that can lift apart without a miniature wrestling match.
The finished effect is delicate pottery, but this project uses oven-bake polymer clay rather than ceramic clay and a kiln. We will build each bowl with a small flat base, a rounded rim and gently opening sides, then add fine painted leaves and flowers. The important part happens before the decoration: giving neighboring bowls enough room to fit without scraping or getting wedged together.
The purchased alternatives below use Amazon affiliate links; if you buy through them, it helps fund this tiny world. As an Amazon Associate I earn from qualifying purchases.
Jump to supplies or the build steps.
For a floral accent, the 8 Pcs Cute Mini Vase Magnets for Fridge can decorate a fridge or a miniature display. Check each piece against your scene’s scale and position its magnet at the back, out of view. Individual dimensions and freestanding stability are not verified, so plan suitable support rather than assuming it will stand like a conventional vase.

About the inspiration: the styled project images are AI-generated illustrations of the design. The measurements below are proposed starting targets. Your clay, hand-forming and finishing will affect the result, so the guide includes a trial pair and several fit checks rather than promising that a set of numbers guarantees perfect nesting.
Plan miniature nesting bowls that have room to fit
Think of each bowl as a shallow rounded cup that becomes wider toward the top. Avoid an inward-curving lip: even a beautiful little rolled rim can catch the next bowl. A small level standing area underneath is more useful here than a tall decorative foot ring, which would consume space inside the bowl below it.
The following set is approximately 1:12-inspired, although you can use it in another miniature setting if the proportions suit your scene. At 1:12, the largest piece represents a generous mixing bowl rather than a cereal bowl. The smallest represents a little preparation dish. Do not treat these as measurements taken from the cover image.
Largest — Muted teal: 32 mm outer rim diameter × 13 mm overall height.
Second — Soft sage: 27 mm outer rim diameter × 11 mm overall height.
Middle — Dusty rose: 22 mm outer rim diameter × 9 mm overall height.
Fourth — Warm ivory: 17 mm outer rim diameter × 7 mm overall height.
Smallest — Gentle terracotta: 12 mm outer rim diameter × 5 mm overall height.
Aim for walls around 1 mm thick, while accepting that handmade walls will vary. Keep the base reasonably even rather than leaving a large solid lump beneath a thin rim. These are shaping targets, not a requirement to sand every finished bowl down to an exact thickness.
There is a useful bit of arithmetic behind the size steps. A 32 mm bowl with approximately 1 mm walls has a mouth roughly 30 mm across. A 27 mm bowl would therefore have about 1.5 mm of space on each side at that opening. That calculation says nothing certain about the curves farther down, where the bowls may meet first. Matching those profiles matters just as much as measuring the rims.
The practical goal is a relaxed stack, not a fitted mechanical joint. A smaller bowl should lift out with almost no effort. It should not depend on flexing its neighbor to escape, and you should not need to twist painted surfaces against one another.
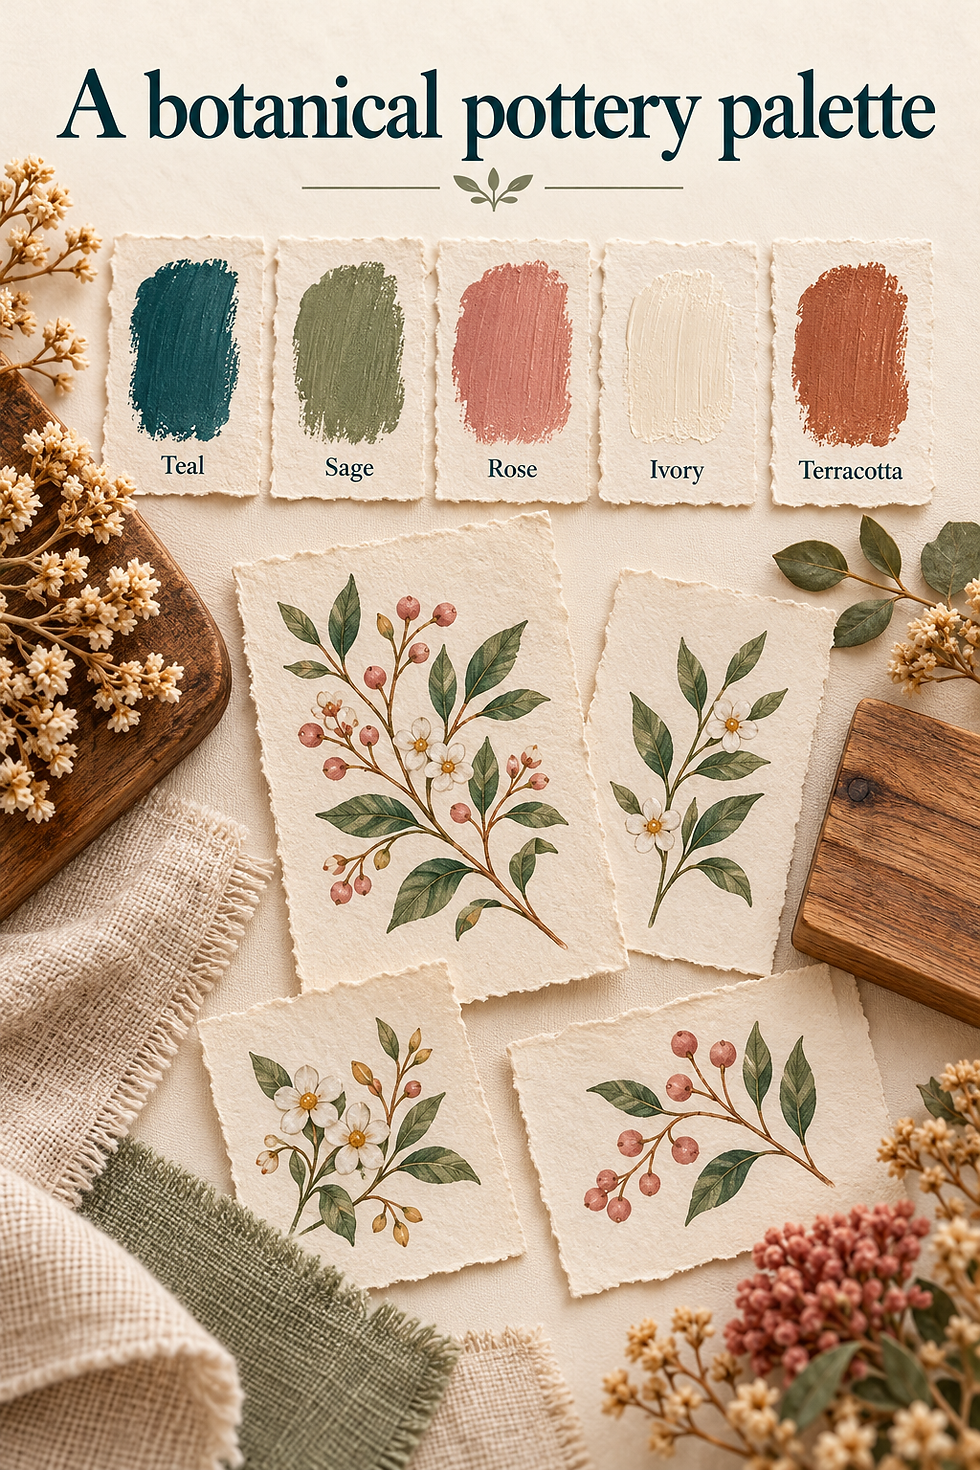
A coordinated palette makes these separate pieces feel related before a single flower is added. Teal gives the set its depth, sage softens the transition, and rose brings warmth to the center. Keep a little ivory in the painted details to tie the colors together.
Gather a small, organized supply board
Set everything out before conditioning the clay. Separate household basics from specialist materials and tools. Keep clay equipment separate from utensils used to prepare food.
Home supplies
Plain paper and a pencil for size circles and side-profile sketches.
Aluminum foil for individual baking cradles.
Baking parchment for an appropriate tray barrier.
A clean cloth or paper towel for keeping the work area tidy.
A shallow box or tray to hold the fully cooled pieces between sessions.

The household group covers the planning and baking setup. The specialist materials below do different jobs: polymer clay forms the bowls, paint supplies the color, and an optional compatible finish protects the decoration. Keep those distinctions when gathering supplies.
Store-bought materials
Oven-bake polymer clay suitable for detailed work, such as Sculpey Premo. A light neutral color makes a useful painting base.
Water-based acrylic paints in teal, sage, dusty rose, ivory and terracotta, plus muted green and pale floral colors.
A finish specifically compatible with polymer clay and your chosen paint, if you want a protective decorative coating.
Fine abrasive paper for very limited cleanup after curing, used according to its maker's directions.
Tools
A clay-dedicated smooth work surface and a small roller.
A rounded or ball-ended sculpting tool for opening and smoothing the bowls.
A small ruler or caliper that can measure millimeters without squeezing soft clay.
Fine paintbrushes, including a small pointed brush for botanical details.
An ovenproof metal tray or another surface approved for your clay.
An independent oven thermometer and suitable oven protection for handling the hot tray.
You do not need a pottery wheel or a set of identical miniature molds. A little patience with the profile is more valuable than a complicated tool collection. If the 12 mm bowl feels frustratingly small, practice the shaping movement on the two largest pieces first.
The Rolife Farmhouse Kitchen DIY Miniature Kit offers a separate kitchen project if you enjoy furnishing small domestic scenes. Its listed 1:18 scale differs from this guide’s suggested 1:12-inspired sizes. Measure the intended shelf or counter and scale your bowl plan accordingly; the kit is not an exact reproduction of this project.

A tidy work tray makes it easier to keep the stages separate. Raw clay, cooled test pieces and freshly painted bowls should each have a place to rest without touching one another. Save the small sample until the last finish check; it has a more important job than looking pretty.
Before the clay comes out
These are decorative miniature accessories, not vessels for food or drinks. Keep the finished small pieces away from children or pets who might swallow them. Read the clay, paint and finish labels before starting, including their handling and ventilation instructions. Use the exact baking directions for the clay you actually buy; different products are not interchangeable simply because they are all called polymer clay.
Make your miniature nesting bowls
Complete steps one through six for the trial pair. Check their fit before shaping the remaining sizes, then paint the whole set.
1. Draw the sizes and decide how the set will stack
Draw five circles on paper using the outer rim diameters in the table. Beside each circle, sketch a simple side view at the suggested height. Give every profile a short flat bottom, rounded lower corners and sides that open gently toward the rim. These drawings are finished-size comparison guides, not circles to cut from clay and expect to become bowls of the same diameter.
Compare the profiles before shaping. Keep the smaller bowls similar to the largest, rather than alternating deep cups with flat saucers.
Mark the color beside each outline. I would keep the strongest teal on the largest bowl, with sage and rose inside it, so that several different rims remain visible in a partial stack. Ivory provides a light pause, while terracotta adds a little warmth at the smallest scale.

Plan to make the first two as a trial pair. Once they are cured and cooled, they will reveal whether your chosen curve actually nests. That small pause is much more useful than decorating five bowls and discovering afterward that the second one cannot sit inside the first.
2. Condition the clay and prepare manageable portions
Knead the clay until its texture is consistent and it feels ready to shape. Soften a modest portion at a time. Keep unused clay covered or stored as its manufacturer recommends, and keep lint, paper fibers and paint residue away from the clean material.
Separate a larger portion for the teal bowl and a slightly smaller portion for the sage bowl. Leave the remaining clay aside until the trial pair tells you whether adjustments are needed. Also save a little material for a plain test piece: it will be useful when checking the paint and finish combination later.
Roll each working portion into a smooth rounded form, then gently flatten it into a thick, compact puck. Do not make a thin pancake at this stage. You need enough material around the center to form the walls without creating a paper-thin bottom.
Adjust the amount of clay as you work; this guide does not prescribe a fixed weight. If a portion clearly contains too much material, remove a little before you begin thinning the rim. Trying to hide the excess in a heavy base makes nesting harder later.
A ready-made iLAND Luxury Kitchen 1:12 Furniture Set is another option for a display around handmade accessories. Check actual counter depth, cabinet openings and shelf clearance before choosing bowl sizes. The nominal scale is useful context, but it cannot guarantee that the largest bowl will fit every cupboard.

Clean handling makes a noticeable difference at this size. A strand of lint that seems insignificant on the table can become a prominent line across a tiny ivory interior. Check your fingers and the rounded tool before opening each bowl.

3. Shape the largest bowl with a steady base
Support the clay puck on your work surface and make a shallow central depression with the rounded tool. Widen the hollow gradually, rotating the piece as you work. Use small movements rather than one deep push, which can leave a thin spot in the base and a thick ridge around the rim.
Support the outside with your fingers while gently encouraging the walls upward and outward. Keep checking the bowl from above and from the side. From above, the opening should stay broadly circular. From the side, the curve should rise smoothly from the base without an abrupt inward ledge.
Compare its rim width and height with the paper guide without pressing the clay onto the drawing. Adjust the general proportions while the material is still easy to reshape. Smooth the rim into a rounded edge rather than pinching it into a sharp knife-like lip.
Set the bowl down gently to establish a small flat standing area. It should sit upright without a dramatic wobble. Avoid adding a separate tall foot, a thick rolled rim or heavy ornament at this stage: those details could interfere with the space needed by the next bowl.

Before moving on, inspect the inside for an obvious tool ridge or central lump. Smoothing a problem now is easier than trying to correct it after the clay has hardened.
4. Make the next size with the same open profile
Form the sage bowl using the same sequence: central hollow, gradually opened walls, rounded rim and a small flat base. Aim for its proposed 27 mm width and 11 mm height, but give the profile more attention than a fraction of a millimeter at the rim.
Hold the two pieces near each other to compare their side views. Do not press the uncured sage bowl inside the uncured teal bowl. Soft clay can stick, flatten or distort under pressure, and a forced fit now tells you little about the final painted pieces.
Check that the sage bowl does not have a wider lower body hidden beneath a narrow opening. That kind of rounded belly can catch inside the teal bowl even when the mouth measurements appear generous. Similarly, keep its flat base modest rather than spreading it into a broad pedestal.
Once the trial pair passes the curing and dry-fitting steps below, return to this shaping sequence for the rose, ivory and terracotta pieces. Make each subsequent bowl a little smaller while keeping the same visual language. If you change the profile substantially, treat the next pair as another trial rather than assuming the rest will follow automatically.
The Boutigem Miniature Resin Coffee Tools can suggest a little coffee corner alongside a pottery collection. These are nonfunctional resin decorations, not working equipment. Compare their actual size with your bowls and keep the arrangement restrained, leaving enough clear space for the handmade pieces to remain the focus.

A handmade set can have slight differences without looking untidy. What matters is that each piece sits securely on its own and that the neighboring shapes have enough room to cooperate.

5. Support the bowls and cure them separately
Make an individual foil cradle for each bowl, smoothing the contact surface so that pronounced wrinkles will not press into the clay. The cradle should support the lower outside curve without squeezing the bowl or curling its rim inward. Place the cradles on the prepared ovenproof tray, with the bowls upright and separated.
Remove shaping tools before baking. Do not assume that a tool handle, marble, household dish or improvised mold can tolerate the oven simply because it helped form the clay. Use only appropriate supports and surfaces, and follow the clay manufacturer's instructions for preparing and protecting them.
Check the actual package for temperature and curing time. Preheat as directed, confirm the oven temperature with an independent thermometer, and provide the recommended ventilation. Do not invent a very short baking time by dividing a published thickness schedule down to these tiny walls. Never microwave the pieces.
Let the bowls cool completely before handling or testing the fit. Bake the spare sample as well so you can test decoration on the same cured material. After evaluating the first pair, repeat the process for the remaining bowls. All five should be cured separately, never as a nested stack.

Keep the trial-pair pause in the project. It gives you a chance to change a shape while the remaining clay is still available, rather than trying to rescue a finished painted stack.
6. Dry-fit the cooled bowls before adding color
Start with the teal bowl on a level surface. Lower the sage bowl into it gently, keeping your fingers beneath or around the smaller piece rather than pushing down on its rim. Stop if you feel resistance. A successful fit does not need force, twisting or deliberate bending.
Lift the sage bowl out again and inspect where the pieces approached each other. A little clearance is desirable, because paint and finish will occupy some of that space. The rims need not sit flush. In fact, a staggered series of rims helps the separate colors remain visible.
If there is a slight rough edge, use restrained cleanup appropriate to the cured clay and your abrasive's directions. Do not sand away a major profile problem or chase exact dimensions until the wall becomes fragile. When a bowl is substantially too wide or badly shaped, remaking it is the more sensible correction.
After the remaining bowls are cured, test each neighboring pair before trying the entire stack. Remove any sanding residue as appropriate and allow the pieces to become clean and dry before painting. Keep the plain test sample with the set so it does not get forgotten during the enjoyable decorating stage.
For a different decorative collection, the 22-piece bronze-ware-inspired resin decor set offers small sculptural vessel shapes. These are resin ornaments, not bronze antiques or clay tools. Their exact scale is unverified; consider them a separate styling option and compare measurements before mixing them with a carefully sized bowl set.

This is the moment to be a little fussy. A small shape adjustment before painting protects all the careful botanical work that comes next.

When every pair lifts apart easily, arrange the bowls in size order. That simple lineup makes it harder to put the right color on the wrong piece.
7. Paint the soft colors and miniature botanicals
Test your water-based acrylic paint on the cured sample first. Once you are happy with its behavior, apply thin coats to the bowls rather than trying to cover everything in one heavy pass. Follow the paint's drying instructions between coats and handle each piece in a way that avoids fresh surfaces.
Use muted teal for the largest bowl, then sage, dusty rose, warm ivory and terracotta. Keep the colors related by choosing softened shades rather than five equally bright hues. A slightly paler interior can look lovely, but it is optional; the set will already have plenty of interest from its graduated shapes.
My guide to miniature hand-painted floral patterns offers more ideas for turning leaves and petals into readable small-scale motifs. Practice a sprig on paper before trying the curved bowl.
Add botanical marks sparingly. Try a fine curved stem, a few small leaves and pale petal dots, leaving breathing room around each motif. A little off-center sprig can feel more believable than a thick band of flowers crowding the entire rim. On the smallest bowl, a single tiny leaf pair may be enough.
Avoid building up raised paint where one bowl meets another. If a design needs more contrast, change the color rather than piling on extra thickness. Let the decoration dry fully before testing the finish, and resist nesting the bowls while any painted surface remains soft or tacky.

The botanical details should reward a closer look rather than overwhelm the form. I would rather leave a quiet patch of color than add one last flower that makes the bowl feel crowded.
8. Finish lightly and make the final fit check
If you choose to add a finish, test it over the same paint on the spare sample. Let the test dry fully and check for an unwanted reaction before coating the bowls. A compatible satin finish suits this softened pottery look; a modest gloss is another option if you prefer more reflected light.
Apply the finish thinly according to its label, avoiding pools along the inner bottom, rim or standing area. Do not treat an extra-heavy coating as a shortcut to a ceramic appearance. It can hide fine botanical marks and reduce the carefully preserved clearance.
Wait for the finish's stated drying or curing period before nesting. Then repeat the gentle pair checks and assemble the stack only if the pieces separate easily. If the surface is still tacky, leave the bowls apart and investigate the finish rather than pressing them together and hoping they will release later.
For the cover-inspired arrangement, nest teal, sage and rose, then place ivory and terracotta beside them. That shows the little interiors while keeping the sense of a complete set. Whenever you store them nested, keep the fit loose and avoid adding pressure from objects stacked above them.
A scrap of cloth can soften the display beneath finished pottery. The Hanjunzhao pastel floral cotton squares are an optional purchased alternative to a piece from your fabric stash. Check the print repeat and fabric thickness before cutting a miniature cloth: a charming full-size flower can become an enormous one at dollhouse scale.

A finished bowl should feel complete whether it is standing alone or tucked into the others. Turn each one over and check its base as carefully as its painted interior.

Five small problems worth solving patiently
1. The smaller bowl catches halfway down
Its lower curve may be wider than the space inside its neighbor. Stop pushing and compare the side profiles. A generous mouth opening does not guarantee clearance below it. Correct minor roughness only; remake a significantly oversized piece with a slimmer lower profile.
2. The bowl rocks on the table
Check whether its standing area is uneven or whether a protruding bit of finish is responsible. Address a small irregularity carefully without thinning the entire base. For the next piece, establish the flat standing area while the clay is still workable.
3. The rim slumped or lost its circle
Review the shaping and support rather than assuming paint will disguise it. The next bowl may need more even walls or a better-fitting external cradle. Do not improvise extra heat to correct a shape; use the clay manufacturer's directions and remake if necessary.
4. The paint looks thick or the flowers feel oversized
Simplify the motif and use a smaller amount of paint on the brush. Let each coat dry rather than repeatedly brushing a half-dry patch. Tiny leaves, a short stem and a few petal marks often communicate more than a complicated painted bouquet.
5. The bowls fitted before finishing but now stick
Keep them separated. The coating may need more drying time, may be incompatible, or may simply have consumed the clearance. Check the tested sample and product instructions. Do not force painted bowls together or use solvent experiments to rescue them.
For a garden-facing miniature display, the Aorvoras miniature rose flower vines offer a ready-made floral accent nearby. Compare flower size with the setting. Keep these plastic vines separate; they are not pottery transfers or paint stencils.

Make the next set your own
A successful first pair gives you a useful reference for future sets. Keep the paper profiles with notes about what you changed: perhaps a lower wall, a narrower standing area or a little more space between sizes. Record the actual clay and finish used rather than relying on memory when you return to the project.
You can vary the decoration without changing the construction. Blue-and-ivory sprigs, warm earthy neutrals or a single repeated leaf shape would all suit the same family of forms. Keep the first set simple enough that you can notice how the shapes work together.
For me, the pleasure of this project is that small moment when a bowl settles into its neighbor and lifts out just as easily. The flowers and colors make the set beautiful, but the thoughtful fit makes it feel finished. Take your time with the trial pair, leave room for the painted surfaces, and let those five little shapes become a collection rather than five separate experiments.
The ANAVRIN Ikseon-Dong Hanok Bakery Miniature House Kit is a separate build with a Korean bakery setting and tiny pastries. It may appeal if the bowl project has given you ideas for a larger food-themed scene. Do not assume the guide’s bowl sizes match the kit; check its finished spaces before planning additional accessories.

As an Anavrin Associate I earn from qualifying purchases. Enter code EOUFQ5ZWKCSNGM for 10% off select products!
If you make another set, start with what the first one taught you. A slightly different curve or a little more clearance is not a compromise; it is part of turning an appealing miniature idea into something your own hands can make.
Which palette would you choose for your set: quiet garden colors, blue and ivory, or warm earth tones? Share your miniature makes with #smallworldminiatures, browse the Small World Miniatures shop, and join the site newsletter for more little projects.








Comments