



The Ultimate Guide to Miniature Ceramics and Pottery: Tiny Bowls, Vases, and Dollhouse Clay Magic
Updated: 4 hours ago

Opening: Why Tiny Pottery Has Such a Big Attitude
There is something deeply satisfying about a tiny pot. A tiny chair says, “Please sit.” A tiny window says, “Someone mysterious lives here and probably owns lace curtains.” But a tiny pot? A tiny pot says, “Civilization has arrived, and someone has opinions about soup.”
That is why miniature ceramics and pottery are some of my favorite details in the whole small-scale universe. They are humble, ancient, decorative, useful, fussy, forgiving, and occasionally rude when they roll off your workbench and vanish into the same portal that eats single earrings. A miniature vase can make a dollhouse room feel lived in. A row of little roof tiles can turn a foam building into something sunbaked and believable. A chipped plate in a tiny sink can tell more story than an entire parlor full of pristine furniture.

This guide is not about copying one specific piece. This is a big, practical, slightly over-caffeinated field guide to miniature pottery: where ceramic forms come from, how different cultures have used them, how miniaturists can borrow those visual ideas respectfully, and how to create tiny bowls, tiles, vases, amphorae, jars, roof tiles, sinks, planters, chimney pots, and suspicious little jugs from several different materials.
Grab a cup of coffee. Or tea. Or a tiny invisible goblet from the royal cupboard. We have clay to discuss.
A Tiny History of a Very Old Material
Ceramics are among humanity’s oldest creative technologies. Before ceramic objects became palace tiles, blue-and-white porcelain, teacups, drainpipes, roof tiles, and decorative garden frogs, they began with an astonishingly simple idea: wet earth can be shaped, dried, and transformed by heat.
Some of the oldest known pottery from East Asia dates to about 18,000 years ago, according to the Smithsonian’s Human Origins Program. The Smithsonian also notes earlier forms of carrying and storage, including woven plant fibers, which helps explain why pottery mattered so much: it made storing, cooking, boiling, and transporting food easier and more durable.

By roughly 9000 BCE, clay-based ceramics had become widely used for containers, water and food storage, art objects, tiles, and bricks, spreading through Asia, the Middle East, and Europe. Early ceramics were often sun-dried or fired at relatively low temperatures in simple ground kilns.
This is where miniaturists should perk up like someone just shook a jar of beads. Ceramics were never just “pots.” They were storage systems, tableware, architecture, plumbing, heat management, trade goods, religious objects, decorative surfaces, roof protection, and status symbols. In miniature, that means ceramics can appear almost anywhere: kitchens, temples, taverns, greenhouses, courtyards, bathrooms, market stalls, rooftops, gardens, apothecaries, fireplaces, bakeries, and the cluttered back room of a wizard who definitely labels nothing.

Earthenware was the first broad type of pottery made and remains widely used today. Britannica describes earthenware as dating back about 9,000 years and notes that it is still common in the modern world.
For miniature artists, the takeaway is simple: pottery is old, global, practical, and decorative. It belongs everywhere. If your scene feels flat, add a tile, a jug, a cracked bowl, a planter, or a roof ridge cap. Suddenly the little world has ancestors.

Ceramics Around the World: A Style Library for Miniaturists
This section is not meant to flatten cultures into craft “aesthetics.” It is meant to give you visual starting points. When borrowing from real traditions, look closely, credit inspiration when appropriate, and avoid turning sacred or culturally specific objects into random decoration. Tiny things still deserve manners.
Jōmon Pottery: Texture, Cord Marks, and Ancient Drama
Jōmon pottery from Japan is famous for cord-marked surfaces, coiled forms, and energetic rims. The word “Jōmon” itself is commonly associated with cord markings, and the vessels often look like they were made by someone who told the clay, “Be useful, but also be a thunderstorm.” Jōmon culture used pottery for boiling and storing food, which expanded how people could prepare natural resources.

Miniature translation: Use polymer clay or air dry clay to make thick-walled storage jars. Press thread, twine, coarse fabric, or a fine chain into the surface. Build rims with tiny coils and nubs. Paint in warm umber, smoke gray, dark terracotta, and ash brown.
Great for: prehistoric scenes, fantasy villages, earthy kitchens, witch cottages, archaeological dioramas.
Chinese Porcelain and Blue-and-White Ceramics
Blue-and-white ceramics were invented in China and became one of the most widely admired ceramic traditions in the world. The V&A describes blue-and-white as ceramics decorated with cobalt blue pigment on a white body, usually under glaze, and notes that Jingdezhen became especially famous for refined porcelain production.

Miniature translation: Use white polymer clay, a smooth air dry clay, or pre-made dollhouse crockery. Paint fine cobalt vines, clouds, birds, dots, borders, or stylized landscapes with a size 00 brush. Seal with gloss varnish so the tiny thing looks glazed and quietly expensive.
Great for: porcelain vases, ginger jars, plates, teacups, apothecary jars, garden stools, tiled fireplace surrounds.

Islamic Tiles, Lusterware, and Geometric Surfaces
Islamic ceramic traditions include extraordinary tilework, lusterware, cobalt glazes, turquoise surfaces, calligraphic bands, star tiles, and geometric compositions. The Met notes that an eighteenth-century Islamic tile in its collection may have originally belonged to a building facade or parapet, which is a useful reminder that ceramics often lived on architecture, not just tabletops.
The Ashmolean describes how lusterware moved across regions of the Islamic world, spreading from Iran to Egypt, North Africa, and Iberia, becoming associated with luxury arts.

Miniature translation: Cut tiny star tiles from cardstock, styrene, polymer clay, or air dry clay. Paint turquoise, deep blue, white, ochre, and metallic gold accents. Use repeating patterns rather than one giant complicated tile unless you enjoy muttering at your desk like a medieval alchemist.
Great for: courtyards, fountains, hammam bath scenes, palace walls, fantasy city gates, fireplace surrounds.
Portuguese and Spanish Azulejos
Azulejos are painted ceramic tiles strongly associated with Portuguese and Spanish architecture. Britannica notes that Portugal imported azulejo tiles from Spain in the fifteenth and sixteenth centuries, and their use became widespread in religious architecture and private building facades.
Miniature translation: Make square wall tiles from cardstock, polymer clay, or printed designs sealed with gloss varnish. Blue-and-white scenic panels are classic, but don’t ignore green, yellow, manganese purple, and ochre borders.
Great for: kitchens, stair risers, exterior facades, garden walls, bathroom tile, cafés, train stations, old-world courtyards.
Talavera: Spain, Mexico, and Glorious Color Discipline
UNESCO recognizes the making processes of artisanal Talavera from Puebla and Tlaxcala in Mexico, along with ceramics from Talavera de la Reina and El Puente del Arzobispo in Spain, as intangible cultural heritage.

Miniature translation: Use white or cream bases, then paint blue, yellow, green, orange, black, and mauve floral or geometric details. Keep the base warm and slightly imperfect. A tiny Talavera-style sink or wall fountain can make a dollhouse courtyard sing loudly enough to annoy the neighbor’s plastic flamingos.
Great for: kitchens, patios, planters, sinks, wall plates, fountains, stair tiles.

Sejnane Pottery: Handbuilt Terracotta with Character
UNESCO describes the pottery skills of the women of Sejnane in Tunisia as a practice using specific techniques to produce terracotta objects for the home.

Miniature translation: Handbuild simple bowls, jars, animals, and small vessels. Avoid over-smoothing. Paint with terracotta, cream, black, and earthy red, then use simple graphic markings. Let the thumbprints stay. The fingerprints are not mistakes; they are the tiny pot saying, “I have not been factory-trained, Brandon.”
Great for: folk interiors, rustic kitchens, market tables, artist studios, travel-inspired scenes.
Zlakusa Pottery: Cooking Vessels and Handmade Function
UNESCO describes Zlakusa pottery from Serbia as hand-wheel pottery made from clay and calcite, used for unglazed vessels for thermal food processing.

Miniature translation: Make unglazed cooking pots with rounded bellies, thick rims, and matte earthen finishes. Use chalky highlights, soot around the base, and a slightly uneven profile.
Great for: hearths, cottage kitchens, taverns, outdoor cooking scenes, historical interiors.

Delft, Maiolica, Studio Pottery, and the “Useful Pretty Thing”
The V&A’s ceramics collection includes Chinese porcelain, Italian Renaissance maiolica, Dutch Delft, European porcelain, Middle Eastern ceramics, tiles, and contemporary studio ceramics.

Miniature translation: Build a reference board. Delft suggests blue-and-white domestic ware. Maiolica suggests painterly color on pale grounds. Studio pottery suggests earthy glazes, drip effects, asymmetry, and the kind of mug that costs $68 because it has “presence.”
Great for: shelves, kitchens, art studios, gift shops, cafés, museums, collector rooms.
The Miniaturist’s Ceramic Vocabulary
Before we get into materials, let’s name the things you can make. This is the fun part, also known as “how to turn one blob of clay into an entire village economy.”

Tableware
Plates, saucers, serving bowls, soup bowls, teacups, mugs, pitchers, creamers, butter dishes, tureens, platters, ramekins, pie dishes, mixing bowls, teapots, sugar bowls, salt cellars, crocks, and spice jars.
Storage and Trade
Amphorae, olive jars, wine jugs, apothecary jars, lidded canisters, fermentation crocks, market pots, grain jars, urns, oil lamps, ink pots, and little mystery vessels that can sit on a wizard shelf looking guilty.
Architecture
Roof tiles, ridge caps, chimney pots, drain tiles, wall tiles, floor tiles, stair risers, fireplace tiles, bathroom tiles, kitchen backsplashes, garden wall caps, terra-cotta vents, decorative finials, brick slips, and ceramic pipework.
Garden and Exterior Details
Planters, urns, window boxes, bonsai pots, bird baths, fountains, wall basins, tiny irrigation jars, garden stools, strawberry pots, hanging planters, and broken shards for ground texture.
Decorative and Cultural Objects
Vases, figurines, masks, plaques, wall plates, devotional niches, sculptural tile panels, bells, beads, buttons, ornaments, and tiny souvenir pieces from imaginary vacations.
Industrial and Utility Forms
Porcelain insulators, wash basins, sinks, tubs, toilet tanks, drainpipes, laboratory crucibles, ceramic knobs, light pull handles, electrical ceramic fittings, tiles in butcher shops, dairy rooms, bakeries, and subway stations.
If you are building a miniature world and you cannot figure out what detail is missing, the answer is often “something ceramic.” Or a cat. Sometimes both.

Scale Notes: How Small Should Tiny Pottery Be?
Here are rough measurements for 1:12 scale, the classic dollhouse scale where 1 inch equals 1 foot.

A full-size 12-inch dinner plate becomes about 1 inch wide. A 6-inch tile becomes 1/2 inch square. A 4-inch mug becomes roughly 1/3 inch tall. A 10-inch vase becomes just under 7/8 inch tall. A 2-foot roof tile length becomes about 2 inches in 1:12, though many dollhouse roof tiles are visually compressed because real scale can look awkwardly big on a small roof.
For 1:24 scale, halve those numbers. For 1:48 scale, prepare your tweezers and apologize to your eyesight in advance.
A practical rule: true scale is useful, but visual scale matters more. If the object looks believable next to the door, chair, hand, or countertop, it is probably doing its job. If it looks like a cereal bowl designed for a horse, reduce it.
Safety First, Because Eyebrows Are Not Optional
Miniature pottery can involve blades, ovens, resin, dust, varnish, paints, and tiny parts that leap toward the carpet. Keep the workbench safe.
Work with sharp blades slowly and cut away from your fingers. Sand wet when possible to reduce dust. Use ventilation when spraying primer, varnish, or working with resin. Keep UV resin away from skin and eyes and cure it properly. Keep craft materials away from food prep surfaces unless the manufacturer says otherwise.

For polymer clay, follow the manufacturer’s baking directions. Sculpey’s guidance says many of its clays bake at 275°F / 130°C for 15 to 30 minutes per 1/4 inch of thickness, but always check the specific package because clay brands and formulas vary. (Sculpey)
Sculpey also states that polymer clay is safe to bake in a home oven when used as directed, with periodic oven cleaning and proper use. (Sculpey)
One more tiny sermon: don’t use clay tools for food afterward. Your pasta machine may be wonderful for polymer clay sheets, but once it joins the craft bench, it retires from lasagna duty. The lasagna will understand eventually.

Shopping List: Useful Supplies Without Buying the Entire Craft Store
First, shop your house. Miniaturists are basically raccoons with better lighting.
Look for toothpicks, sewing needles, old toothbrushes, aluminum foil, bottle caps, blister packaging, coffee stirrers, cardstock, cereal boxes, expired gift cards, makeup sponges, paper clips, beads, pen tubes, plastic straws, disposable gloves, parchment paper, wax paper, tweezers, and scraps of fabric or lace for texture.
For purchasable equivalents, these are the supplies I’d keep nearby. Some of the links below are Amazon affiliate links, which means purchases may help fund the tiny world without costing extra. Think of it as tossing a coin into the miniature fountain, except the fountain is a coffee mug on my desk. Affiliate items listed here come from the Small World Miniatures affiliate link document.

Core shaping materials
Basswood strips and sheets for molds, jigs, and drying racks
Chipboard for faux tile sheets and backing panels
Styrene strips and sheets for crisp faux ceramic tile, sinks, and modern pieces
Finishes and glaze effects
Ready-made helpers
Architecture and display
Choosing the Right Medium
There is no one perfect material for miniature ceramics. That is annoying, but also freeing. The best material depends on what you are making.
Polymer clay is best for tiny objects that need crisp detail and durability: plates, mugs, teapots, roof tiles, vases, knobs, small sculpture, and beads. It stays workable until baked, which is helpful if you like to reconsider every curve seventeen times.
Air dry clay is good for rustic, larger, matte objects: planters, urns, wall plaques, thick tiles, old crocks, and folk pottery. It can shrink or crack, but that can be charming if you are making an ancient garden pot and not, say, a luxury porcelain soup tureen for a duchess with a clipboard.

Epoxy putty is best for strong add-ons and repairs: handles, spouts, raised tile details, sink rims, knobs, relief patterns, and sculpted trim. Modeling guides often note that epoxy putties such as Green Stuff cure after mixing, adhere well to surfaces, and are useful for detail and gap filling.
Paper clay and lightweight clay are good for architectural surfaces: tiles, brick slips, stucco-ceramic hybrids, chimney pots, rough vessels, garden ornaments, and broken shards.
Real clay or ceramic slip is best if you have access to proper ceramic firing. It gives the most authentic material result, but it requires kiln knowledge, shrinkage planning, and patience. Tiny real ceramics are magical. They are also a little bossy.
UV resin and gloss mediums are not clay, but they create glaze illusions: glossy interiors, faux water inside bowls, shiny ceramic coatings, glassy tile surfaces, and crackle-like effects.
Cardstock, chipboard, and styrene are excellent faux ceramic materials for tiles, roof pieces, and architectural panels. Modelers have long used paper and card to create convincing surfaces, and miniature roof shingles can be built from cut strips, carefully aligned and weighted flat while drying.

Medium One: Polymer Clay Miniature Pottery
Polymer clay is the miniature potter’s reliable little goblin. It holds detail, bakes hard, comes in colors, and lets you make several forms at once. Use white or translucent mixes for porcelain, terracotta for earthenware, gray for stoneware, and custom blends for everything in between.
Polymer Clay Best Practices
Condition the clay until soft. Roll it evenly. Keep lint away unless you are making “ancient archaeological pot with mysterious fuzz,” which is not currently a museum category. Use cornstarch sparingly as a release agent. Bake on ceramic tile, cardstock, or parchment according to package directions. Let pieces cool fully before sanding, painting, or varnishing.
A sculpting guide in the reference files notes that polymer clays remain workable until baked, making them useful for practice and fine shaping, though care is needed because details can be accidentally damaged while still soft.

10 Things to Make with Polymer Clay
Tiny plates: Roll clay thin, cut circles with a straw, press gently into a shallow dish shape using a bead or rounded tool. Bake, sand edges, paint rim lines, gloss.
Bowls: Press a small ball of clay over the end of a rounded paintbrush handle or bead. Hollow gently with a ball stylus. Keep walls thin.
Mugs: Wrap a thin rectangle of clay around a toothpick or dowel. Add a disk base and a tiny handle. Bake with support so the handle doesn’t slump.
Teapots: Start with a bead-sized ball, add a flattened base, lid disk, curved spout, and loop handle. Use liquid clay as a bonding helper when compatible with your clay.
Vases: Roll tapered forms by hand, then use a toothpick to open the mouth. Make several neck shapes: narrow bud vase, flared amphora, squat studio pot.
Roof tiles: Roll sheets around a straw to make curved half-round tiles. Cut equal lengths before baking. For Spanish or Mediterranean roofs, vary terracotta shades.
Chimney pots: Use a tube shape with a flared top. Add rings by wrapping thin clay coils around the cylinder.
Decorative wall plates: Cut circles, dish slightly, bake, paint tiny florals, blue-and-white patterns, or faux transfer designs.
Apothecary jars: Make lidded cylinders. Paint labels after baking, then seal with satin or gloss varnish.
Broken shards: Roll thin irregular pieces, bake, snap or cut, paint terracotta edges. Scatter around archaeology scenes, gardens, or “someone dropped the royal gravy boat” kitchens.

Medium Two: Air Dry Clay Miniatures
Air dry clay is approachable, inexpensive, and wonderfully low-tech. It is not as crisp as polymer clay, but it gives excellent earthy texture. It is especially good for rustic pieces, old pottery, folk vessels, garden pots, and rough architectural ceramics.
Air dry clay hardens at room temperature rather than requiring oven baking, while polymer clay needs heat to cure; that basic difference affects durability, detail, and drying behavior.

Air Dry Clay Best Practices
Keep pieces small and hollow when possible. Thick blobs dry unevenly and may crack. Use water lightly to smooth, but do not soak the piece. Dry slowly under a loose cover if cracking becomes an issue. Sand gently after drying. Seal with acrylic sealer, varnish, or a gloss medium if you want a ceramic shine.
10 Things to Make with Air Dry Clay
Rustic garden planters: Roll a ball, press a hole, thin the walls, pinch the rim unevenly. Paint terracotta with mossy green dry-brushing.
Large urns: Build in two parts: a lower bowl and upper neck. Let each firm slightly, join with slip-like wet clay, then add handles.
Wall tiles: Roll a slab, score a grid, cut when leather-hard. Stamp texture with lace, buttons, or carved eraser stamps.
Relief plaques: Press clay into a shallow mold or sculpt raised vines, suns, moons, shells, or house numbers.
Stoneware crocks: Shape cylinders with thick rims. Paint cream, gray, salt-glaze blue, or brown. Add tiny stamped numbers.
Fountain basins: Form shallow bowls and wall spouts. Seal heavily if using fake water effects.
Bonsai pots: Make rectangular boxes with small feet. Texture lightly and paint matte charcoal, ochre, or celadon green.
Market amphorae: Roll a long oval body, pinch a neck, add handles. Let imperfect symmetry stand.
Roof ridge caps: Roll small half-cylinders and dry over a straw or dowel. Use for ridge lines on rustic roofs.
Old sink basins: Shape a rectangle or oval bowl, sand smooth, paint white, add gloss varnish, then age around the drain.
Medium Three: Paper Clay and Lightweight Modeling Compounds
Paper clay and lightweight compounds are excellent for architecture. They can be rolled thin, textured, carved, sanded, and painted. They are not always durable enough for delicate handles, but they are splendid for tile fields, rough vessels, chimney details, and old plaster-ceramic surfaces.

8 Things to Make with Paper Clay
Handmade wall tiles: Roll thin sheets, press texture, cut squares, dry flat under light weight.
Subway tile panels: Score rectangles into a smooth sheet. Paint white, cream, pale green, or black. Gloss each tile face.
Terra-cotta floor tiles: Cut squares or hexagons. Vary colors with burnt sienna, orange, umber, and dusty beige.
Chimney pots: Wrap clay around a straw, dry, remove, add rings with narrow strips.
Tile rubble: Roll scraps, cut irregular shapes, paint both faces, pile into construction scenes.
Decorative fireplace surrounds: Build tile strips around a firebox. Add raised relief squares or simple painted motifs.
Bathroom tile sheets: Make panels instead of individual tiles. Score grout lines, paint, gloss, then install as one piece.
Garden wall caps: Roll long strips, cut capstones, dent and chip edges, paint as aged ceramic or stoneware.

Medium Four: Epoxy Putty for Ceramic Details
Epoxy putty is strong and adhesive. It is excellent when you need a tiny handle that will not snap off if someone breathes dramatically nearby.
Green Stuff and similar two-part putties are often used in miniature modeling because they can fill gaps, sculpt details, and cure into a durable material.

Epoxy Putty Best Practices
Mix tiny amounts. Keep tools damp to prevent sticking. Let one section cure before adding delicate attachments. Use it for add-ons rather than large objects unless you enjoy expensive lumps.
8 Things to Make with Epoxy Putty
Mug handles: Add to pre-baked polymer clay mugs or pre-made crockery.
Raised tile relief: Press small putty shapes onto tile blanks: flowers, vines, dots, scrolls, stars.
Sink rims: Add rounded rims around styrene or clay sink forms.
Spouts: Sculpt teapot spouts, ewers, pitchers, and wall fountain outlets.
Ceramic knobs: Roll tiny balls, flatten backs, add painted floral centers.
Broken repair lines: Use thin putty snakes to imitate old ceramic repairs or raised seams.
Pipe collars: Add ceramic-looking rings around drainpipes or utility lines.
Roof finials: Sculpt ridge ornaments, little balls, cones, and caps.
Medium Five: Real Clay and Ceramic Slip
Real clay is the closest material to real pottery because, well, it is real pottery. It requires firing, shrinkage planning, and proper clay-body knowledge. If you have access to a kiln or a local pottery studio, tiny ceramics can be stunning.

Real Clay Best Practices
Test shrinkage. Many clay bodies shrink during drying and firing, so make test pieces before committing to a full set of matching plates. Build slightly thicker than polymer clay. Dry slowly. Avoid closed hollow forms unless properly vented. Use appropriate glazes and firing schedules for the clay body.
8 Things to Make with Real Clay
Thrown micro bowls: Use a miniature wheel or hand-turning method if you have the patience of a saint and the finger control of a watchmaker.
Pinch pots: Perfect for rustic scenes. Pinch tiny forms and leave subtle marks.
Tiles: Roll slabs, cut, bisque, glaze, fire. Use for real ceramic backsplashes.
Roof tiles: Press clay over a dowel, cut to length, dry carefully, fire unglazed.
Planters: Small real planters look wonderful in garden scenes.
Oil lamps: Shape shallow lamps with pinched spouts.
Tiny plates: Press clay into plaster molds or over smooth forms.
Ceramic beads: Use as knobs, finials, garden ornaments, or decorative shelf clutter.
Medium Six: UV Resin, Gloss Medium, and Faux Glaze
UV resin and gloss media are how miniaturists fake the wet shine of glaze. They are not always necessary. Some real ceramics are matte. But when you want porcelain, majolica, Talavera, Delft, or glossy subway tile, shine matters.
UV resin cures under ultraviolet light and is used in miniature modeling for clear fills and smooth surface effects. A painting guide in the files describes UV resin as a liquid polymer that hardens under UV exposure and can fill seams or gaps.

8 Things to Make or Finish with Resin and Gloss Medium
Glossy plate interiors: Add a dot of resin or gloss varnish to a painted plate.
Tile shine: Brush gloss medium on individual tile faces, leaving grout matte.
Water in a bowl: Add tinted resin to a basin, fountain, or wash bowl.
Glazed drip pottery: Apply gloss gel in vertical drips, then tint with transparent paint.
Porcelain sink finish: Layer white paint, gloss varnish, then a subtle gray wash around the drain.
Crackled glaze illusion: Paint fine dark lines, then gloss over them.
Candy-colored art pottery: Use translucent inks or clear colors under gloss.
Wet terracotta: Add satin patches near plant soil or fountain bases.

Medium Seven: Cardstock, Chipboard, and Styrene Faux Ceramics
For tiles and architectural ceramics, faux methods can be better than clay. They stay flat, cut cleanly, and install easily. Nobody will know your Portuguese courtyard wall began life as cereal box unless you announce it, which I do not recommend at dinner parties.
Modeling references often advise preparing smooth surfaces before decals and using clear gloss coats to reduce silvering and help designs sit properly on a model. Those decal principles are useful for miniature tile decals and printed ceramic patterns too.

10 Things to Make with Cardstock or Styrene
Azulejo wall panels: Print tile patterns, mount to chipboard, seal with gloss varnish.
Subway tiles: Cut styrene rectangles, glue in rows, paint, gloss, and grout with thin gray paint.
Checkerboard floor tiles: Use black and white cardstock or painted chipboard.
Roof tiles: Cut strips, notch tabs, overlap like shingles, paint terracotta.
Tin-glazed backsplash: Use printed patterns sealed with satin, then gloss selected tiles.
Ceramic shop signs: Paint raised letters on styrene plaques.
Bathroom fixtures: Laminate styrene into sinks, cistern lids, soap dishes.
Decorative stair risers: Use printed tile strips for Mediterranean, Mexican, or Portuguese-style staircases.
Tile tabletops: Cut a grid into styrene, paint individual squares, add grout lines.
Broken tile mosaic: Cut tiny irregular pieces, glue into a tabletop or garden path.
Medium Eight: Pre-Made Crockery, 3D Prints, and Bought Blanks
There is no shame in starting with pre-made pieces. Tiny crockery sets, resin prints, beads, charms, and blank dollhouse accessories can save time and sanity. The magic comes from repainting, aging, reglazing, grouping, and placing them in a convincing scene.

8 Ways to Customize Pre-Made Pieces
Repaint plain crockery: Use acrylic paint and a gloss seal.
Add cobalt patterns: Blue vines, dots, borders, and tiny landscapes.
Age with washes: Thin brown-gray wash around bases, rims, and handles.
Add chips: Paint tiny dark crescent shapes on rims, then a lighter highlight below.
Create matching sets: Repeat one color and one motif across plates, bowl, pitcher, and vase.
Turn beads into jars: Add clay lids and painted labels.
Turn charms into wall plates: Remove loops, sand, paint, and mount.
Reglaze plastic pieces: Prime, paint, gloss. Suddenly cheap plastic becomes “estate sale porcelain,” which sounds fancier and slightly haunted.
Practical Tutorials: Core Miniature Ceramic Projects
Choose a project: A 1:12 Miniature Terracotta Pot · Blue-and-White Porcelain Plates · Rustic Amphora · Miniature Ceramic Roof Tiles · Faux Azulejo Tile Wall · Talavera-Style Sink · Chimney Pots · Studio Pottery Vase with Drip Glaze · Broken Ceramic Shard Path · Apothecary Jars
Project One: A 1:12 Miniature Terracotta Pot
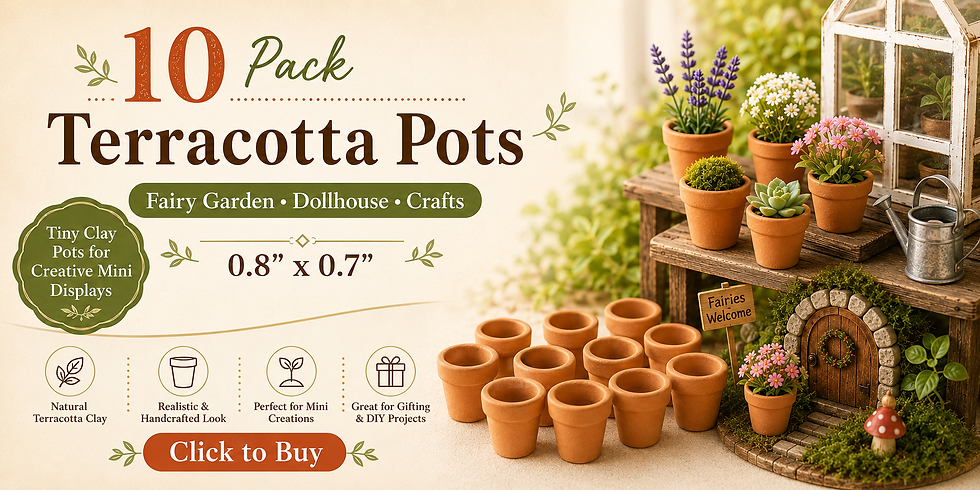
Roll a pea-sized ball of terracotta polymer clay. Press a toothpick into the center and rotate gently. Thin the walls with a ball stylus. Flatten the base slightly. Add a tiny coil around the rim. Texture with a toothbrush. Bake according to package directions.

Paint with a thin wash of burnt umber and matte medium. Dry-brush orange, ochre, and dusty beige. Add green-gray weathering near the bottom. Finish matte or satin.
Use for garden scenes, kitchen herbs, market stalls, or the windowsill of a tiny person who believes basil is a personality.
Project Two: Blue-and-White Porcelain Plates
Cut white polymer clay circles about 1 inch wide for 1:12 dinner plates. Press them gently into a shallow curve using a rounded bead. Bake and cool. Sand edges smooth.

Paint a thin cobalt rim. Add a central sprig, bird, landscape, or abstract floral. Do not try to paint the entire history of the Ming dynasty on a one-inch plate. I have tried things spiritually adjacent to this. The plate won.
Seal with gloss varnish.

Project Three: Rustic Amphora
Shape a tapered oval body from polymer clay or air dry clay. Roll a narrow neck and attach it. Add two curved handles from thin snakes of clay. For polymer, bake after smoothing. For air dry, support the handles with bits of foam or tissue while drying.

Paint with terracotta, then stipple darker browns around the base and rim. Add pale mineral streaks with watered-down beige. Use in ancient scenes, fantasy markets, wine cellars, or as a questionable container in a pirate tavern.
Project Four: Miniature Ceramic Roof Tiles
Roll polymer clay into thin sheets. Wrap around a straw or dowel to create curved half-rounds. Chill briefly if the clay gets floppy. Cut equal lengths with a blade. Bake on the straw only if the straw is oven-safe; if not, remove carefully and support the curve with folded cardstock or foil.

Paint several terracotta tones: burnt sienna, orange oxide, brick red, raw umber, dusty beige. Install in overlapping rows. Add darker grime under overlaps and pale dry-brushing on top ridges.
For faster builds, use pre-cut dollhouse roof tiles, then customize with paint and weathering.
Project Five: Faux Azulejo Tile Wall
Create a tile grid on chipboard or styrene. For 1:12, 1/2-inch squares read as 6-inch tiles. Paint the base white or warm cream. Add blue patterns with a fine brush or use printed tile art scaled down. Seal with gloss.

To make grout lines pop, rub a gray wash into the grooves and wipe the tile faces clean. Use in kitchens, courtyards, bathrooms, stair risers, or a tiny train station that clearly has better design taste than most full-size bus stations.
Project Six: Talavera-Style Sink
Build a basin from polymer clay, air dry clay, or styrene. Paint the base warm white. Add floral or geometric designs in cobalt, yellow, green, and black. Keep the pattern balanced: border, central motif, small repeats.

Gloss heavily. Add a tiny drain from a seed bead, eyelet, or punched foil circle. Install into a rustic cabinet or courtyard wall.

Project Seven: Chimney Pots
Roll small tubes from polymer clay, paper clay, or epoxy putty. Add rings with thin coils. Flare the top with a rounded tool. Let dry or bake. Paint terracotta, soot black inside the opening, and pale dust on raised ridges.

Chimney pots are marvelous because they make rooflines feel architectural. A roof without chimney pots can be lovely. A roof with chimney pots looks like it has gossip.
Project Eight: Studio Pottery Vase with Drip Glaze
Shape a vase from polymer clay. Bake and sand. Paint the base matte charcoal, cream, rust, or speckled gray. Mix gloss gel medium with a little acrylic color and drag it down from the rim in uneven streaks. Add a second clear gloss layer only over the drips.

This is great for modern interiors, art studios, galleries, and coffee shops where the tiny barista has strong opinions about oat milk.
Project Nine: Broken Ceramic Shard Path
Make thin slabs from polymer clay or air dry clay. Paint both sides as terracotta, blue-and-white, green glaze, or patterned tile. Break or cut irregular pieces. Glue into a garden path or mosaic tabletop. Fill gaps with fine sand, grout-colored paint, or lightweight spackle.

This is one of the easiest ways to add age and story. Broken pottery says: “Something happened here.” Maybe it was history. Maybe it was a tiny raccoon.
Project Ten: Apothecary Jars
Use beads, polymer clay cylinders, or 3D-printed blanks. Add lids from tiny disks of clay. Paint cream, cobalt, amber, or white. Add labels with microscopic handwriting or printed strips. Seal satin or gloss.

Line them on shelves. Add one crooked jar. Crooked jars are character. Perfect rows are suspicious.
Painting Ceramic Effects
Acrylic paints are widely used in miniature painting because they are versatile, water-thinnable, quick-drying, and adhere to common modeling surfaces such as plastic, resin, metal, and textured materials.

Terracotta Recipe
Base: burnt sienna + orange oxideShade: raw umber + dark grayHighlight: ochre + pale beigeWeathering: green-gray near damp areas, white mineral streaks, black-brown in cracks
Use matte or satin finish. Real terracotta is not usually candy-glossy unless glazed.
Porcelain Recipe
Base: warm white, not pure printer-paper whiteShade: very thin blue-gray in recessesPattern: cobalt blue, iron red, green, or gold accentsFinish: gloss varnish
Add tiny imperfections. A perfectly white miniature plate can look plastic. A slightly warm plate looks ceramic.
Stoneware Recipe
Base: gray, taupe, brown, cream, or muted blueTexture: sponge stipple with two nearby colorsGlaze: satin or gloss dripsFoot ring: leave matte and slightly darker
Tin-Glazed Look
Base: creamy whitePattern: blue, yellow, green, black, manganese purpleFinish: glossOptional: add hairline crackle with a fine gray-brown brush
Old Tile Grout
Use gray-beige, not stark white. Add a thin wash into grooves. Highlight tile edges. Keep some tiles slightly different shades. Real tile fields are rarely perfect unless they were installed yesterday by someone with a laser level and no emotional life.
Pattern Ideas by Style

Jōmon-inspired: cord marks, coils, flame-like rims, dark earthy firing colors.
Chinese blue-and-white: cobalt vines, clouds, peonies, birds, mountains, borders, dot clusters.
Delft-inspired: windmills, florals, ships, blue borders, corner ornaments.
Maiolica-inspired: fruit, scrolls, portraits, yellow, blue, green, orange on pale ground.
Islamic tile-inspired: stars, polygons, interlacing lines, turquoise, cobalt, white, gold accents.
Azulejo-inspired: repeating blue tiles, scenic panels, architectural borders, floral frames.
Talavera-inspired: bold floral motifs, cobalt outlines, yellow and green fills, lively symmetry.
Rustic folk pottery: dots, stripes, black slip marks, handprint texture, matte terracotta.
Studio pottery: asymmetry, speckles, drip glaze, muted colors, organic silhouettes.
Art Nouveau ceramic: irises, lilies, peacock curves, flowing borders, soft greens and blues. This one always gets me. A tiny Art Nouveau tile fireplace? I am listening.
Building Tile Surfaces Without Losing Your Mind
Tile is one of those miniature details that can either elevate a scene or trap you in a grid-based emotional crisis. Here is my preferred order.
Start with the scale. Decide tile size first. For 1:12, common choices are 1/4 inch, 3/8 inch, or 1/2 inch. Smaller tiles look refined but take longer. Larger tiles show patterns better.
Create a test strip. Paint three or four tiles, grout them, gloss them, and place them in the room. Lighting changes everything.

Use panels when possible. Individual tiles are beautiful, but a full bathroom wall of separate 1/4-inch tiles can become a cry for help. Score tile lines into one sheet of styrene, chipboard, or clay. Paint the grooves as grout.
Vary color. Even white tiles need variation. Mix warm white, cool white, cream, and pale gray.
Gloss selectively. Tile faces shine. Grout does not. A tiny brush and patience will reward you.
Chip corners. Not all corners. Just enough. The goal is history, not demolition.
Roof Tiles: Tiny Architecture with Big Mediterranean Energy
Roof tiles deserve their own tiny parade. They define climate, region, and age. Terracotta barrel tiles suggest Mediterranean, Spanish Colonial, Italian, French, and Latin American influences. Flat clay tiles can feel English, French, German, or broadly European. Decorative ridge tiles can make a simple cottage feel more specific.

For miniature roof tiles, decide whether you need true scale or visual rhythm. Real roof tiles may look too large if scaled exactly, depending on the model. I often compress roof tile dimensions slightly so the roof reads correctly from a viewing distance.
Weathering matters. Roof tiles fade on top, darken underneath, collect moss in shaded valleys, and gather soot near chimneys. Use three layers: base terracotta, darker wash under overlaps, pale dry-brush on exposed ridges. Add moss only where water would sit.
Pre-made tiles can save hours. Handmade tiles give more irregularity. Both are valid. The tiny house does not judge. The tiny homeowner might, but they are imaginary and very behind on property taxes.
Miniature Ceramics by Room and Scene

Kitchen
Use plates, bowls, crocks, tile backsplash, sink, mugs, teapot, mixing bowls, spice jars, butter dish, ceramic canisters, and a chipped plate in the drying rack.
Bathroom
Use wall tile, floor tile, sink, tub, toilet tank, soap dish, toothbrush cup, drain covers, and glossy white surfaces aged with gray around seams.
Garden
Use terracotta pots, urns, wall fountains, bird baths, ceramic stools, broken shards, tile tabletops, strawberry pots, and glazed planters.
Rooftop
Use roof tiles, chimney pots, ridge caps, vents, finials, drain pipes, and cracked replacement tiles.
Shop or Market
Use stacked bowls, hanging mugs, amphorae, olive jars, tile signs, pottery crates, broken discount bin pieces, and a hand-painted “Please do not touch” sign that absolutely everyone ignores.
Fantasy Scene
Use potion jars, moon tiles, rune-etched crocks, dragon-scale roof tiles, glowing resin bowls, relic shards, and suspicious teapots.
Historical Cottage
Use unglazed cooking pots, chamber pots, storage crocks, chimney pots, simple bowls, and soot-darkened fireplace tiles.
Modern Interior
Use studio vases, subway tile, ceramic pendant lights, sculptural bowls, minimal planters, glossy black tile, and handmade mugs on open shelves.
Troubleshooting: When the Tiny Pot Misbehaves

Problem: Polymer clay piece looks bulky.Fix: Roll thinner slabs. Use a bead or dowel as a form. Sand after baking. Paint rims darker to visually thin them.
Problem: Air dry clay cracks.Fix: Make walls thinner and more even. Dry slowly under a loose cover. Patch cracks with fresh clay or modeling paste.
Problem: Handles keep breaking.Fix: Use epoxy putty for handles or bake polymer pieces in stages. Make attachment points larger than real life.
Problem: Gloss varnish looks cloudy.Fix: Apply thinner coats. Let paint fully dry first. Test varnish on a sample. Avoid heavy coats in humid conditions.
Problem: Tile sheet warps.Fix: Seal both sides, glue to a rigid backing, and dry under wax paper with weight on top.
Problem: Painted patterns look too large.Fix: Use fewer strokes. Suggest detail instead of drawing it fully. At miniature scale, a dot and a curve can become a flower.
Problem: Roof tiles look too uniform.Fix: Paint tiles in batches of three or four related tones before installing. Add random pale dry-brushing.
Problem: Everything looks plastic.Fix: Reduce pure colors. Add warm off-whites, muted earth tones, subtle washes, satin/matte contrast, and tiny chips.
Problem: The piece is stuck to your tool.Fix: Use water, cornstarch, or a tiny amount of release depending on the material. For epoxy putty, damp tools help.
Problem: Your tiny teapot looks like a potato with a nose.Fix: Congratulations, you have made a folk-art teapot. Add a lid, paint it beautifully, and pretend you meant to.
Reference Board: How to Study Real Ceramics for Miniatures
When I study ceramic inspiration, I look for five things.

First, silhouette. Is it squat, tall, flared, narrow, round, angular, elegant, chunky?
Second, surface. Is it glossy, matte, carved, stamped, crackled, speckled, or smoky?
Third, color. Does the tradition use earthy clay, cobalt blue, turquoise, white tin glaze, iron red, celadon, black slip?
Fourth, placement. Is it used on a table, roof, wall, courtyard, temple, kitchen, bath, market, or garden?
Fifth, imperfection. Where does it chip? Where does soot gather? Where does glaze pool? Where do hands leave marks?
Miniature realism is not about making everything perfect. It is about putting the right imperfection in the right place. A chipped rim on a plate says daily life. A soot-black chimney pot says years of winter fires. A faded roof tile says sun. A crooked handmade vase says a human was here, and possibly sneezed at a crucial moment.
A Miniature Ceramics Project Menu by Medium
Here is the quick-reference version for the workbench.

Polymer Clay
Make plates, bowls, mugs, vases, teapots, roof tiles, chimney pots, amphorae, apothecary jars, decorative wall plates.
Best finish: acrylic paint plus gloss or satin varnish.
Air Dry Clay
Make planters, urns, wall plaques, rustic crocks, fountain basins, bonsai pots, ridge caps, folk animals, old sinks, tile sheets.
Best finish: acrylic paint, matte sealer, selective gloss.
Paper Clay / Lightweight Compound
Make wall tile panels, floor tiles, fireplace surrounds, subway tiles, rubble, garden caps, chimney details, old architectural ceramics.
Best finish: primer, acrylic, wash, dry-brush, varnish.
Epoxy Putty
Make handles, spouts, raised tile relief, knobs, sink rims, repair seams, pipe collars, finials.
Best finish: acrylic paint after cure, then varnish.
Real Clay / Slip
Make pinch pots, micro bowls, true ceramic tiles, roof tiles, beads, oil lamps, planters, plates.
Best finish: fired glaze or underglaze, depending on kiln access.
UV Resin / Gloss Medium
Make glaze effects, water in bowls, shiny tile faces, porcelain sink shine, drip glaze, wet surfaces, crackle illusions, glossy interiors.
Best finish: fully cured, thin layers.
Cardstock / Chipboard / Styrene
Make tile panels, backsplashes, roof strips, stair risers, shop signs, mosaic tabletops, bathroom panels, faux ceramic plaques.
Best finish: sealed paint, printed patterns, gloss on tile faces.
Pre-Made Blanks
Customize crockery sets, 3D prints, charms, beads, jars, bottles, plastic plates, resin sinks, dollhouse accessories.
Best finish: primer if needed, paint, age, gloss or satin.
Closing: Go Forth and Make Tiny Pots
Miniature ceramics are small, but they carry a lot of story. They can whisper ancient history from a shelf, shout color from a courtyard wall, bake under a terracotta roof, or sit quietly beside a dollhouse sink like someone just finished washing up after soup.
And honestly, that is the magic. A tiny pot is not just a tiny pot. It is food, trade, culture, shelter, craft, ritual, decoration, weather, memory, and sometimes a very good place to hide a miniature spoon you do not know what else to do with.
Try one medium. Make one little bowl. Then make five more because the first one looked lonely. Before long, you will have a shelf full of tiny ceramics and the deeply specific confidence of someone who can say, “Actually, this wizard pantry needs more stoneware.”
I would love to know what you make first: a roof tile, a blue-and-white plate, a terracotta planter, a Talavera-style sink, or a tiny teapot with suspicious potato energy. Share your creations with #smallworldminiatures so we can all admire the little clay kingdom together.
#smallworldminiatures #miniatureceramics #miniaturepottery #dollhousepottery #dollhouseminiatures #miniatureartist #miniatureart #miniaturetutorial #polymerclayminiatures #airdryclay #miniaturetiles #dollhousetiles #miniaturevase #miniatureplates #tinyceramics #tinyworld #miniaturemaking #dollhousecrafts #miniaturearchitecture #terracottatiles #miniaturegarden #miniaturekitchen #scaleartist #handmademiniatures #miniaturedesign






Comments