



The Lantern Apprentices: A Hungarian Halloween Miniature Cottage

First Impressions in Miniature
Some cottages put out a pumpkin. This Hungarian Halloween miniature cottage appears to have appointed an entire lantern committee. Curled branches carry glowing lamps, floral borders climb the deep blue walls, and the roof wears enough jewel-colored scales to make a dragon reconsider its wardrobe.
I love the warmth gathering behind those pointed windows. The surrounding night feels enormous, but the little front garden feels protected. Come closer for a black cat’s very unusual evening rounds, then stay for a practical way to translate the roof, painted ornament, and branching lights into your own miniature.
The purchased alternatives below use Amazon affiliate links; if you buy through them, it helps fund this tiny world. As an Amazon Associate I earn from qualifying purchases.

Miniature Backstory — The Tiny Tale
Bodza, keeper of the cottage lanterns, had managed thirty-seven perfectly respectable Octobers without an apprentice. Then two small ghosts arrived on the doorstep carrying a letter of introduction that neither could hold.
It passed through their fingers, slid between the paving stones, and was never seen again.
“We are highly recommended,” said the taller ghost.
“By the letter,” added the shorter one.
Bodza washed one black paw. He had reservations.
Still, there were lamps to light and a climbing rose to untangle from the gate. He appointed the ghosts assistant lantern keepers on the condition that they frightened absolutely nobody before supper.
Their first task was simple: count the lanterns.
The taller ghost counted the lights on the left tree. The shorter ghost counted the lights on the right. Then both noticed the glowing windows and began again. By moonrise, they had counted everything except the pumpkins, which kept smiling in a suspiciously official manner.
“There are too many,” whispered the shorter ghost.
“Or too few,” whispered the taller.
This was when the highest lantern went dark.

Bodza looked up. The two apprentices immediately floated behind the nearest pumpkin.
“Something has swallowed the light,” they said together.
The cat climbed the fence, stepped onto a curling branch, and studied the lantern. Inside sat a large moth wearing a dusting of golden pollen. It had mistaken the warm glass for the moon and was deeply disappointed by the accommodation.
Bodza opened the little door. The moth fluttered away. Light spilled over the garden again.
“A moon,” said Bodza, returning to the steps, “usually has more room.”
The ghosts considered this useful professional knowledge.
By the following evening, they had developed a system. One counted the lanterns. The other reassured the pumpkins. Bodza supervised from the doorstep, where supervision required very little movement and an excellent view of everything.
You can spot the whole night shift beside the entrance: the black cat, the two pale apprentices, and the pumpkins who have somehow become management.
A Guided Tour of the Build
The roof is where my eye goes first. Blue, plum, and dusty pink scallops overlap beneath steep gables, while red-and-cream floral borders trace the edges. The turret on the left lifts the silhouette into a pointed cap, balanced by the taller gable to the right. Repeated gold-colored accents connect those very different shapes.

Around the entrance, amber windows create the feeling of a house awake after dark. Their pointed frames and petal-like divisions echo the floral decoration outside. The darker front door gives that glow a place to settle, and the tiny cat and ghosts make the doorstep feel occupied without crowding it.

The lantern trees spread outward like elaborate brackets, framing the cottage rather than hiding it. Their warm lights repeat the windows’ color above a garden of orange, purple, and green. Painted fence posts, an ironwork-looking gate, and a stone-like path give the foreground a clear boundary; beyond it, the distant towers dissolve into night.

Inspirations — From the Big World to the Small
The most useful architectural connection is Hungarian Secession, or Szecesszió, with its appetite for decorative surfaces and expressive rooflines. This cottage freely combines that vocabulary with storybook Gothic shapes and Halloween props. Treat the connection as a source of ideas rather than a claim that this is a reconstruction of a Hungarian village house.
Budapest’s Museum of Applied Arts, designed by Ödön Lechner and Gyula Pártos and built between 1893 and 1896, offers a particularly vivid precedent. Its ceramic decoration and roof came from the Zsolnay factory. For your miniature, the useful lesson is that a roof can carry color and ornament as confidently as the walls. The cottage’s blue-and-purple palette is its own fantasy choice.
Kecskemét’s Cifrapalota provides another close visual conversation: colorful majolica, glazed roof tiles, decorative ceramics, and ornate chimneys. You can borrow the relationship between a strong building outline and lively surface pattern. At miniature scale, repeating one flower on several posts often reads more clearly than inventing a different motif for every inch.

For the story illustrations, the Hungarian children’s-book tradition offers a gentler companion to all that architectural flourish. Publisher Móra describes Károly Reich’s work through light, flowing lines, playful simplicity, and affection for animals and nature. Those qualities suggest an original ink-and-watercolor approach for Bodza and his apprentices: expressive outlines, simple shapes, and enough quiet space for a nervous ghost to hesitate.

If this combination of ornament and nighttime atmosphere appeals to you, the Hungarian Art Nouveau haunted mansion explores a more imposing version of the mood. Here, the small fence and flower boxes keep the grandeur within comfortable paw’s reach.
Artist Tips — Make Your Own Magic
The cottage and supporting illustrations are AI-generated design inspiration. The following methods offer a practical interpretation; they are not an exact, tested reconstruction of a photographed physical model. Results will vary, especially when a very ambitious gable encounters ordinary cardboard.
Plan your Hungarian Halloween miniature cottage
Try 1:24 as a starting scale, with a suggested base around 35 by 28 centimeters and a front door around 8 centimeters high. These are planning choices, not measurements recovered from the image. A shallow cottage façade with a removable rear panel keeps the project manageable while preserving the roof silhouette.
This is an intermediate build because intersecting roofs, repeated ornament, and concealed lighting need coordination. Essential tools include a cutting mat, sharp hobby knife, metal straightedge, scissors, tweezers, small brushes, and appropriate cutters for craft wire. Work on a stable surface and keep fingers outside the cutting path.

Gather your supplies
Structure: start with clean cereal-box card for templates and trim, sturdy packaging board for mockups, and wooden coffee stirrers for braces. Purchased equivalents include chipboard, basswood sheets, and basswood strips. Use a rigid base that stays flat under the scene.
Windows and roof: reuse clean, flat transparent packaging, tracing-paper scraps, and thin greeting-card stock. Purchased equivalents include clear acetate sheets, vellum, and smooth cardstock. Check that your chosen adhesive bonds the specific plastic without clouding it.
Ornament and paint: save small buttons, suitable jewelry findings, and clean card offcuts. Add acrylic paints in deep teal, cream, brick red, blue, mauve, ochre, and a restrained metallic gold; fine brushes, PVA or tacky craft glue, and a compatible water-based finish cover most surfaces.
Trees and lanterns: use paper strips and clean tissue for bark texture, with small lightweight beads or card shapes for unlit lanterns. Purchased craft wire supplies the armature. A ready-made, low-voltage LED set provides lighting; its original power supply, instructions, and accessible switch stay together.
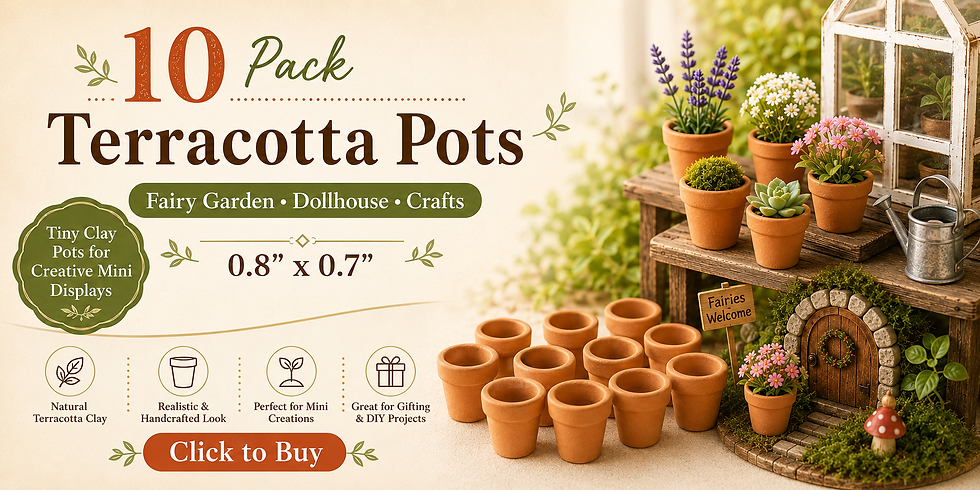
Ground and residents: clean paper egg-carton pieces make paving, while paper scraps and embroidery thread become leaves and stems. Purchased options include air-dry modeling clay, miniature foliage, scenic tufts, flower materials, and optional tiny terracotta pots. Polymer clay is a separate optional material with its own heat-curing requirements.

1. Build the base and a shell you can reach inside
Draw the cottage footprint, path, fence, and two tree positions on paper before cutting permanent parts. Leave enough space between each tree and the house for both the branches and your fingers. Mark where lighting wires will cross the base and where the power connection will remain accessible.
Make the front wall and roof shapes as a taped-card mockup. Look at it from the intended camera angle. Adjust the turret and right-hand gable until their outlines remain distinct; keep the main roof broad enough to connect them visually.
Transfer the approved shapes to chipboard or basswood. Cut window openings while the panels are flat, then glue the walls around simple internal braces. Use light knife passes rather than forcing a thick cut. Support corners squarely while the adhesive dries according to its label. Leave the rear removable and postpone attaching the roof. For an easier build, make the turret a shallow faceted projection against the façade.

2. Make warm windows and a doorway with depth
Create each pointed window from a paper template so matching openings stay consistent. Cut outer frames from thin card and add narrow strips for the interior divisions. Simplify the elaborate tracery to a few curves and a central petal shape; the amber light will do much of the decorative work.
Paint the frames separately. Once dry, fit clear packaging or acetate behind them, using small adhesive applications on hidden edges. Place a separate vellum diffuser behind the glazing, leaving a gap between it and the LED. Follow the lighting maker’s clearance requirements and keep ventilation paths open.
Build the door from layered card with scored plank lines and a separate arch surround. A tiny paper wreath or floral cluster supplies the welcome. Test the windows with the intended light before fixing them permanently. If the pattern disappears, enlarge the clear areas or reduce the number of bars. Let every glued layer dry flat before installing it.

3. Layer the scalloped roof and turret cap
Cut the main roof planes from firm card and test their meeting edges over the shell. Make paper patterns for the smaller gables and turret before committing to thicker material. A faceted turret cap is easier to assemble than a smooth cone and still gives you that lifted, storybook outline.
For the shingles, mark repeated rounded tabs along thin cardstock strips. Cut between the tabs without separating them from the strip. Glue the first row at the eaves, then work upward, overlapping each row enough to hide its uncut band. Stagger the scallops so vertical seams do not form obvious ladders.

Use shorter strips around the turret, narrowing them as the roof rises. Let the adhesive set before adding the next awkward section. Paint small batches of shingles in related blue, plum, and dusty pink shades, keeping the brightest colors sparse. A thin satin finish can suggest glazed tiles without turning the roof into a mirror. Test it on a spare painted strip first. Hide ridge joins with folded trim, then add lightweight finials only after the roof fits securely. For the chimney, wrap a small card box with staggered rectangles of thin card, leaving narrow mortar gaps. Paint these brick red with occasional ochre pieces, then add a simple cap. Purchased miniature bricks are an optional facing if the chimney support can carry their weight.

4. Paint a repeatable floral language
Give the walls a deep teal base and let it dry fully before drawing any motifs. Prepare one simple flower pattern on scrap card: a red tulip-like shape, two cream leaves, a curling stem, and a few gold-colored dots. Practice it at the size you will actually paint.
Map the repeats lightly along gable boards and fence posts. Keep flowers larger on broad panels and reduce narrow trims to alternating leaves and dots. You can paint the strips flat before gluing them in place, which is considerably kinder to your wrist than decorating an assembled turret.
Use thin coats and allow each color to dry before adding the neighboring one. Correct a stray mark with the base color rather than surrounding it with more flowers. For easier repetition, use printed paper motifs of your own design, testing ink and adhesive compatibility first. The miniature floral-pattern guide offers more ways to turn simple marks into convincing ornament.

5. Shape lantern trees and test the lights
Twist craft wire into a trunk with a few substantial branches. Form the curls around a smooth dowel, keeping the curves broad enough to read from the front. Anchor the trunk firmly into a prepared base opening or hidden support block. Wear eye protection when clipping wire, control the offcut, and cover sharp ends.
Wrap the armature in narrow paper strips with craft glue, then add small tissue ridges for bark. Let this dry completely before painting. Position your ready-made LED string loosely along the branches to check that the spacing suits the lantern locations. Never cut or splice a string unless its manufacturer explicitly allows it.

Make lightweight lantern shells with open card ribs, leaving the LEDs’ required clearance. Route insulated wiring along the rear of the branches without piercing, crushing, or tightly bending it. Keep connectors and the battery compartment accessible. Test everything before disguising the route with extra bark texture.
Use battery-operated low-voltage lighting, never candles. Choose an enclosed, secure battery compartment and keep loose cells away from children; the CPSC’s battery guidance explains the particular hazards of button and coin cells. An unlit lantern tree photographed beside an external warm light is a perfectly useful simpler version.

6. Give the gate and path clear boundaries
Cut paving pieces from a clean paper egg carton, trimming them into irregular rectangles. Arrange them dry so the path leads toward the door and leaves a little breathing room around the residents. Glue them down, let the adhesive dry, then apply restrained gray-brown paint. Pick out a few edges with a lighter dry brush after the base color dries.
Make fence rails from coffee stirrers or basswood strips. Build posts slightly wider so the repeated floral motifs have room to show. Paint the components before assembling them on the base, checking that the fence line stays level.
For the gate, sandwich simple curled paper strips between two flat card frames. This creates an ironwork-looking silhouette without soldering or difficult metal joints. Paint it dark charcoal, attach it closed, and let the joints set undisturbed. A working hinge adds complexity without improving the main view; the apprentices already have enough responsibilities.

7. Add pumpkins, apprentices, and garden layers
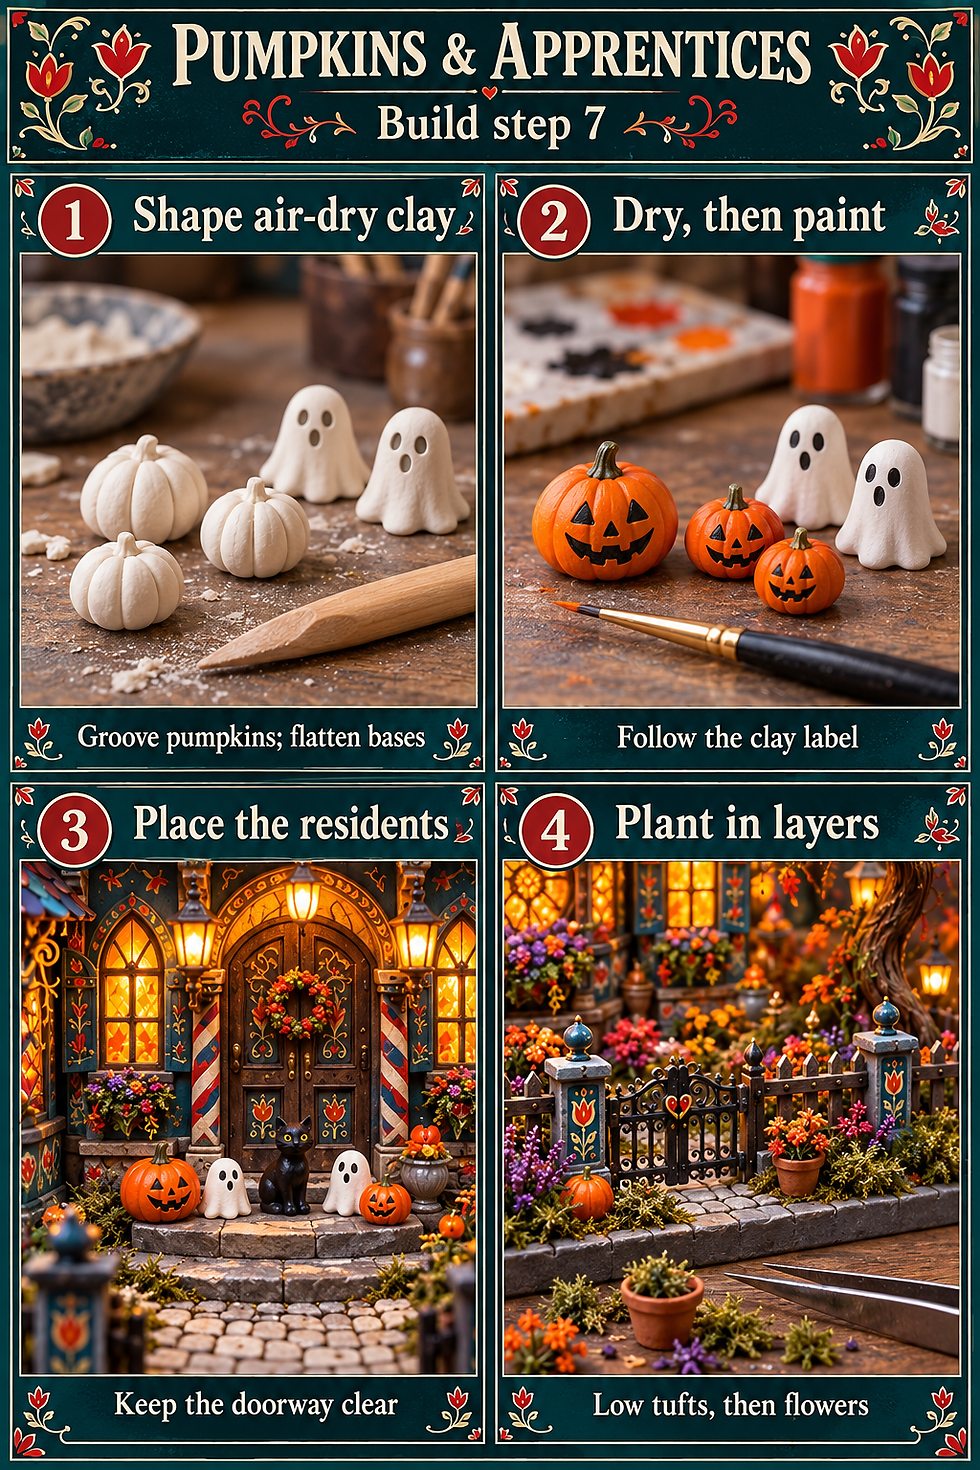
Shape pumpkins and simple ghost forms in air-dry clay, following its label for thickness and drying. Keep them separate from the model while drying so shrinkage or moisture does not disturb the paving. Score gentle pumpkin grooves and flatten each base slightly. Paint the jack-o’-lantern faces onto the surface, or use ready-made hollow miniature pumpkins if you want light inside.
If you choose polymer clay instead, cure it separately using the manufacturer’s instructions for that exact product. Use an oven thermometer and good ventilation; never exceed the label’s temperature or use a microwave. Do not bake the assembled cottage, electrical parts, or unknown household plastics. Let cured pieces cool before painting or gluing them.

Place Bodza and the two apprentices near the door, leaving their silhouettes clear. Build the garden from low ground cover upward: tufts along fence feet, flower clusters beside the path, and fuller planting behind those. Use repeated purple and orange accents to connect the beds with the pumpkins and roof. Tuck an optional tiny terracotta pot beside the steps or beneath a window, checking that it leaves the doorway clear. Keep glue off finished windows and test scenic materials on a spare patch first. Allow the planted base to dry before lifting or photographing it.
8. Photograph a small pool of warmth
Set the cottage against a plain blue-gray backdrop that curves gently behind the base. Lower the camera toward doorstep height so the roof rises above you, then move back slightly and frame the full fence. Avoid a steep overhead view if you want the lantern trees to feel tall.
Switch on the miniature lights and add a soft, cool external light from one side. Begin with that external light dim enough for the windows to remain amber, but bright enough to reveal the painted walls. Adjust exposure until you can still see window divisions instead of white patches. Use a tripod or stable support and a timer to reduce shake.
Move the light sideways to control reflections on the glazing. Take the full scene first, then the roof, entrance, and garden close-ups. Keep the model and lights still while you compare exposures. The Bulgarian fantasy cottage offers another useful example of warm windows against a cool nighttime setting.

When the tiny building argues back
Curling roof strips: use less wet adhesive, work in shorter lengths, and let each row set before bending the next around the turret. Test the same card and glue on a spare roof corner.
Floral borders turning muddy: let the base color dry, simplify the motif, and leave more dark background between flowers. Judge the result at normal viewing distance.
Lantern branches drooping: lighten the lantern shells, shorten their reach, or reinforce the trunk connection. Check stability before adding more planting around the base.
Light leaking through wall seams: locate the leak in a darkened room, disconnect power, and add an opaque card baffle inside the accessible shell. Keep it clear of LEDs and connectors, and retest after the adhesive dries.

Closing — Until Next Time in the Small World
I keep returning to the doorway. The roof has the spectacle, but that little cluster of cat, ghosts, and pumpkins gives the whole cottage a reason to stay lit.
Which detail would you tackle first: the scalloped turret, the painted flowers, or the lantern trees? Tell me in the comments, and share your own tiny night shifts with #smallworldminiatures. You can join the newsletter using the signup form at the bottom of the page and explore the online shop.
Bodza would probably recommend starting with the lamps. The pumpkins have already called a meeting.







Comments