


How to Make an Indoor Fairy Garden: A Beginner’s Guide

A tiny cottage, a path that disappears behind a leaf, and one bench positioned for an extremely important cup of tea: an indoor fairy garden gives a few ordinary houseplants an entire neighborhood. You can build one on a sunny-room table, a plant stand, or another spot with the right light, without needing a yard or a talent for constructing microscopic plumbing.
One of my favorite examples of miniature garden design is the rooftop garden I photographed at the Sunshine shopping center in Higashi-Ikebukuro, Toshima, Tokyo. The little cottages sit among living plants, with full-size city buildings behind them. That change in scale is wonderful. One minute you are looking at Tokyo; the next, you are wondering who lives behind a door shorter than your hand.

My photograph of the rooftop miniature village in Tokyo. The overlapping roofs and low greenery make the cottages feel like a neighborhood rather than separate ornaments.
That garden is outdoors, so its plants are inspiration for the composition, not a shopping list for a living room. Indoors, we will borrow the winding paths, clustered planting, and cozy architecture while choosing plants that suit the light and humidity we can actually provide.

Another of my Tokyo photographs: a red-roofed cottage framed by flowers. A small clear space in front of the doorway keeps the architecture visible, even with lush planting around it.
Make your own indoor fairy garden magic
This is a practical beginner’s guide to an open, planted dish garden. The illustrated cover and instructional illustrations are AI-assisted design inspiration; the Tokyo photographs are my own. Treat the illustrations as ideas rather than exact planting plans, and expect your results to vary with your plants, room, and materials. The bright flower accents can be removable miniature decorations rather than a promise that outdoor flowering plants will thrive beside indoor foliage.
The simplest starting recipe is one broad draining container, a few compatible small houseplants, one cottage or door, a short pebble path, and a single place to sit. Leave some soil surface visible while you learn how the garden behaves. You can always add the fairy bakery later. Apparently every tiny village needs one.
Some links in this post are affiliate links, which means Small World Miniatures may earn a commission at no extra cost to you. As an Amazon Associate I earn from qualifying purchases.

A small fairy garden furniture set can supply the focal point without a complicated house build. Check the pieces’ dimensions against your container before ordering; a charming bench is less charming when it occupies the entire town square.
Choose a spot before choosing the plants
Start with the room, not the miniature cottage. Most foliage plants used in this style of garden prefer bright, indirect light. Look for a bright position without hours of strong direct sun, and keep the arrangement away from heating vents, air-conditioning blasts, and cold window drafts. A table that looks perfect in a photograph may be too dark to support healthy growth.
Watch the proposed spot at different times of day. If you need a grow light, choose one intended for plants and follow its placement instructions. Decorative fairy lights create atmosphere; they do not replace useful growing light. Keep electrical parts outside the wet planting area.
Allow enough access to lift the pot, remove the cottage, and water without performing a surgical procedure through a fern. Protect the furniture below with an appropriate saucer and waterproof surface protection, then check underneath regularly. A tiny magical world should not leave a very real ring on the coffee table.

Use the inspiration board to choose a restrained palette: leaf green, warm stone, bark brown, and one accent color. Repeating those materials makes even a small arrangement feel considered.
Pick a container that can drain
A broad, stable pot with drainage holes is the easiest choice. It must be deep enough for the actual root balls of your plants, with some room for fresh potting mix and a little space below the rim for watering. A shallow decorative tray that holds a few pebbles may not hold living plants comfortably.
If you love a bowl without holes, use a removable draining insert or keep the plants in individual nursery pots inside it. Take those pots out to water and let them drain before returning them. Empty any water collecting in the outer bowl. Do not bury the nursery-pot rims so deeply under decorations that you cannot lift them out.
Skip the layer of gravel beneath the soil. It does not turn a sealed bowl into a well-drained planter. Drainage holes, suitable potting mix, and somewhere for excess water to escape do the useful work. A small piece of mesh over a large hole can retain mix while allowing water through; it is optional, not an elaborate foundation system.

The important distinction is water leaving the container. Keep the drain holes open and empty the saucer or outer pot after watering, rather than hiding standing water below a decorative surface.
Supplies for a manageable first garden
Gather from home
A spoon for placing potting mix, a soft brush for clearing paths, a small watering vessel with a controlled spout, and a clean tray for working are enough to begin. Add a few clean smooth stones or a flat tile for a removable cottage platform. Avoid sharp fragments and anything that has held chemicals. You do not need a specialized tool for every pebble.
Buy or choose carefully
Use a container with drainage, a matching saucer, fresh houseplant potting mix, two or three compatible small plants, and one or two miniature accessories. Choose decorations suited to their intended exposure. Keep wood, paper, delicate paint, and electrical components separate from damp soil. Look at mature plant size as well as current pot size: “small when purchased” is not the same as “stays small.”
Helpful tools
Small scissors or clean pruning snips, tweezers for awkward spots, and gloves if you prefer them make maintenance easier. Use tools appropriate for your materials, follow product instructions, and keep the tiny loose parts away from young children and pets.

A simple supplies layout keeps the project approachable. Buy the container and plants first; choose the miniatures after you know how much usable space remains.
Choose compatible indoor fairy garden plants
For a leafy woodland look, start with small foliage houseplants that share light and moisture needs. Fittonia, also called nerve plant, offers beautifully veined leaves and low growth. It likes bright indirect light and moisture without waterlogging, but can struggle with dry air and drafts. Choose it because your room can support it, not just because the pink leaves match the cottage curtains.
Friendship plant, Pilea involucrata, has textured foliage and can be pinched to keep it compact. It still grows, and a small specimen may eventually need its own pot. A compact Boston fern cultivar can suggest a miniature tree canopy, but even compact ferns need suitable humidity and care. An ordinary Boston fern is likely to overwhelm a small bowl.
Ask a nursery for the exact plant names and care requirements. Do not mix moisture-loving plants with succulents in one shared soil bed. If your brightest window suits a dry succulent garden, build a separate version using compatible plants and the appropriate mix. The same miniature bench can live in either neighborhood; the watering routine cannot.

In my Tokyo photo, low plants create a landscape around the cottages. For an indoor version, copy that relationship between plant height and building size while choosing houseplants suited to your room.
Lay out the village before planting
Set the plants in their nursery pots inside the empty container and try the cottage beside them. Put the tallest foliage toward the back if the garden will be viewed from one side. For a centerpiece, arrange heights so there is something interesting from several angles, without hiding every doorway behind a leaf.
Reserve a little open ground for the path and a flat resting spot for the main accessory. A gently curved path usually feels more natural than a straight stripe across the bowl. Start with one destination: a door, a bench, or a little table. Too many equally important focal points make a small garden feel like a miniature storage unit.
Take a quick phone photo of the trial layout. It is easier to spot a crowded corner in a picture, and it gives you a reference when the plants come out for planting. Leave growing room between them. A garden that looks slightly airy on day one is easier to maintain than one already packed to the rim.

A fairy door can provide the suggestion of a home without using much floor space. Check the accessory’s size and use a freestanding dry backing if needed; do not attach it to or damage a living plant.
Plant the greenery, then add the architecture
Moisten the potting mix lightly if it is very dry, following the mix’s instructions. Add enough to support the root balls at their existing planting depth. Ease each plant from its nursery pot and arrange it without burying the stem base deeper than before. Fill the gaps gently; do not compress the mix into a dense miniature pavement.
Water as appropriate for the plants and let excess escape. Once the surface has settled, adjust low spots with a little more mix. Keep a modest gap beneath the rim so watering stays in the container. If using separate nursery pots in an outer bowl, keep that removable arrangement rather than pretending it is one shared planting bed.
Place the cottage on a flat removable tile or stone, preferably with its vulnerable base above the damp surface. Take it out when watering. A resin or ceramic-looking accessory is not automatically waterproof; follow its manufacturer’s care information. Avoid coating items with a mystery sealant and assuming that makes them safe for plants or permanently water-resistant.
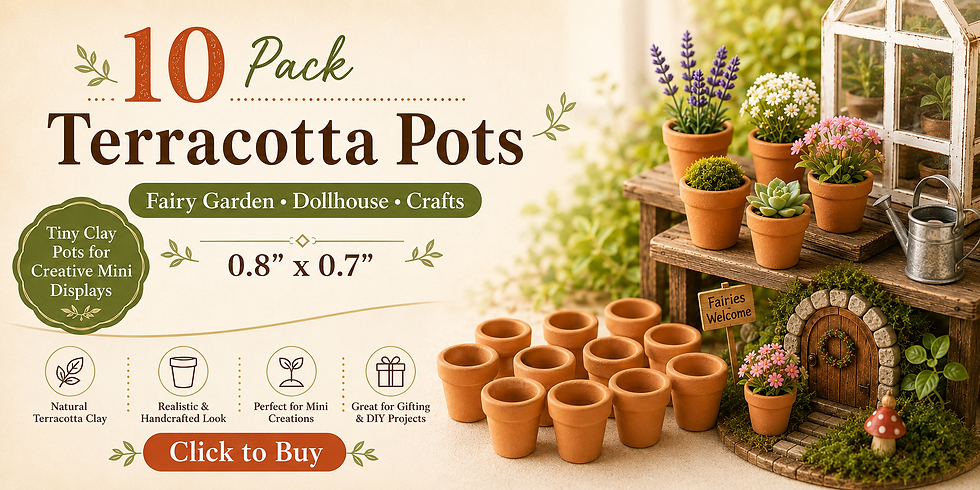
Mini terracotta pots make lovely decorative accents, but very tiny pots dry quickly and may not offer enough room for a plant’s roots. Use them as empty props or choose a genuinely suitable small plant and check it separately.
Build paths and details with a light touch
Lay a thin, removable trail of small stones across the surface rather than covering every inch of soil. Leave room to check moisture and reach the plants. A few larger flat stones can suggest stepping-stones; a narrow curve disappearing behind the cottage adds depth without demanding more furniture.
Choose two or three finishing details. A bench facing the path, a mushroom near the door, and a tiny pot can tell a complete story. Repeat one accent color instead of collecting every bright accessory into the bowl. Check that the decorations can be lifted out for cleaning and that they do not press against growing stems.
For a handmade touch, use a short twig as a fallen log or build a little sign from craft sticks. Keep absorbent craft pieces on a dry, removable platform. Natural materials can soften or decay in damp conditions, so treat them as replaceable decorations rather than permanent structural supports.

Craft sticks are useful for a removable sign, bench, or tiny porch. Assemble and finish the piece away from the plants, follow the adhesive’s cure instructions, and keep it out of the watering zone.

Artificial miniature flower vines can add color to a dry trellis or removable cottage. Keep them separate from living stems, and follow the decoration’s care directions rather than assuming it can stay wet.
Decide what “moss” means in your garden
Living moss, preserved moss, and artificial scenic foliage do different jobs. Living moss needs appropriate conditions and should be sourced responsibly. It is not guaranteed to stay lush in a dry, open living-room bowl. Start with a small area if the moss’s needs suit the space, and be ready to change the design if it struggles.
Preserved moss is decorative material, not a living lawn waiting to wake up. Watering it will not make it grow. Follow the specific product’s instructions and keep it out of wet soil if it is intended for dry craft displays. Artificial moss and foliage can also be used on a separate dry accessory, but should not be mistaken for living groundcover.
You can skip moss entirely. A few visible patches of potting mix, removable stones, and healthy low foliage are perfectly convincing. The fairies have not published a lawn ordinance. A simpler surface also makes watering and pest checks much easier.

A small group of miniature mushrooms adds color without asking a flowering plant to live in unsuitable light. Treat glow effects and weather resistance as product-specific features, and keep loose pieces out of reach of pets and children.
Care for the plants, not the calendar
Check the potting mix before watering and follow the needs of the actual plants. Temperature, pot size, light, and humidity all affect how quickly it dries. A fixed “water every Tuesday” rule is convenient until the room changes. Direct water toward the root zone, let excess drain, and empty the saucer or cachepot.
Inspect the garden regularly. Remove dead leaves, clean debris from the path, and trim selectively to keep doors and seating areas visible. If a plant outgrows the arrangement, move it to a larger pot and replace it with a suitable small specimen. That is routine gardening, not a failure of your tiny urban-planning department.
Misting does not provide sustained humidity. If your chosen plants need more humidity than the room offers, adjust the environment appropriately or choose plants that tolerate it better. Watch for pests on leaf undersides and isolate an affected garden from other houseplants. Excessive watering and poor drainage can encourage fungus gnats; correct the care problem rather than reaching for an improvised pesticide recipe.

The flower-framed cottage in my Tokyo photograph shows how effectively foliage can create a sense of enclosure. Indoors, leave enough space behind that cozy effect to inspect the leaves and reach the soil.
Prefer a dry miniature garden instead?
If plant care is not the part that excites you, make a dry display with artificial greenery and removable miniature flowers. It is a different project, with no living roots or watering schedule. You can use more delicate paper and wood details as long as the display stays dry and you follow the kit’s instructions.
Anavrin’s Forest Cottage book nook is a separate woodland-inspired kit option for that route. It is a dry display project, not a cottage to bury inside a watered dish garden. Check the current product page for contents and specifications before buying. Keep a completed kit beside your living plants, rather than mixing its structure or electronics into the soil.
As an Anavrin Associate I earn from qualifying purchases. Enter code EOUFQ5ZWKCSNGM for a 10% discount on select products!

For another dry greenhouse-style miniature, Rolife’s Dreamy Garden House can provide a plant-filled visual theme without becoming a real planter. Consider it an alternative craft project, not a required item for this guide, and check its dimensions against your available shelf space.

Keeping dry kit projects separate from living gardens lets each one do what it does best. Your plants get sensible drainage, and your paper accessories avoid an unscheduled monsoon.
Quick answers before you start
Can I use a closed glass jar?
A closed terrarium is a different growing environment, with different plant and moisture choices. This guide is for an open container. Do not add a lid to the finished arrangement and assume the same watering advice still applies.
Can I use soil from the yard?
Use suitable houseplant potting mix for this project. Outdoor soil can be too dense in a container. Choose the mix for your plants and avoid packing it tightly around the roots.

Is an indoor fairy garden safe around pets?
Identify each plant by its exact name and check a reliable pet-toxicity reference. Nerve plant and Boston fern are listed by the ASPCA as non-toxic to cats and dogs, but that does not make every fern, coating, moss product, or tiny accessory safe to chew. Place the whole display where pets cannot eat it or knock it down.
Why is my plant wilting even though the soil is wet?
Wilting can have several causes, including root problems. Do not automatically add more water. Check drainage, the plant’s conditions, and signs of pests or damage; seek plant-specific advice if the cause is unclear.
A tiny garden you can keep enjoying
Start small enough that you can actually care for it: a few compatible plants, one focal point, and a path that leads somewhere. The best version is the one that still looks inviting after the first watering, not just before the photograph.
If you have space outdoors, my outdoor fairy village guide takes the same love of tiny architecture into the yard. For handmade details, the miniature pottery guide offers ideas for little pots and decorative pieces; use those as removable accents and keep material care in mind.
What would be the first building in your indoor fairy garden: a cottage, a tea shop, or a library? Share your miniature world with #smallworldminiatures. I am always happy to see a neighborhood where the biggest civic crisis is a crooked pebble path.
Plant-care references
For more detail, consult Iowa State Extension’s houseplant-care guide, NC State Extension’s container-gardening handbook and plant profiles, the RHS guide to terrariums, University of Minnesota Extension’s indoor-plant pest advice, and the ASPCA plant database. Use the care requirements of your exact plants as the final guide.








Comments