



Where October Keeps Shop: A Boston-Inspired Autumn Miniature

First Impressions in Miniature
I would go into this shop for one candle and come out carrying a pumpkin, a jar of something delicious, and a new opinion about door handles. The dark timber, glowing bay window, and pots of red and yellow flowers make a wonderfully persuasive argument for lingering. Even the fallen leaves seem to have arranged themselves for a better view.
This autumn miniature shop borrows the feeling of an old New England neighborhood rather than copying a particular Boston address. Its steep roof and twin dormers sit above an extravagantly welcoming storefront. Below, gray steps and paving give all that orange a cool place to land. We'll look around, meet the shop's most difficult customer, and then build an inspired version with layered card, simple glazing, miniature pumpkins, and a generous helping of paper foliage.
This post contains affiliate links. As an Amazon Associate, I earn from qualifying purchases. If you choose to shop through these links, it helps support Small World Miniatures at no extra cost to you.
A ready-made shop kit can be a useful starting point if the display window is your favorite part. Rolife Becka's Baking House offers a different bakery scene to explore; it is an alternative project, not the model shown here. Check its dimensions and included supplies before choosing accessories for it.

Miniature Backstory — The Tiny Tale
Every October, Mrs. Bell put the smallest pumpkin beside the front door and declared it unsuitable for sale. It was the shop's lucky pumpkin, she explained. It had a flat bottom, a crooked stem, and a talent for making everything around it look more expensive.
Mr. Pike disagreed. He had been trying to buy it since Tuesday.
On Wednesday he offered a jar of pear butter. On Thursday he offered two. By Friday he had arrived with a basket large enough to transport a modest chandelier.
“Still not for sale,” said Mrs. Bell, without looking up from her wrapping paper.
“I haven't asked.”
“You brought the pumpkin basket.”
“It is an ordinary basket.”
The basket contained a small blanket.

Outside, the maple shook loose another handful of red leaves. One landed on the upper step, where Mrs. Bell's assistant, Elsie, had just finished sweeping. Elsie considered the leaf, considered the broom, and decided the entrance had acquired a seasonal accent.
At closing time, Mr. Pike returned carrying his own pumpkin. It was twice as large and leaned slightly to the left.
“I thought yours might appreciate company.”
Mrs. Bell examined it with professional seriousness. “It will need a position.”
Elsie moved a pot of chrysanthemums. Mr. Pike adjusted the new arrival until its best side faced the street. Mrs. Bell brought out three smaller pumpkins and announced that the display was now a committee.
Nobody mentioned prices. Nobody mentioned the basket.
The street lantern came on, and the shop windows filled the paving with amber squares. Mr. Pike accepted a parcel of biscuits for the walk home. Mrs. Bell locked the door, then came back to turn the smallest pumpkin a fraction toward its new neighbor.
By morning, the red leaf was still on the step. Elsie had swept carefully around it.
A Guided Tour of the Build
A window worth stopping for
The projecting bay on the right gives the shop its strongest invitation. Dark glazing bars divide the warm interior into small discoveries: vessels, shelves, rounded objects, and a wreath-like arrangement. I like how the window's angled sides catch light differently. The view stays interesting before you identify every tiny object. For a brighter neighboring world, the Main Street miniature explores a whole row of inviting storefronts. A full shop interior is not necessary to recreate that depth; a shallow display behind the panes can do a great deal.

The roof joins the garden
Two dormers break through the gray, slate-like roof. Their warm windows repeat the glow below, while vines soften the roofline without entirely burying it. Red and orange leaves cross the cool tiles like scattered bookmarks. The dark gables and delicate-looking trim create a storybook character, but the clear roof planes keep the silhouette legible. This is a useful reminder to leave some quiet surface between the decorative flourishes.

A doorstep full of October
The broad stone-like steps lead through a crowd of potted flowers and pumpkins. Large flower heads and leaves sit near the front, with finer texture farther back. The freestanding lantern provides a tall, narrow counterpoint to the round planters. I would preserve the little open route to the door in any version of this scene. Even a fictional shop needs customers to get inside without hurdling a squash.

Inspirations — From the Big World to the Small
Boston supplies a mood here, not a claim of architectural accuracy. The city's Beacon Hill historic district includes Federal and Greek Revival residences. Their orderly openings and carefully framed entrances offer a useful lesson for a miniature storefront: establish a calm architectural rhythm before adding the seasonal abundance. This dark cottage-like shop is a freer interpretation, with more decorative timber and garden space than a literal Beacon Hill reproduction would suggest.
A second regional reference is Salem's Ropes Mansion and Garden. Peabody Essex Museum identifies the house as Georgian, later renovated in the Colonial Revival style. Its relationship between a formal building and a cultivated garden is the parallel I would borrow, rather than its exact façade. In miniature, a disciplined central doorway can anchor an enthusiastic jumble of planting.
For the little pots and flower masses, the principle is contrast. Crisp frames make soft foliage look softer; a sparse stretch of paving makes the next cluster feel abundant. Woodland Scenics foliage is one optional scenic material for background greenery. Keep the autumn reds and golds in separate accents, and select textures that suit your chosen scale instead of assuming any scenic material will look right beside any door.

I also like the display-window approach in an Owl Bookstore book-nook kit: a framed view can suggest a whole business within a limited footprint. That is another separate project, useful for readers who enjoy small shops but prefer a kit to cutting a custom shell.

Artist Tips — Make Your Own Magic
The illustrations in this post are AI-generated inspiration, and this guide is a practical starting point rather than an exact, tested reproduction. Results will vary with your materials and scale. Your pumpkin committee may also prove less cooperative than Mrs. Bell's.
Planning an autumn miniature shop
Try a shallow frontage instead of a complete building for your first version. A proposed 1:24 scale keeps the scene manageable: divide a real-world dimension by 24 when choosing door, step, and accessory sizes. The reference's actual scale is unknown. Sketch the storefront, roof, bay window, and garden on paper before cutting. This is an intermediate project mainly because angled glazing and layered roof work reward patience; the pumpkins and planting can be tackled independently.

Supplies
Base and shell: reuse clean, flat packaging card for templates and small details. Use rigid mounting board or thin plywood for a stable base, with dense card or basswood for the frontage. Avoid greasy, damp, or warped packaging.
Roof and stone effects: cereal-box card makes overlapping tiles; torn clean paper makes surface texture. Thin air-dry clay is optional for separate paving pieces. It is not interchangeable with oven-bake polymer clay.
Windows and trim: use clean transparent packaging for glazing after testing it for clarity. Thin card strips or basswood form frames. Use a compatible clear-drying glazing adhesive, following its label; keep adhesive away from the visible center of each pane.
Color and assembly: water-based acrylic paints, PVA craft glue appropriate to the materials, brushes, scissors, a protected cutting surface, and a sharp craft knife. Cut away from your body and keep fingers out of the blade path.
Autumn details: colored paper, fine florist wire with trimmed ends covered, thread, and dry scenic foliage. Polymer clay is an optional pumpkin material. Use separate craft tools, and follow the exact clay package's curing directions.
Optional finishes and lighting: a compatible model varnish for selected glossy props, plus a ready-made low-voltage LED set with accessible battery holder. Keep loose batteries away from children and pets. This decorative model is not a toy.

A miniature scenic-leaf assortment can shorten the foliage stage. Compare the individual leaves with your door and steps before buying or attaching them; the product's apparent size matters more here than a broad “miniature” label.

1. Plan the frontage and open route
Draw the base outline on scrap paper and place paper shapes for the shop, steps, bay, and planters. Give the bay enough room to project without blocking the approach. Set the central doorway first, then position the two dormers above it. Keep one clear path from the front edge to the door. Move the paper pieces until the scene works from a low viewing angle as well as from above.
Build a plain card mock-up before committing to better material. Hold a small accessory beside it to catch scale problems early. If the roof overwhelms the storefront, lower its ridge or reduce the dormers. Mark only the major divisions on your template. The ornamental details come later, after the shell establishes a believable structure.

2. Assemble the shell and stepped base
Cut the wall pieces and dry-fit them with temporary supports. Make several light knife passes rather than forcing one deep cut. Add internal corner braces, then glue the walls square and let the adhesive dry as directed before adding the roof. A shallow box behind the façade gives the window display somewhere to sit and prevents light from shining through unintended gaps.
Build the steps from stacked card layers with equal rises. Cover the exposed edges with narrow card strips so the layers don't resemble a sandwich. Texture the surface with thin crumpled paper glued flat, or use separate air-dry clay slabs made and fully dried away from the structure. Keep each tread broad enough for a miniature visitor's foot and leave the edges slightly irregular, not dangerously broken-looking.

3. Make the projecting bay and glazing
Construct the bay as three flat framed panels: one front and two angled sides. Cut the openings before assembly. Paint the frames first, allow them to dry, then attach clear plastic behind them using the adhesive's recommended application. A simple paper template underneath helps the angles match while the pieces set. Avoid superglue near clear glazing unless its specific formulation is confirmed suitable; fogging can spoil an otherwise careful window.
Before closing the roof, temporarily test the ready-made low-voltage set behind the bay and dormer glazing, keeping its battery holder outside and following the set’s instructions. Remove or move the test lights as construction requires; secure their final route in Step 8.
Fit a shallow floor and back wall inside the bay. Use a dark back wall and a few tiered shelves rather than packing every inch. Leave the rear accessible until you have tested the lighting and arranged the display. For an easier version, make a flat shop window with a deep sill; the warm framing and layered contents will still carry the idea.

4. Layer roof tiles and timber color
Cut card into short tile strips, snip shallow divisions, and overlap the rows from eaves toward ridge. Stagger the joins and keep the exposed height reasonably consistent. Fit the dormer cheeks and roofs separately, checking their placement before glue makes the decision permanent. Finish the ridge with folded strips. Paint a test piece first to see how much moisture your card can tolerate.
Use a dark gray base for the roof, then lightly brush a softer gray across the raised edges. Paint timber a deep brown, with restrained lighter streaks following the apparent grain. Keep the contrast subtle so it reads as small wood rather than zebra stripes. Dry each layer before the next. Fine card curls or simple embossed strips can suggest carved trim; a clean repeated motif is more convincing than a mass of fragile detail.

5. Stock a glowing display window
Make display crates from card, folded paper boxes, and a few narrow wood offcuts. Place taller shapes toward the back and leave gaps where light can pass. Small beads can become ceramic-looking vessels; capped paper cylinders can suggest jars. Glue every small part securely. If using a clear gloss finish, test compatibility on a spare painted bead and follow the varnish instructions. Keep the shelf surfaces mostly matte.

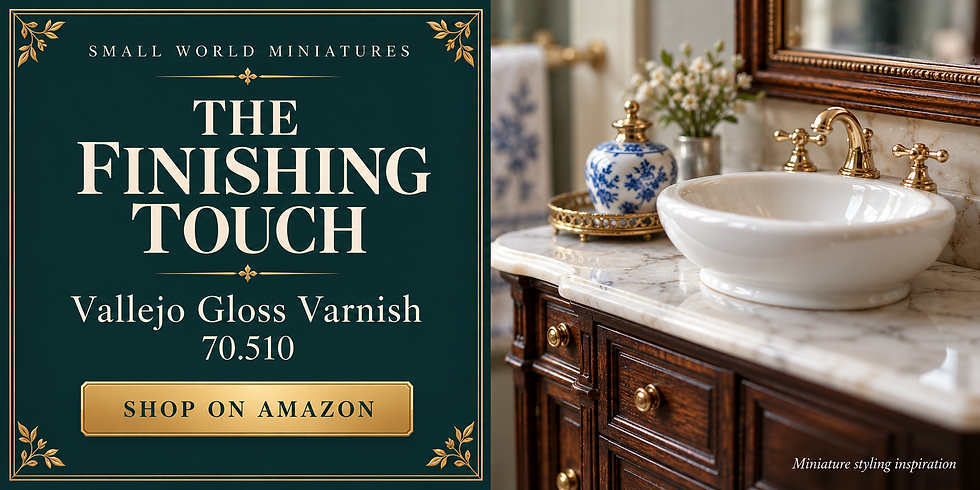
Vallejo Gloss Varnish is an optional model finish for selected painted accessories, not a substitute for window plastic or a pouring resin. A little contrast between a glossy pot and a matte crate can make a shallow display feel richer. Don't coat the entire storefront in shine.
For a food-shop interpretation, SAMCAMI baking accessories provide a purchased alternative to making every tiny prop. Check their listed scale against your planned shop first; larger accessories won't become convincing simply because they fit through the opening. You can also leave the merchandise abstract and let the warm window do the storytelling.

6. Sculpt pumpkins and build flower pots
Roll small polymer-clay balls, flatten their bottoms, and press shallow grooves from top to bottom with a blunt sculpting tool. Vary the proportions: one tall, one squat, several small. Add a short curved stem and a slight depression around it. Cure pieces separately from the card building, using the exact manufacturer's temperature, timing, ventilation, and suitable baking surface. Let them cool before painting or gluing. Never microwave polymer clay.
For a no-oven alternative, use air-dry clay and allow it to dry according to its own instructions before finishing. Make pots from rolled card sleeves with closed bottoms. Fill them with a hidden paper support, then add tightly fringed colored-paper strips rolled into flower heads. Group several heads into a rounded chrysanthemum-like mound. Alternate red, ochre, and yellow pots, leaving a few dark gaps so every blossom doesn't compete equally.

7. Add trees, vines, and fallen leaves
Use a prepared miniature tree armature or twist fine wire into a trunk with several uneven branches. Cover sharp ends and secure the tree firmly to the base. Apply a compatible trunk coating and let it dry before adding foliage. Stretch scenic foliage into small loose pieces rather than one dense ball. Keep glimpses of branches visible, especially near the trunk. The miniature autumn tree guide explores that open-canopy approach in more detail. Manufacturer instructions are the best guide for the matching foliage adhesive.
Cut maple-like leaves from thin colored paper in a few sizes, or use scale-appropriate purchased leaves. Touch them with muted orange and brown so the red has somewhere to rest. Trail fine thread or thin stems around the roof edges, adding leaves in interrupted clusters. Keep most tiles visible. Put only a few leaves on the steps; the larger piles belong beside planters and along the paving edges, where a breeze might gather them.

8. Light, arrange, and finish the street
Test a ready-made low-voltage lighting set before installation. Position its warm light behind the display or above the shelves, not directly against the glazing. Conceal wires along internal corners while keeping the battery holder and switch reachable. Follow the set's instructions for clearances and use; don't improvise mains wiring or use a real flame. Unlit lantern shells painted warmly are a perfectly good simpler choice.
Arrange the pumpkins and pots in clusters of different heights. Leave the route to the door open and test the view from the intended display angle before gluing. Add a final restrained dry-brush to the paving edges, then remove stray glue strings and loose foliage. A soft brush is useful for cleaning the windows and roof. Keep any protective finish appropriate to each material rather than applying one coating indiscriminately over everything.

Photograph the little shop
Place the model against a plain, softly colored background. Use a diffused lamp to one side and a white card opposite to lift the shadows. Keep the light source safely separated from paper and foliage. Lower the camera position toward the doorway so the steps lead into the image; a high overhead view tends to flatten the shop into its base.
Take an overall view, then concentrate on the bay, roof, and doorstep. Move the lamp or camera slightly to control window reflections. Turn down the interior lighting or brighten the room if the panes become featureless orange rectangles. Keep the important trim sharp while allowing the distant trees to soften. Photograph the unlit version too: good construction should still be readable when the batteries are off.

Small problems, practical fixes
Warped roof strips: use less wet glue, work in small sections, and let each area settle before continuing. Replace a badly curled strip rather than hiding it under foliage.
Cloudy panes: remove smears with a method safe for that plastic. Replace a fogged pane if cleaning would scratch it, and test the adhesive before the next attempt.
Pumpkins look like orange balls: deepen a few grooves, flatten the base, and vary the stem angle. Avoid identical size and spacing.
Flowers form one bright blob: separate the pots with dark gaps and vary the height of the flower mounds. Save your brightest yellow for one or two accents.
The shop feels crowded: remove one planter and a handful of leaves. Keep the doorway and a clear strip of paving visible before adding anything back.
Closing — Until Next Time in the Small World
I think Elsie had the right idea about that leaf on the step. A small scene needs a little room for things to happen naturally, even when every pumpkin has been placed with tweezers. The warm window invites us in, but those slightly untidy edges make the shop feel occupied.
Which would you make first: the bay window, the pumpkin committee, or the pots of autumn flowers? Share your own tiny storefront with #smallworldminiatures. You can find more miniature inspiration through the newsletter and browse the Small World Miniatures shop for another small-world adventure. Just don't ask Mrs. Bell to sell the lucky pumpkin.








Comments