


A Place for Every Bloom: A Medieval Flower Market Miniature

My Vision for This Small World
For this medieval flower market miniature, I’ve brought pointed arches and tall gables together with the everyday pleasure of choosing a few flowers. Pale architectural details rise above terracotta pots and little wooden crates, giving the stalls a wonderfully grand setting. The slate-gray roof steadies the soft pinks and creams below, while the open center keeps the flowers within easy view. Even the smallest bunch gets an impressive place to wait for a customer.
Some links earn me a commission from qualifying purchases and help keep this tiny world growing. As an Amazon Associate I earn from qualifying purchases.
Bring a little woodland magic to your bookshelf with Anavrin’s Forest Cottage Book Nook Kit. Its cozy setting is a lovely invitation to linger over the small details. Ready to give your shelf a tiny new adventure? Use EOUFQ5ZWKCSNGM for 10% off select Anavrin products.

Miniature Backstory — The Tiny Tale

A Guided Tour of the Flower Market
Pointed arches, softened by petals
The roofline is the scene’s signature. Three forward-facing gables break up the large roof plane, while delicate finials keep the silhouette lively. Under the central peak, curved openings nest inside one another like a small wooden window without glass. Peach-colored leaves and blossoms travel down the gable, repeating the plants below in the architecture itself.
I would preserve that relationship before attempting any elaborate carving. A clean pointed opening, a second narrow outline and a few leaf-shaped accents would communicate the same idea. The dark roof is equally important: it gives the pale framework enough contrast to remain readable instead of dissolving into a mass of cream-colored detail.

A counter that tells us what happens here
The front display is low enough to let us look into the stall. Shallow compartments hold separate colors of flowers, clear jars catch the light, and ranks of pots fill the shelves behind. That repetition makes the market feel stocked, while the changing sizes prevent it from looking like a collection of identical accessories. The counter projects forward, inviting an imaginary customer to stop.
At ground level, broad barrel planters and sculptural white jugs give the composition weight. Higher up, hanging baskets fill the spaces between the arches rather than concealing them. The flowering tree at the right offers a looser outline against all those carefully arranged roof edges. I like how almost everything belongs to the same small family of materials and colors, even when its shape changes.

The flowers are the main attraction, but they do not need to be equally detailed everywhere. A few crisp foreground blossoms can lead the eye while softer foliage fills the back shelves. For a deeper look at petals, stems and convincing containers, the miniature flower guide is a useful companion to this project.
A few flowers can make even the smallest room feel loved. These miniature flowers and vases are sweet finishing touches for shelves, tables and tiny shop displays.

Inspirations: A Little Gothic, a Little Garden
The pointed arches and ornamental tracery borrow from Gothic design. The Victoria and Albert Museum traces the Gothic style to twelfth-century northern France and describes its pointed forms, tracery and natural ornament. Here, those ideas have been translated into a pale, open flower stall rather than a monumental stone building. I’m drawn to the playful change of purpose: dramatic architecture becomes a frame for tiny everyday transactions.
English Heritage describes medieval gardens as places for food, medicine, recreation and contemplation, with flowers also growing within castle walls. That mixture of beauty and everyday usefulness is a helpful starting point for the stock on these shelves. This particular market is a playful medieval-inspired fantasy, with pastel color, floral carving and tidy displays chosen for their storybook charm.

For the palette, I would keep charcoal gray, warm ivory and terracotta as the stable foundation. Blush pink, soft white and sage can then repeat in smaller amounts. A restrained palette lets the details feel abundant without becoming noisy. A handful of real leaf shapes, a simple arch sketch and a scrap of weathered wood are enough to start an inspiration board; a finished model does not have to dictate every decision.
The Gothic miniature flower shop build guide explores another way of pairing expressive architecture with flowers. In this market, I would keep the planting lighter so customers could still see the counter. Let roses climb through your miniature collection with Aorvoras flower vines. They’re a lovely way to dress a garden arch, soften a balcony or add a little romance around a doorway.

Artist Tips: Make Your Own Magic
A little AI-assisted imagination brought this flower market to life. Its intricate details offer plenty of possibilities for your own miniature. What catches my eye most is the balance: tall gables, low displays, a generous central opening and plants that soften the edges without hiding the structure.
Planning a medieval flower market miniature
I would approach this as a small scenic structure with removable stock, not a complete dollhouse room. A simplified version can begin with one central pointed arch, two side posts and a shallow pitched roof. The extra gables, leaf trim and hanging baskets can be added later. That keeps the recognizable silhouette within reach even if this is your first architectural miniature.

Choose one scale before shopping. At 1:12, an imagined six-foot-tall person becomes six inches tall; that gives a useful reference for the opening and counter. The inspiration image does not establish an exact scale. Make a paper person or use one known-scale figure during planning, then remove it from the finished display if you prefer a people-free scene. Leave access for your fingers or tweezers behind the counter.

Materials without a mountain of shopping
From home: clean cereal-box card for shingles and decorative overlays; corrugated packaging for a mock-up; an egg carton for irregular stones; paper offcuts for flowers; thread for basket cords; and a bottle cap as a temporary paint dish. Keep packaging clean and dry, and avoid food residue or unknown crumbly materials.
Store-bought basics: basswood strips for the main frame, firm mat board for the base, PVA glue for porous materials, opaque acrylic paints, floral wire, tissue paper and a little fine scenic foliage. Optional ready-made miniature pots can save time, but compare their dimensions with your chosen scale. Not every small plant pot is a dollhouse-sized accessory.
Tools: sharp scissors, a craft knife, a protected cutting surface, fine tweezers, brushes, a pencil, a measuring tool and a sanding block. Cut away from fingers, cap blades when not in use and use adult supervision where appropriate. Follow each adhesive’s label; a ventilated work area matters more than using the strongest glue. This is a decorative model, with small parts that should stay away from young children and pets.
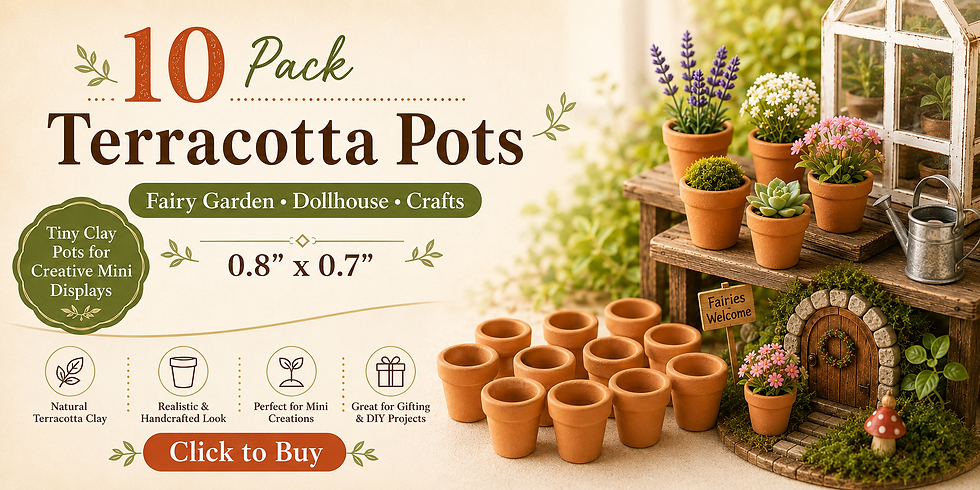
Tiny terracotta pots are the sort of detail I always want to arrange in little groups. Add them to a garden shelf, line a sunny doorstep or fill them with your favorite miniature blooms. For more ways to mimic clay without a kiln, see the miniature ceramics and pottery guide.
Step 1: Establish the base and open footprint
Start with a paper plan showing the roof outline, supporting posts, counter and a clear strip of paving in front. Make the base slightly larger than the stall so barrels and pots have somewhere to stand. Test the plan with scraps standing in for the largest accessories; a beautiful drawing is not enough if the front becomes inaccessible once the stock is added.
Build a rigid, flat base from mat board or a suitable wood offcut. If using layered card, glue thinly and dry it flat under a protective sheet and evenly distributed weight. A shallow raised platform can be made as a hollow card box rather than a solid block. This keeps the model lighter and gives the front a convincing stone-faced edge.
For paving, cut irregular pieces from clean egg carton or textured card. Leave narrow, varied joints, but keep a clear route to the counter. Paint a test piece first: thin washes can soften unsealed paper. Use small amounts of paint and let each layer dry. Check for rocking before adding the structure, because a warped base becomes much harder to correct later.

Bring fresh texture to your little landscapes with Woodland Scenics Light Green Foliage F51. It’s a useful addition to a scenery collection for softening garden edges and building up planted corners.

Step 2: Build the frame and pointed openings
Cut a simple paper template for the central pointed arch and fold it down the middle to check its symmetry. Transfer the shape to thin card for an overlay; the main posts and crosspieces should carry the structure, not the delicate decorative edge. Test the opening against your scale reference before cutting multiple pieces.
Assemble the frame flat where possible, using a square corner as a guide. Basswood strips can form straight posts and beams, while layered card supplies the ornamental curves. Leave the rear open enough for placing the shelves. Allow the joints to cure according to the glue instructions before standing the structure upright or adding a roof.
Create the impression of tracery with a second, narrower arch inside the first, then add a few leaf shapes near the peak. I would stop there initially. Oversized scrollwork can make a small building look heavy, and fragile points are vulnerable during handling. Paint the framework warm ivory rather than brilliant white, with a slightly darker wash tucked into the joints. Keep the most visible edges crisp.

A little molding gives a miniature room a beautifully finished edge. These dollhouse trim strips are a useful addition to the workbench for dressing up windows, walls and furniture.

Step 3: Roof the stall and bring out the structure
Make the main roof as two card panels meeting at a ridge. Test them loose on the frame before attaching shingles. For a manageable interpretation of the inspiration, add one forward gable first; the side gables can remain optional. Keep the roof removable during construction if that helps you reach the shelves, then secure it only when the interior arrangement is settled.
Cut narrow strips of cereal-box card into shingles, leaving their upper edges connected. Glue rows from the eaves upward so each course overlaps the one below. Stagger the vertical joints and vary a few lower corners without turning the roof into a ruin. Thin card gives a better scale impression than thick, chunky tiles.
Paint the roof in several close gray tones. A small dry-brushed highlight along the lower edges will show the overlap, while a restrained dark wash can separate the rows. Keep the roof cooler and darker than the frame. Finials can be simplified into layered card or tiny wooden shapes with rounded tips; there is no need for needle-sharp ornaments. Add a few pale leaf motifs only after the paint has dried.

Keep your favorite acrylic mixes close at hand with The Army Painter Wet Palette. It’s a useful workbench companion for those satisfying sessions spent painting one tiny detail after another.

Step 4: Make the counter, pots and flower stock
Build the counter as a simple shallow box with legs or brackets beneath it. Add low dividers on top to suggest separate flower bins. Behind it, two or three narrow shelves are enough to create the impression of a well-stocked shop. Paint those pieces before installing them, and leave some breathing room so the jars and pots can be read individually.
Rolled strips of card can become tapered paper pots: wrap a narrow strip around a removable form, glue the seam and add a slim rim. Keep the bottom closed with a small disc. Paint them terracotta, cream or muted gray, then dry-fit each group. Clear craft beads can suggest little jars, provided their holes are turned away or disguised.
For flowers, start with three repeatable shapes: tiny cupped tissue petals, narrow lavender-like clusters and simple green leaves. Use short lengths of floral wire for stems, tuck their cut ends safely into the containers and handle them with tweezers. Make a few detailed blooms for the foreground and looser clusters for the shelves. Avoid identifying every stylized flower as a particular species when the shapes do not support it.

Step 5: Arrange the market, then edit it
Place the largest planters first, followed by the counter stock and hanging baskets. Aim for varied heights with a clear central view. A tall plant at one side can balance the broad roof, while low pots along the front connect the stall to the paving. Photograph the arrangement before gluing; a flat image often reveals a crowded corner more quickly than staring at the model.
Hanging baskets can be small paper bowls with thread supports. Attach them to sturdy beams rather than fragile trim, and keep their foliage out of the main sightline. Use a narrow strip of textured material or painted paper around a simple cylindrical pot to suggest a barrel. A few repeated container shapes will tie the display together without requiring dozens of different accessories.
Finish with selective weathering at the base of posts and between stones. The inspiration is tidy, so I would resist heavy black washes or moss on every surface. Remove anything that obscures the pointed opening or makes the counter difficult to understand. One empty pot or a small gap in a row can make the whole market feel less staged and give the eye somewhere to rest.

If tiny gardens make you linger, Rolife’s Dreamy Garden House is a lovely next project. Its enclosed greenhouse setting makes an inviting addition to a plant-filled miniature collection.

Photographing and troubleshooting the little stall
Use a plain curved backdrop, soft side light and a white card opposite the light to lift shadows beneath the roof. Keep the lens near the imagined customer’s eye level for the main view, then take a higher angle to reveal the counter. Avoid direct sunlight if it washes out the pale frame. A phone supported steadily can work; tap to focus on the front arch and check that the bright petals retain detail.

If the market looks crowded, remove one entire cluster instead of shifting every pot by a fraction. If the pale frame disappears, darken the roof slightly rather than outlining all the wood in black. If the paper flowers look too large, reduce the leaves as well as the petals. And if an arch leans, correct the structural joint before disguising it with foliage. Decoration should not be asked to hold a building upright.
Closing: Leave Room for One More Pot
What I like most about this miniature is that its elaborate architecture still leaves room for small, familiar things: a jug, a stack of pots, a bunch of flowers waiting for someone to choose it. The pointed roofline gives the scene its identity, but the open counter gives it life. I would rather build a simpler version with that welcoming space intact than reproduce every ornament and lose the invitation to step closer.
Would your market specialize in cottage-garden bouquets, medicinal herbs or unusual plants collected along a fairy-tale road? I’d start with one signature flower and one imperfect pot, then let the rest of the story grow around them.
Share your own little stalls and planting experiments with #smallworldminiatures. You can also visit the Small World Miniatures shop and join the newsletter for more tiny places to explore. If you add Ada’s blue jug to your own build, give it a place where a neighbor could easily leave a cutting; it is an imagined story detail rather than something hidden in this image.








Comments