



The Midnight Bouquet: A Gothic Miniature Flower Shop in Teal and Copper
Updated: 11 hours ago

First Impressions in Miniature
Some flower shops sell a bouquet. This gothic miniature flower shop appears prepared to arrange your entire dramatic entrance. Dark arches climb past glowing windows, the roof shimmers in overlapping teal scales, and hanging flowers spill from copper-colored curls as though gravity has become a negotiable shop policy.
I love the balance here. The architecture brings the delicious Halloween mood, while those pink blossoms keep the place welcoming. You could buy flowers for a mysterious midnight appointment and still ask whether they come with a little packet of plant food. Below, we will explore the details and build an inspired shallow-front shop using layered card, botanical window panels and a very manageable army of tiny pots.
The purchased alternatives below use Amazon affiliate links; if you buy through them, it helps fund this tiny world. As an Amazon Associate I earn from qualifying purchases.

Miniature Backstory — The Tiny Tale
In the town of Bellwether Hollow, a raven named Corvin runs the Midnight Bouquet. He wears no uniform; his feathers already satisfy the shop's unusually strict black dress code. Every Halloween, he prepares the flowers for the neighborhood's candlelit supper. Every Halloween, somebody requests a bouquet that is "appropriately gloomy, but uplifting."
This year the request comes from a pale moth who has spent the afternoon inspecting every illuminated window. Corvin assembles a respectable arrangement of purple stems and dark leaves. The moth studies it, then lands on the brightest pink flowers in the shop. Corvin explains that those are unsuitable for solemn occasions. The moth remains exactly where she is.

Negotiations continue beneath the striped canopy. A second pink flower is selected. Then a third. By closing time, the supposedly gloomy bouquet has become an enthusiastic pink cascade, and Corvin has decided that the customer is artistically challenging rather than technically wrong.
The next morning, he places the remaining pink flowers in the hanging basket at the left of the shop. That extravagant trailing cluster is visible in the scene. In my version of the story, it is also his reminder never to accept color advice from anyone who spends the evening flying directly toward a lamp.
A Guided Tour of the Build
A roof that changes the weather
The upper roof has the rhythm of fish scales: overlapping rounded shapes in turquoise, sage and blue-green. Dark seams keep the color from becoming a flat patch. Above them, a delicate crest of looping metal-like ornament draws a fine line against the black background. The center rises over a tall pointed opening, establishing a strong vertical axis without making the wings feel rigidly identical.

The roof's color also introduces the shutters below. Those repeated green notes connect separate levels, while the copper-brown borders provide a warmer outline. I would preserve that conversation even in a much simpler version with fewer individual shingles.
Flowers reflected in flowers
The windows glow amber behind dark frames, with rose, orange and green botanical patterns layered into their surfaces. Around the entrance, the pale peach canopy opens in scalloped points. It is a small soft shape surrounded by hard-edged trim, which makes the door feel approachable despite its considerable theatrical qualifications.

At street level, glazed-looking panels offer glimpses of shelves and vessels. The scene's depth comes partly from that contrast between a crisp exterior frame and softly resolved objects behind it. A shallow shop can suggest a busy interior without requiring you to construct an entire building. The storefront rhythm in this miniature Main Street offers another useful approach to balancing windows, canopies and flower displays.
The pavement belongs to the plants
Pots gather around the curved steps, fill wooden stands and hang from long ornamental arms. A clipped round tree steadies the left side; a tall narrow evergreen steadies the right. Between them, the containers vary in height and finish. That variation gives the abundance a hierarchy instead of making every plant compete equally.

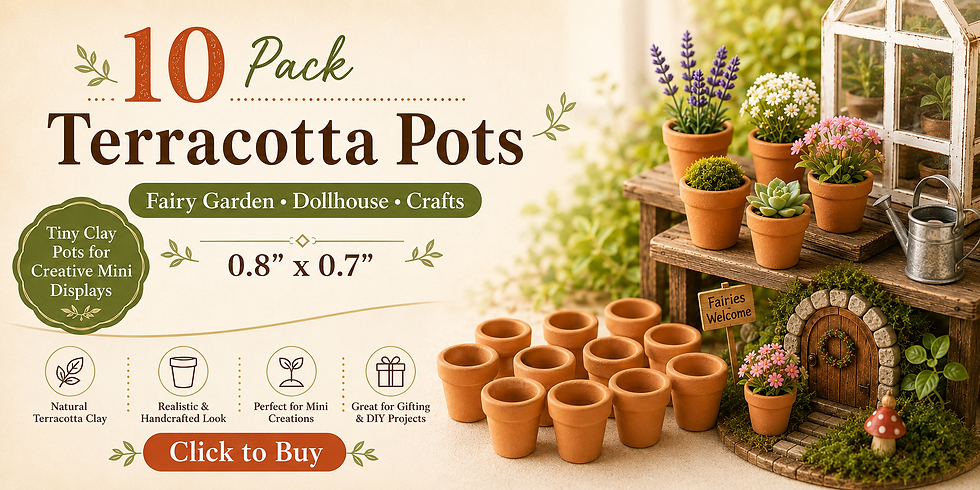
Notice the narrow breathing space directly in front of the doorway. Even a gloriously overstocked florist needs somewhere to stand while discussing a bouquet. Keep that little route visible in your version. Ready-made miniature terracotta pots can shorten the repetitive container work, but check each pot's actual dimensions against your chosen scale before buying.
Inspirations — From the Big World to the Small
I read this as a fantasy meeting of Gothic Revival drama and Art Nouveau growth. The pointed openings establish the Gothic mood; the curving stems and almost floral metalwork loosen it. That is an interpretation of the visible design, not a claim about who created the image or which buildings its maker studied.
Strawberry Hill House, the Gothic Revival villa developed by Horace Walpole in Twickenham from 1749 onward, offers a useful precedent for domestic architecture turned into a romantic showpiece. The lesson to borrow is the concentrated silhouette: one emphatic opening and a memorable roofline can suggest an entire imagined world. You do not need to reproduce a historic house, and this shop is certainly no measured reconstruction.

For the curling supports, I would look toward Hector Guimard. MoMA's discussion of ornament connects his Art Nouveau curves to patterns found in plants. That relationship is useful here because the shop sells the very forms its architecture echoes. A supporting bracket can grow outward like a stem, while its terminal curl suggests a bud. Keep those motifs related instead of attaching a different flourish to every available corner.
A third reference is the everyday florist's display: buckets, shelves, hanging baskets and a carefully protected doorway. The contrast between theatrical architecture and ordinary retail usefulness gives the miniature its charm.
Artist Tips — Make Your Own Magic
The supporting illustrations are AI-generated, and this guide proposes an inspired interpretation rather than an exact, tested reconstruction. Results vary with your materials and patience. Happily, a flower shop can accommodate a slightly eccentric leaf more gracefully than most municipal buildings.
Scenic foliage works best as background volume behind the individual paper leaves, rather than as an undifferentiated green blanket. The foliage banner below offers a separate material option; follow its own adhesive and handling guidance, and compare the texture with your chosen scale before committing it to the storefront.

Plan your gothic miniature flower shop
Treat 1:24 as a suggested working scale, not the verified scale of the supplied scene. A shallow facade is a practical intermediate project: the basic shell is simple, but repeated shingles and delicate trim reward careful preparation. Start with a front roughly 28 cm wide and 32 cm tall, then adjust on paper. At this scale, a 2.1 m real-world doorway would be about 8.75 cm high. Choose one believable doorway and size everything else around it.
Supplies
• Structure: clean, dry packaging card for templates and layers; craft chipboard or basswood for a firmer facade, base and braces. Use PVA craft glue appropriate to the materials.
• Windows and canopy: clean clear packaging that is already flat, translucent colored paper and plain paper scraps; purchase clear acetate and tracing paper if your reclaimed pieces are cloudy. Keep thin cotton scraps for an optional fabric canopy.
• Ornament: paper strips and clean fine thread first; soft craft wire is optional for hanging supports. Round-nose pliers and suitable wire cutters help with that version.
• Plants and containers: painted paper offcuts, clean thread and tiny rolled-card pots; optional air-dry clay, preserved craft moss and scale-appropriate premade pots. Avoid garden soil or damp organic scraps.
• Color: acrylic paint in charcoal, teal, sage, copper-brown, warm cream, rose and ochre, plus small brushes. Optional compatible matte finish for painted surfaces; leave window faces untreated unless a test confirms compatibility.
• Tools and lighting: scissors, tweezers, a hobby knife, cutting mat and clamps. Optional ready-made low-voltage miniature lighting with its specified power source.

Sort supplies into a structural tray and a decorative tray before you begin. Reserve your finest paper and smallest scraps for the final plants. Most of the visual richness comes from patient repetition, so there is little benefit in making every possible flower before you know how much shelf space the shop will have.
1. Set the silhouette and clear the doorway
Draw the central entrance, two display windows and the upper trio of openings on scrap paper. Fold the drawing down the middle to compare the major masses, then vary the flower displays later. Place a paper doorway and a simple rectangle representing a person beside the sketch only as planning checks; neither becomes a figure in the finished scene.
Make a loose card mock-up with side returns and a removable back. Test the route from the pavement to the door and allow room behind the windows for shallow shelves or silhouettes. Mark the lighting route on the reverse if you plan to illuminate the shop. Keep that access area free of permanent braces. No glue needs to set at this stage: revise the paper until the broad shape feels balanced.

2. Build a flat, well-braced shell
Transfer the approved outline to your structural material. Cut the openings while the facade lies flat, using several light passes on a cutting mat rather than forcing a blade through thick card. Keep your supporting fingers clear of the cut. An easier version uses thinner card laminated into layers after cutting.
Glue side returns and short internal braces behind the facade, leaving the rear service opening available. Add a base that projects far enough to hold pots without disguising the entrance. Stack shallow card shapes for the curved steps, with each lower piece extending beyond the one above. Press flat assemblies under a clean protective sheet while the adhesive dries according to its label. Do not stand the facade upright until the joints hold their shape without assistance.

Thin materials become easier to manage when your workspace is bright and you can see the blade's path clearly. A magnifying work lamp is an optional bench aid for the upcoming small window frames and paper trim; it is separate from any lighting installed inside the model.

3. Layer arches and roof scales
Cut the pointed surrounds as nested paper or card silhouettes rather than attempting a deep carved frame. Build the relief outward one layer at a time, checking that the openings remain aligned. Narrow strips create horizontal ledges. Use the same thickness repeatedly so the architecture feels deliberate rather than assembled from unrelated leftovers.
For the roof, round one long edge of several paper strips into repeated scallops. Starting at the bottom, overlap the next strip to hide the straight upper edge. Offset the scallops slightly between rows. Work on detachable roof panels if possible, then attach them after the layers have dried flat. Plain overlapped rectangles are a perfectly useful beginner alternative. Leave the roof crest and hanging brackets off for now; they would only catch your sleeve during painting.

4. Establish charcoal, teal and worn copper
Paint a thin charcoal foundation over the shell and trim, keeping glue joints and openings clear. When it is dry, brush a slightly lighter gray over raised edges. Mix a small family of teal, blue-green and muted sage colors, then distribute them across the roof scales without making a rigid repeating pattern. Let the dark seams remain visible.
Paint the shutters separately in a stronger green. For the copper-like borders, start with brown and add restrained copper-colored highlights to the outer curves. This is a painted effect, not a chemical patina process. Test each coating on an offcut and let one layer dry before adding another. Keep the palest highlights near the entrance and upper central arch so the eye has a route through the darker structure.

A wet palette can help organize that related family of acrylic colors while you work through many small shingles. Keep the variation subtle: a handful of closely related shades suggests an aged surface more convincingly than treating every roof scale as a separate jewel.

5. Make botanical windows and the soft canopy
Design the window flowers on separate translucent-paper inserts. Use simple stems, circles and leaf shapes, leaving translucent space around them so the pattern can glow. Frame each insert between the facade and a clean clear sheet cut slightly larger than the opening. Test the adhesive on a spare piece first; keep it on concealed margins and avoid smearing the visible center. Let the joint dry before handling the panel.
Build the canopy from folded paper segments attached to a shallow curved card rim. Alternate warm cream and pale rose paint for the stripes, then cut the lower edge into broad points. The illustration shows a simplified paper interpretation rather than working fabric engineering. Attach it above the entrance only after the window assembly is secure. A gently pleated strip on a straight support is an easier alternative if the rounded shape becomes frustrating.

6. Curl the ornament and furnish the shallow shop
Roll narrow paper strips around a smooth brush handle to establish loose spirals, then release and adjust them on a paper template. Join several scrolls into a crest or bracket on a flat surface. After the glue dries, paint the assembly copper-brown and attach it with small concealed tabs. Keep paper brackets decorative: rest heavy hanging pots on a hidden support rather than trusting a delicate curl to carry them.
For stronger optional brackets, use soft craft wire and suitable tools, wearing eye protection while cutting and containing the clipped ends. Turn sharp ends inward. Add simple shelf units behind the ground-floor windows from card rectangles and strip supports. Populate them sparsely with paper-wrapped cylinders and pot silhouettes; full furniture is unnecessary in this shallow space. Allow every support joint to dry before adding a load or moving the facade.

7. Grow the flower displays in small groups
Make plant shapes in batches: narrow folded leaves, clipped paper fronds and tiny rolled-paper roses. Glue flowers onto short thread or soft-wire stems, then gather only a few stems into each pot. Paint rolled-card containers in terracotta, charcoal and faded green. If you choose air-dry clay for pots, follow that product's drying instructions and decorate only after the pieces are dry enough for its recommended finish.
Begin with the tall right-hand tree and round left-hand tree, then add medium-height pots along the walls. Build hanging cascades from fine thread with spaced paper blossoms. Keep the center steps visible. Use small tufts of purpose-made scenic foliage to soften selected gaps, leaving distinct leaf and flower shapes readable. Let the pot fillings and hanging assemblies set before lifting them into position. One impressive basket is often more convincing than six rushed ones.

8. Add the evening glow and final shop clutter
Install an optional ready-made low-voltage light behind the windows using its manufacturer's intended power supply. Keep the battery compartment or connector accessible through the removable rear. Do not improvise mains wiring or seal the power source permanently inside the model. Test the light with the back temporarily in place before deciding where the final shelves belong.
Arrange a small ladder, shallow crates and empty spare pots near the outer edges. Keep the light itself hidden behind architectural trim so the window reads as a warm room rather than a visible bulb. If illumination feels like one task too many, warm translucent-paper windows still work beautifully with external light. Secure the final clutter sparingly and allow the chosen adhesives to dry before photography. Corvin may overstock the pavement, but he still needs that front door to function.

Photograph the little night market
Place a dark matte background behind the shop with enough distance to soften its texture. Use a large diffused light from one side and a white card on the other to recover detail in the charcoal trim. Keep any internal lighting gentle. If the windows turn into white patches, reduce exposure or soften the surrounding contrast rather than making the whole picture brighter.

Set your lens near the shop's lower windows and keep the facade upright in the frame. Move the light or your viewpoint slightly if the clear panels reflect the room. Make one complete view, then separate roof, entrance and plant-display closeups. Allow a little base edge to remain visible so the object still reads as a miniature. A simple steady support helps more than an elaborate filter.
Small problems, useful fixes
• Bowed facade: let the panel dry fully, then add a straight rear brace. For the next layer, use less wet adhesive and press the flat assembly while it sets.
• Roof details disappear: deepen the seams with a controlled dark wash and restore a few pale edges after it dries. Avoid flooding paper layers.
• Cloudy windows: remove a replaceable test insert and choose a compatible adhesive on hidden margins. Do not assume a clear-drying wood glue will disappear on every plastic.
• Flowers look oversized: reduce the blossoms and keep some stems green. More empty space between blooms can restore scale immediately.
• Brackets sag: lighten the basket or add a discreet structural support. Decorative paper scrolls should not become an accidental load test.
A few loose miniature leaves can connect the doorstep to the surrounding display. Keep them out of the middle of the path and choose pieces that look believable next to your pots; full-size dried leaves usually overwhelm a scene this small. Add them last so they remain a quiet finishing detail.

Closing — Until Next Time in the Small World
I would happily let Corvin choose the architecture, although the moth probably deserves final approval on the flowers. Which detail would you keep in your own version: the teal roof, the glowing botanical windows or that wonderfully excessive hanging basket?
Share your creations with #smallworldminiatures. You can find more tiny-world ideas and the newsletter on the newsletter signup page, and browse the online shop. Until next time, leave a little room on the pavement. A very determined moth may have ordered another bouquet.








Comments