


The Palm Room After Sunset: An Art Deco Sunroom Miniature

My Vision for This Small World
My Art Deco sunroom miniature brings a black, ivory and gold palette into a room full of palms. The window grids and checkerboard floor give the arrangement a crisp rhythm; curved seating and generous greenery soften its edges. I’ve paired those elements in an imagined Los Angeles setting, with the warmth of an indoor garden and a little old-screen glamour. Even the small footstool looks ready to receive someone wearing considerably more elegant shoes than mine.
Jump to the build guide or gather your supplies.
Some links earn me a commission from qualifying purchases and help keep this tiny world growing. As an Amazon Associate I earn from qualifying purchases.
Bring a little garden indoors with Rolife Dreamy Garden House DIY Miniature Kit. Its plant-filled setting makes a lovely display for anyone who can never resist one more miniature pot.

Miniature Backstory — The Tiny Tale
Celia Vale had invited exactly two people to her sunroom, which was two more than her brother thought necessary for a rehearsal. Arthur stood by the curved sofa with a page of dialogue and the grave expression of a man who had been asked to play a duke without being offered dinner.
Their neighbor Mabel had brought no script. She had brought an opinion about the lighting. The larger pendant, she announced, made Arthur look important; the smaller one made him look as if he were about to apologize. Celia directed him toward the important side. Arthur moved the footstool instead.
For years, Celia had designed sets for other people’s grand entrances. Tonight she wanted to rehearse one of her own. Her speech concerned a missing necklace, a train departing at midnight and a woman who had finally stopped waiting for permission. Unfortunately, the palm behind the sofa kept brushing Arthur’s paper whenever he leaned back.

“Your jungle is stealing my lines,” he said.
“Then speak faster,” Celia replied.
Mabel settled into the right-hand chair, listening with her chin lifted. Halfway through the speech, Arthur forgot to turn the page. Celia continued without him. The room grew quiet, even the paper stopped rustling, and the warm pools beneath the pendants seemed to hold their breath.
When she finished, Mabel applauded. Arthur bowed, although his main contribution had been standing beside a plant. Celia pointed him toward the little footstool. It was now officially reserved for supporting actors. In this room, even the smallest seat had acquired a theatrical career.
A bold little sofa can give an entire room its personality. iLAND Turquoise Sofa brings a delicious splash of color to a dollhouse sitting room or a growing furniture collection.

A Guided Tour of the Build
Black window grids, ivory columns and a crisp checkerboard floor give the room its structure. Then the palms soften everything. Our black, white and gold Art Deco living room explores a related palette through a more enclosed interior. The Los Angeles mood comes through as an imagined combination of sunshine, indoor greenery and old-screen glamour, rather than a reconstruction of a particular address. We’ll explore those contrasts, meet the room’s residents and work through an approachable version built from card, clear sheet and small upholstered forms.
Fanlights and a room full of edges
Look first at the upper corners. Semicircular fanlights sit within broad ivory frames, while narrow black divisions repeat through the taller glazed walls. The raised roofline has the layered rhythm of a small architectural crown. Its slender gold finials are a restrained finishing note; the black framework remains the strongest graphic element. The visible edges and open front let us appreciate the room as a constructed miniature rather than lose it inside an endless interior.

A conversation arranged in curves
The seating gathers around a round table: a curved cream sofa at the back, two chairs toward the front and the little stool closest to us. Dark legs anchor those pale shapes against the alternating floor squares. The ribbed gold table edge introduces a finer rhythm, while its reflective top catches foliage and light. I especially like the modest space left between the furniture. The room feels occupied by possibilities, with enough breathing room for a guest to cross it.

Greenery under amber light
Broad leaves rise behind the sofa, a fan-shaped plant spreads to the left and clipped green spheres punctuate the right. Pale and gold-colored pots connect the greenery to the architecture. Above them, two ribbed pendant shades cast a honey-colored glow. Small statues, a framed picture and the console’s ornaments give the perimeter little discoveries without overwhelming the central seating. Those little discoveries make the room feel ready for an evening of conversation, with the palms quietly stealing a scene or two.

Inspirations — From the Big World to the Small
The V&A’s introduction to Art Deco describes a broad mixture of influences and a strong appetite for geometric form. That is a useful way into this scene. Its stepped trim, repeated lines and polished accents belong comfortably in a Deco-inspired composition, while the conservatory glazing and classical figures make the room more eclectic than a strict period exercise.
A tiny tea break deserves beautiful china. Odoria Blue Lotus 1:12 Porcelain Tea Set brings blue-and-white floral charm to a dollhouse table, dresser or carefully arranged tea-time vignette.

Two Los Angeles landmarks offer helpful comparisons. Bullock’s Wilshire, completed in 1929, combines buff-colored terra cotta, vertical recesses and copper details; the Conservancy also records its custom Lalique lighting. In miniature, the useful lesson is the relationship between pale architectural masses and precise metallic accents, rather than copying a department-store facade into a sunroom.
The Eastern Columbia Building, designed by Claud Beelman and opened in 1930, uses sunbursts, geometric ornament and strong vertical emphasis. Its turquoise exterior is different from this room’s ivory palette. What carries across is the disciplined repetition: a fanlight, a fluted column and a table rim can echo one another without becoming identical. The board below brings those ideas into paper studies, fabric and finish samples.

The same restrained palette can make a small build feel cohesive. Bring a cream fabric swatch and a painted black strip beside your gold finish before committing: their sheen and texture should work together in the actual light where you plan to display the room.
Artist Tips — Make Your Own Magic
AI-assisted imagination brought this sunroom its evening glow. Let your first cardboard mock-up be gloriously unglamorous while you check the fit. It has an important job and does not need evening wear.
Plan an Art Deco sunroom miniature
A suggested 1:12 starting point is a base around 32 × 25 cm, with a room height near 25 cm. These are planning dimensions, not measurements of the pictured model. The project is intermediate because repeated glazing bars, curved upholstery and clean light-colored edges expose small inconsistencies. Start with a simpler flat clerestory if the curved upper glazing feels ambitious. A craft knife, small square, scissors, sanding block, tweezers and fine brushes handle most of the work.
The right finishing details make a tiny room feel beautifully dressed. Dollhouse Trim brings architectural character to doors, wall panels and the little spaces you want to make special.

Gather your supplies
For the structure, save clean cereal-box card for templates, sturdy packaging card for laminated walls and clear flat packaging for test windows. Purchased mount board or basswood provides a more predictable shell. Use clear craft glazing sheet for the final panels if reclaimed plastic is cloudy or scratched. Keep packaging with unknown coatings out of heated processes.
For the surfaces and furnishings, collect smooth paper, cream cotton scraps, thin felt and small wooden offcuts. Add ivory, black, muted green and gold acrylic paints, fine-grained stripwood and suitable clear-drying glazing adhesive. Fine-weave fabric matters more than a luxurious label: a coarse weave can make a tiny chair resemble a basket.

For plants and accents, reuse plain paper for leaves and clean small caps as planter cores. Optional purchased miniature foliage, ready-made pots and dollhouse ornaments can speed up the finishing. PVA suits paper and porous card joints; glazing adhesive must be compatible with the particular clear sheet. A ready-made low-voltage miniature lighting set is optional. Keep its correct power supply and accessible switch together, and follow the manufacturer’s instructions.
Arrange a protected cutting area, a small square, sharp blades, clips and sanding tools before beginning. Keep fingers behind the blade path, make several shallow passes and collect tiny offcuts before they disappear into the upholstery. The supply illustration separates household materials, bought supplies and tools so you can shop only for genuine gaps.
A few Miniature Terracotta Pots can turn a bare doorstep into a welcoming garden corner. Their warm clay color looks lovely among leafy greens and bright little blooms.

1. Mock up the room and its conversation
Draw a floor rectangle on scrap paper and place simple paper shapes for the sofa, chairs and round table. For the suggested scale, try a sofa about 15 cm wide, a table around 7 cm across and chair seats roughly 4 cm above the floor. Adjust these together rather than shrinking whichever piece happens to block the doorway. Leave a believable route from the front steps into the seating group.
Fold scrap card into temporary walls. Mark the major window openings and the height of the upper frame; check the scene from the intended viewing angle. Keep the front open and test whether the roofline hides the sofa. Use a removable paper strip to represent each pendant’s hanging position. This dry layout lets you move everything without tearing a finished floor. Save the approved paper templates for the next stage.

2. Build a square shell and layered steps
Transfer the templates to mount board or thin wood. Cut the window openings while each wall lies flat. Laminate card in balanced layers with a thin, even adhesive coat, then let it dry under a clean flat weight before assembly. Thick puddles of glue encourage curling and make the joints harder to align.
Build the base first, followed by the rear and side wall frames. Use a small square and temporary braces to keep the corners upright until the adhesive has set. Add the shallow front steps as stacked layers, checking that each tread remains level. Keep the upper frame removable for now. You will need access to paint, glaze and install furniture. A simpler rectangular opening and straight stair edge are sensible alternatives to the reference’s curved entrance.

3. Lay the checkerboard and finish the columns
Make a paper floor template and establish a centerline before cutting any tiles. Try squares approximately 15 mm across for this proposed room, then test the pattern beside your furniture templates. Cut black and ivory paper tiles from consistent stock, or paint a printed grid on smooth card. Work outward from the center so the narrow edge pieces look deliberate. Seal a scrap first to check for bleeding or unwanted gloss.
Build the ivory columns and stepped capitals from stacked card strips. Let the joints dry, sand the exposed edges gently and apply several light paint coats rather than one heavy coat. Paint the black plinth separately. Restrained gold details belong on the highest trim and selected accents; leave broad white areas calm. Allow each coating to dry as its label directs before masking or handling.

4. Assemble the black window grids
Draw each window at full model size on paper and cover the drawing with a non-stick protective sheet. Lay narrow black-painted strips over the template, fixing their intersections while the frame stays flat. Make the semicircular fanlights from layered card arcs with straight radial bars. A tidy simplified fan often looks better than many uneven spokes. For a different approach to curving glasshouse forms, explore the mint-and-gold Art Nouveau conservatory.
Test the dry frame against its opening before adding clear sheet behind it. Use a compatible glazing adhesive sparingly around the hidden edges; test the adhesive on an offcut for clouding first. Keep clear areas free of fingerprints and squeeze-out. For the upper clerestory, use short flat glazed segments supported by ribs instead of heating plastic into a curve. Let the joins cure before lifting the assembly. Refit the removable top gently and check for twisting.

For anyone whose miniature collection could use another garden, the DIY Miniature Greenhouse Kit offers a charming world under glass. It is a lovely excuse to spend time arranging a tiny green retreat.

5. Shape the cream seating and gold table
Build the sofa seat from laminated card or a small wooden block. Form its curved back from several thin card layers around a temporary template, letting them dry completely before removing support. Add thin padding and cream fine-weave fabric, keeping bulky folds underneath. Work in sections and use only enough compatible fabric adhesive to hold the cloth without soaking through it.
Make the chairs with the same materials and seat height, then add dark legs with small gold-painted tips. Set each piece on a flat surface to check all feet touch. For the table, sandwich a clear round top over a painted disk and disguise the rim with narrow vertical strips. Let the support frame dry square before adding the top. A painted glossy tabletop is an easier option if cutting a neat clear circle proves frustrating.

6. Add warm lights with an accessible route
Choose the lighting system before enclosing any wire channels. A ready-made miniature low-voltage set with its specified power supply avoids improvising electrical components. Test it on the bench, then plan concealed routes behind columns or below the removable top. Leave the switch, connectors and power source reachable after the furniture is installed. Never introduce mains wiring into this craft build.
For an unlit version, amber translucent beads and gold-painted caps can suggest the pendant shades without electronics. Support each shade from an actual attachment point; decorative chain alone should not conceal an insecure joint. If you use working lights, follow the component maker’s enclosure, clearance and heat guidance rather than trapping an LED in an unknown bead. Check the effect in a dim room before final fixing. A soft glow preserves the ivory detail better than a very bright point.

7. Plant the room and place its small treasures
Cut paper leaves in several related sizes, score a subtle center vein and curve them before attaching them to stems. Build a broad-leaf plant behind the sofa, a fan-shaped group at one side and small rounded topiary forms near the perimeter. Use a secure core inside each pot so stems cannot tilt through the finished arrangement. Dry-fit the plants around the seating before gluing; leave the window pattern visible in selected gaps.
Make simple planter sleeves from card and paint them ivory or aged gold. Purchased miniature pots are another option, but compare them with the chair height first. Add a tiny framed print, a console and a few ornaments with clear silhouettes. Leave the table mostly open. The reference’s little stool already supplies the story’s final detail, so you can keep the rehearsal scripts imaginary or add a folded paper page as your own variation.

Small pieces look more convincing when their finishes differ slightly: a satin pot, a soft leaf and a brighter table rim catch the light in different ways. Avoid coating the entire room with the same gloss simply because the setting feels luxurious.
A touch of soft greenery can make a miniature feel wonderfully settled. Woodland Scenics Light Green Foliage F51 adds leafy texture to little gardens, shaded corners and the bases of your favorite buildings.

Photograph the amber hour
Set the finished model on a plain surface with a quiet backdrop beyond its visible base. Place a large diffused light to one side and a white card opposite it to lift the deepest shadows. Keep the miniature lamps softer than the main light. Move the light or camera slightly when glazing reflects a bright rectangle across the seating.
Photograph from a gently elevated three-quarter angle so the base, open front and upper framework remain legible. Take a wider view first, then close details of the fanlight, upholstered curve and plant grouping. Use stable support and, if your equipment allows, focus stacking for important details rather than relying on extreme blur. The setup illustration shows the small room, light diffuser and bounce card in relation to one another; keep real lighting equipment safely clear of paper and fabric.

Small snags, elegant fixes
The shell leans: check the base and dry joints before adding trim; a decorative column cannot straighten a warped wall.
Glazing looks cloudy: test a different compatible adhesive on scrap, keep it at the panel edges and replace damaged sheet rather than hiding it with more bars.
Floor squares drift: return to a centerline and use a paper template; trim the perimeter after the main pattern is aligned.
Upholstery looks lumpy: reduce padding, grade fabric overlaps underneath and test a smaller scrap before covering the next chair.
Plants swallow the room: remove a few leaves and lower one pot. Empty space is part of the arrangement.
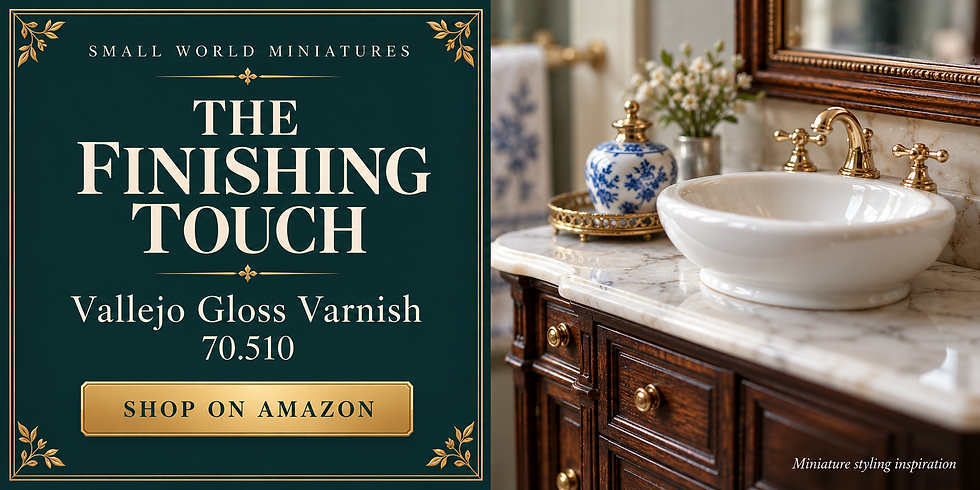
A little shine brings tiny details to life. Vallejo Gloss Varnish 70.510 adds that polished finishing touch to painted pots, decorative vessels and other glossy accents.
Closing — Until Next Time in the Small World
I keep coming back to the little stool. It is such a modest shape among all those windows and glowing pendants, yet Celia’s supporting actor would be lost without it. That balance is worth borrowing: give the room its grand gesture, then add one ordinary thing that makes it feel used.
Would you keep the cream upholstery and amber light, or introduce a sharper accent color? Tell me which detail you would build first, and share your own interpretation with #smallworldminiatures. You can find more miniature inspiration through the newsletter on our website and browse the online shop when your next small room needs a finishing touch.








Comments