


At the Edge of the Poppies: A Wizard of Oz Miniature Diorama

My Vision for This Small World
For my Wizard of Oz miniature diorama, I followed the yellow brick road through red poppies toward a distant green city. A basket and glittering red shoes bring the story close to the foreground fence, while the broad horizon leaves room for the journey ahead. I like the change of scale between those tiny belongings and the faraway destination. Rough stone, worn-looking timber and scattered petals keep the colorful landscape full of small things to discover.
Some links earn me a commission from qualifying purchases and help keep this tiny world growing. As an Amazon Associate I earn from qualifying purchases.
Ready to give your shelf a tiny new adventure? Use EOUFQ5ZWKCSNGM for 10% off select Anavrin products.
Bring a little woodland magic to your bookshelf with Anavrin’s Forest Cottage book nook. Its cozy setting is a lovely invitation to linger over the small details.

Miniature Backstory — The Tiny Tale
The Smallest Rescuers

The scarlet poppies looked lovely. Then Dorothy’s eyelids grew heavy, and she fell asleep beside Toto. The Lion ran for the edge of the field, but the flowers overcame him too.
The Scarecrow and Tin Woodman carried Dorothy and Toto into fresh air. The Lion was too heavy. Soon afterward, the Woodman saved a field mouse from a wildcat. She was the Queen of the Field Mice, and she offered help.
The Woodman built a truck. Thousands of mice arrived with lengths of string. With the Scarecrow and Woodman helping, they drew the sleeping Lion out of danger.
When he woke, the great beast learned that tiny creatures had saved his life. Together, the friends could continue toward the Emerald City.
The poppy-field episode belongs to L. Frank Baum’s The Wonderful Wizard of Oz. The illustrated retelling follows the novel’s rescue by the field mice. There is a charming scale lesson tucked inside it: the characters who seem least equipped to move a lion become the reason he survives.
A Guided Tour of the Build
The road that does the storytelling
The road enters broadly at the front, narrows as it curves and reappears beyond the flowers. Its uneven golden surface catches the light without becoming a flat yellow stripe. Red petals break the edge just enough to suggest that this carefully laid route passes through a landscape with opinions of its own.

The distant skyline stays soft and green. It gives the eye a destination without competing with the foreground.
Make room among your books for a little greenery. Rolife’s Garden House book nook brings a garden-loving miniature collector an inviting new world to assemble and display.

The fence, stones and red flowers
On either side, aged-looking rails sit above rocky banks. The open gaps matter: a solid barrier would make this feel like a display case, while the irregular fence lets the flowers push toward the path. Pale little blossoms interrupt the stronger scarlet, giving your eyes somewhere quiet to rest.

The red blooms vary in height and angle. Some stand above the fence; others gather around its feet. That layered arrangement is more convincing than a row of identical flowers standing at attention.
Bring fresh texture to your little landscapes with Woodland Scenics Light Green Foliage F51. It’s a useful addition to a scenery collection for softening garden edges and building up planted corners.

A basket and a very recognizable pair of shoes
The basket’s curved handle and blue-and-white cloth soften the hard edges of the road. Beside it, the red shoes provide the strongest story cue in the foreground. Their symbolic placement brings a familiar flash of storybook magic to the foreground.

One important distinction: Baum’s Dorothy wears silver shoes. The ruby slippers belong to the famous 1939 film adaptation, as the Library of Congress explains. This scene blends the novel’s poppy-field idea with that cinematic visual shorthand. You can choose either tradition for your own display, as long as you know which story your shoes are telling.
Inspirations — From the Big World to the Small
A Wizard of Oz miniature diorama with storybook depth
Baum’s original adventure supplies the narrative, while W. W. Denslow’s first-edition illustrations offer a useful design reference for clear silhouettes and decisive shapes. You need not copy a printed illustration to borrow that clarity. A recognizably winding road, a patch of red flowers and a green skyline can communicate the setting before a viewer notices any smaller detail.
The film’s color imagery offers a second reference. Here, the shoes and road pull the warmest colors toward the front, while the distant city becomes cooler and quieter. Borrow that warm-to-cool contrast for your own little stage, simplifying and rearranging the scenery as you please.

A third useful comparison is a layered theater backdrop. Foreground props have substantial texture, middle-distance scenery becomes simpler, and the far horizon can be a painted panel. In a shallow miniature, a partly painted city can suggest more distance than a crowd of oversized towers. The visible base edge helps the illusion because it lets us appreciate the little stage as well as the imaginary place.
Anavrin’s Whispering Hollow pairs a fantasy miniature house with a music-box element. It’s an enchanting centerpiece for a collection of tiny worlds. The 10% code applies to select Anavrin products; this limited edition is excluded.

Artist Tips — Make Your Own Magic
A little AI-assisted imagination brought this poppy-field scene to life. Choose the details that suit your materials and display space, then let your own version bloom. The field mice will be delighted to lend a little storybook encouragement.
Aim for a manageable slice of landscape. A shallow road, two flowering banks and a small skyline can carry the idea without a huge base. The fiddliest work is making and placing flowers; prepare a sample cluster before committing to an entire meadow.
Supplies
Home: begin with clean corrugated card for a mock-up, cereal-box card for brick tests, scrap paper for templates, a small piece of fine checked cloth, and a sound offcut for the base. Use dry, clean twigs only after checking their strength. Avoid crumbly bark or damp garden debris that could make the finished display unstable.
Store-bought: useful equivalents include a rigid craft base, thin card, PVA craft glue, acrylic paints, tissue or fine crepe paper for poppies, craft wire, and model foliage. Air-dry clay is an optional alternative for a few foreground stones or shoes; it is not interchangeable with oven-cured polymer clay. Keep the materials simple enough to test on scraps.

Tools: scissors, tweezers, brushes, a pencil and a suitable cutting surface cover most of the work. Use a craft knife only for cuts that need it, with the material secured and fingers outside the cutting path. Wire cutters help with stems; turn or bury sharp wire ends so they do not project from the finished foliage.
Natural bark and irregular grain bring lovely character to a tiny scene. These BYHER natural wood craft sticks are useful additions to a scenery stash, ready for fences, woodland accents and small decorative details.

1. Plan the route and build a rigid base
Draw the road on paper first. Give it an open entrance at the front and one broad curve that carries the eye toward the rear. Set paper shapes where the basket, shoes and skyline might go. View the layout from the intended display angle, not only from overhead. Move anything that hides the road’s destination or squeezes the foreground props against the edge.
Choose a scale from the smallest object you want to make convincingly. If a basket or ready-made shoe is your starting point, let it determine the front fence height and brick size. The distant skyline may be deliberately reduced for forced perspective, but keep neighboring foreground objects consistent. Photograph the paper arrangement before gluing so you have a useful reference.
Use a rigid base and build low banks from layered card. Keep the road bed stable and the tallest scenery toward the sides. Bond each layer with an adhesive suited to those materials, press it flat where appropriate, and let it dry according to its instructions.

Leave a narrow plain border around the scenery. It gives you somewhere to lift the model without touching flowers. A clean recycled wooden offcut is a sensible first choice; check that it is flat, sound and free of sharp edges before using it.
2. Lay and paint the yellow brick road
Test a short piece of road on scrap card. You can cut individual thin-card bricks, or score a brick pattern into a suitable sheet material with a blunt tool. Individual pieces give natural small variations, but a scored surface is quicker. Keep joints narrow and stagger the rows. Avoid deep trenches that make the road resemble a tiled swimming pool.
Work from the foreground toward the back. The miniature masonry guide explores bond patterns if you want to compare arrangements. Use modestly smaller marks in the far distance only where you deliberately want forced perspective. Keep the curve smooth; a sudden sharp bend can make the path feel like an accidental obstacle course. Dry-fit several rows before you glue. If the pieces need persuasion, trim the outer curve instead of forcing every rectangle into the same shape.
Once the adhesive is dry, paint an opaque warm ochre base with acrylic paint compatible with the surface. Add a few lighter golden bricks and a restrained darker wash in the joints after the base coat dries. Wipe or brush excess away before it pools. Finish with a gentle dry-brush over the raised edges. The goal is visible brick texture, not a heavy black grid.

Leave the middle of the path mostly clear. A handful of fallen petals near the banks provides movement without burying all that careful paving.
3. Add rocky banks and an open timber fence
For the banks, tear and layer card into irregular ledges, then cover the surface with small paper pieces and a thin application of compatible craft adhesive. Let each wet stage dry before painting; a large saturated paper lump is more likely to slump than become a convincing rock. For separate foreground stones, use small air-dry clay pieces and follow the clay manufacturer’s drying and painting guidance.
Paint the banks with a middle gray-brown, then work darker color into recesses and lightly pick out the highest edges. Vary a few stones rather than coating everything with the same highlight. Keep the road edge distinct so the rockwork frames the route instead of spilling across it.
Dry-fit fence posts and rails above the banks. Trim the wood safely, smooth rough points and glue the joints with an adhesive suitable for the wood. A dark undercoat with a restrained lighter dry-brush can suggest weathered grain. Do not burn the wood to age it. Leave openings between the rails and stagger a few post heights slightly, while keeping the structure visually stable.

Stop the fence before it becomes a continuous wall around the base. Test the basket beside the post now, while there is still room to adjust the opening.
4. Make poppies in clusters, not in a queue
Use thin tissue or fine crepe paper for small petals. Cut a few rounded shapes, cup them gently with a blunt tool and gather them around a dark center. Attach each flower to a fine craft-wire stem with a small amount of suitable adhesive. Make a handful first, let them dry, then judge their size beside the fence and basket. Thick paper often needs simplifying rather than more layers.
Paint or wrap the stems if their finish is too bright. Bend them lightly so the blooms face different directions. Plant several heights together, with a few closed buds among open flowers. Position your most detailed poppies near the front; smaller red flecks can represent distant blooms. This is an excellent place to spend your patience selectively.

Keep occasional gaps of green and scatter a few pale flowers at the margins. Avoid filling every space with red, especially around the shoes, which need their own visual breathing room. Insert stems into prepared holes or a suitable scenery base, burying the sharp ends. Allow the adhesive to set before moving to adjacent clusters so tweezers do not undo your previous work.
A scattering of miniature leaves can give a scene the feeling of a season. Warmtree miniature leaves are lovely little finishing touches for garden paths, woodland corners and the ground beneath a tiny tree.

5. Layer the greenery and the distant city
Build a few simple tree shapes toward the sides and back. Clean twigs can serve as trunks when they suit the scale; purchased miniature trees offer a simpler alternative. Secure each trunk before adding foliage, and avoid placing a broad crown directly in front of the city. The yellow route should still have a clear visual destination.
Add ground texture in small patches, allowing earlier glue to dry before brushing or tapping away loose material. Use more than one green, with quieter, smaller textures farther back. Fine foliage should connect the flowers to the banks, not conceal every stone. The separate autumn-tree guide offers useful ideas about building layered foliage even when your own palette stays green.
Make the city as a small removable silhouette first. Cut a few towers from card, vary their heights and paint them in related green tones. A layered flat skyline is enough; you do not need to engineer a full miniature metropolis. Position it behind the road and test the viewing angle. Slightly softer contrast helps it feel distant. Keep its bottom edge hidden by scenery rather than leaving it perched visibly on the horizon.

Use daylight or a separate display light for the scene before adding electronics. An external light can make the green towers glow visually without turning the build into a wiring project. If you later choose lighting, use a ready-made low-voltage system exactly as its manufacturer directs, with accessible power and no covered heat-producing components.
6. Finish the basket, shoes and story details
A tiny basket can begin as a small card shape wrapped with narrow paper strips or fine thread. Suggest the woven texture rather than trying to reproduce every crossing. Add a curved handle and a little cloth folded over the edge. Choose a fine check or a softly painted pattern; a large full-size fabric print can overwhelm a miniature basket.
Make shoes as simple paired shapes from an appropriate air-dry clay, or choose ready-made miniature footwear. Let handmade shapes dry fully according to the material’s instructions before painting. Silver follows Baum’s book; red follows the film-inspired shorthand in this scene. Either can work as a deliberate design choice. Keep the pair slightly offset so both silhouettes are readable.

For a red version, paint a deep red base and add tiny brighter highlights. A carefully tested gloss finish can suggest sparkle without loose glitter shedding across the road. Vallejo Gloss Varnish is an existing option for a compatible painted finish; follow its product directions and test it on a spare sample first. Gloss belongs on the shoes, not over the entire landscape.
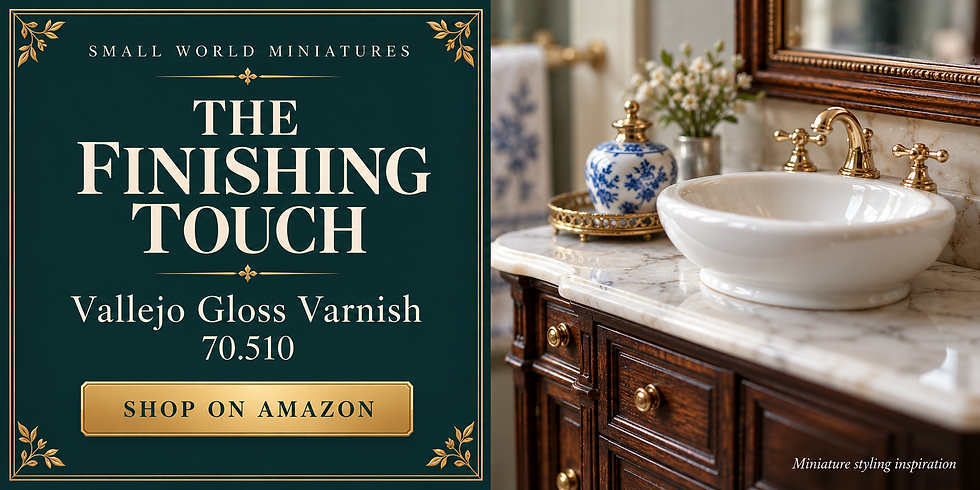
A little shine can make a miniature detail catch the eye. Vallejo Gloss Varnish 70.510 is a handy finishing addition for painted pieces that deserve a polished touch.
Add the last scattered petals and check the joins from the front. If you want the field-mouse Easter egg, place one small gray mouse near the fence where it can be discovered without crowding the basket. It is an optional addition inspired by the book, not something visible in the supplied model.
Photograph the journey
Bring the lens down close to road level for an immersive view. Position a plain backdrop behind the skyline and a broad diffused light to one side. A white card opposite the light can lift deep fence shadows. Keep the display away from direct heat, and adjust the light rather than spraying the scene to imitate dew.

Take one wider photograph that includes the base edge, then closer views of the road, flowers and basket. Check reflective shoes for a distracting bright spot. If the skyline becomes completely unrecognizable, increase depth of field or make a second, slightly higher view. A shallow focus effect is lovely when the important detail remains legible; it is less helpful when the entire adventure turns into red soup.
Small problems, practical fixes
The road curls up: remove loose pieces and test a more rigid backing. Use less wet adhesive and allow thin layers to dry under suitable restraint before adding scenery.
The poppies look too heavy: reduce petal thickness and layer count. Keep the fullest blooms in the foreground and suggest distant ones more simply.
The fence disappears: lighten a few rail edges and remove foliage from selected gaps. Contrast and open space often help more than adding another post.
The skyline looks too close: reduce its size, simplify detail and soften contrast. Move it behind a discreet landscape ridge rather than building taller foreground banks everywhere.
The props compete: give the basket and shoes a little clear road around them. Remove two details before adding a third; tiny worlds benefit from editing too.
Closing — Until Next Time in the Small World
The part of the Oz rescue I keep returning to is that a lion needs mice. That feels wonderfully appropriate for miniatures: a few small, well-placed things can do a surprising amount of work. Here, the flowers make the spectacle, but the open road, worn fence and little basket make me want to lean closer.
Would you choose the book’s silver shoes or the film-inspired red pair for your own scene? Tell me which detail you would build first, and share your version with #smallworldminiatures. You can browse the Small World Miniatures shop for another project, or join the newsletter through the website for more small-world inspiration. Keep a little room on the worktable for the unexpected helper.








Comments