


The Guest Who Wouldn’t Nap: A Portuguese Miniature Bedroom in Carved Wood and Flowers

My Vision for This Small World
My interior-design training always pulls me toward proportion first. In my Portuguese miniature bedroom, the tall carved headboard anchors a room filled with floral patterns, while the lower chest and small bedside table keep its scale gentle. Cream backgrounds give the bedding, pottery and ornament room to breathe. Light from the left catches the carving before settling over the coverlet, bringing a restful warmth to a tiny room with a generous appetite for decoration.
Some links earn me a commission from qualifying purchases and help keep this tiny world growing. As an Amazon Associate I earn from qualifying purchases.
Create a restful little retreat with iLAND Classical Bedroom Furniture. Its traditional character makes a lovely addition to a dollhouse or a collection of favorite miniature rooms.

Miniature Backstory — The Tiny Tale
Dona Leonor announced the family’s first Great Resting Competition on a Thursday. She had embroidered the guest-room coverlet through an entire winter, and everyone who visited admired it standing up. Nobody ever stayed long enough to discover whether the bed was comfortable.
“Twenty minutes,” she said. “No errands. No repairs. No improving anything.”
Her brother Tomás arrived carrying a cushion he considered more supportive. Her niece Inês brought a book with a folded corner marking a particularly good chapter. Leonor confiscated both at the door. The contest required nothing beyond lying down, which immediately made it the most difficult event the family had ever attempted.
Tomás lasted four minutes before noticing that the floral pillow leaned slightly left. He straightened it, then discovered the quilt’s border was no longer centered. Inês watched from the doorway with the solemn expression of an official who had already disqualified her uncle in her head.

When her turn came, Inês lay still for almost ten minutes. Then she began counting the roses. She counted them across the quilt, along the wallpaper and around the lamp base, lost her place, and started again. Leonor declared counting to be work. Inês appealed. The appeal was denied.
By late afternoon, neither contestant had won. Leonor sat on the edge of the bed to explain the importance of letting other people look after you occasionally. She leaned back against the pillow to demonstrate. Her next sentence never arrived.
Tomás and Inês backed out of the room. They put the confiscated book on a shelf, returned the spare cushion to the chest, and agreed to award first prize without disturbing the winner.
The woven basket beside the bed stayed empty. For once, nobody was permitted to put a project in it.
Give your shelves a little grandeur with MiniCity Library of Gods Book Nook. It is a tempting project for anyone who loves the meeting of miniature architecture and literary imagination.

A Guided Tour of the Build
A headboard with a leafy rhythm
The warm brown headboard is the room’s strongest shape. Its crest rises above a broad, curved panel, with paired scrolls and leaf-like flourishes running toward the center. Light catches the raised edges while darker recesses make the pattern readable. I particularly like the contrast between that confident silhouette and the small round finials on the posts. The carving looks elaborate, but the overall outline remains easy to recognize.

Soft edges against polished wood
Cream pillows and the floral coverlet soften the bed’s architectural frame. Tiny red-orange blooms repeat the wallpaper’s palette, with dark green leaves adding definition. The lace edging matters as much as the flower pattern: its irregular outline breaks up the heavy footboard and gives the bedding a convincing drape. The rug repeats the same color family at floor level without copying the bed exactly.

The useful things around the edges
The bedside lamp has a flower-painted ceramic-looking base and a pale pleated shade. Behind it, the patterned wall feels textile-like rather than slick. Across the room, shelves hold pots and books; a decorated chest sits beneath the window. These small supporting pieces suggest ordinary habits around a rather grand bed. The basket’s open weave adds a quieter texture beside all those flowers.

Bring a fresh little burst of pattern to your fabric collection with Hanjunzhao Spring Floral Cotton Squares. They are lovely inspiration for miniature curtains, cushions and the next tiny room you are dreaming up.

Inspirations — From the Big World to the Small
The Portuguese-inspired character comes from the relationship between ornate furniture, floral cloth and everyday ceramics. I would carry that conversation between materials into a miniature, while leaving room for my own choice of pattern.
Castelo Branco embroidery brings silk thread, linen and botanical imagery together in a rich Portuguese textile tradition. The little coverlet shown here has a different, cross-stitch-like appearance; I would borrow the broader idea of a floral textile as the room’s centerpiece rather than present it as an authentic Castelo Branco example.
In Rafael Bordalo Pinheiro’s ceramics, plants and animals become modeled decoration on everyday objects. That affection for the natural world translates beautifully into a miniature room: a leaf-shaped detail, a painted blossom or a small pot with a rounded silhouette can carry the theme without turning every surface into a matching set.

Make room for a little literary atmosphere with MiniCity Hemingway House Book Nook. It is an inviting project for anyone who loves miniature interiors and a bookshelf with a story to tell.

Artist Tips — Make Your Own Magic
AI-assisted illustrations offer a little bedroom inspiration for your own workbench. Choose the scale, materials and finishing touches that delight you. Fortunately, Leonor has no authority over your craft table.
Plan your Portuguese miniature bedroom
A proposed 1:12 scale makes the furniture manageable and offers plenty of compatible accessories. Choose one scale for the bed, lamps and room opening. The challenge is the layered ornament and the fabric thickness, so start with a simpler scroll pattern if this is your first furniture project. A bed and two-wall corner are enough; a whole house is not required.
Supplies for a carved-bed diorama
Found at home: clean cereal-box card for patterns and backing; a tightly woven cotton scrap for bedding; thin lace from an unwanted trim; small paper scraps for books; a clean wooden coffee stirrer for a test finish. Use only materials you can cut and clean safely.
Store-bought supplies: basswood sheet and basswood stripwood for the furniture and floor; small wooden beads or turned posts; thin decorative wooden appliqués or layered card for relief; fine cotton floral fabric; wood glue for wood-to-wood joints; a compatible craft adhesive for mixed materials; acrylic paint; a suitable clear finish; thin paper for wallpaper; optional scale ceramic accessories and a ready-made battery-powered miniature lamp.
Tools: pencil, scissors, a fine saw with a secure cutting support, craft knife used on a protected surface, small clamps, sanding sticks, tweezers and a few brushes. Wear suitable eye protection when cutting. Keep fingers out of the cutting path, and follow the adhesive and finish labels for ventilation and curing.

The shelf can hold a few rolled paper books or a complete bought bookcase if you want to extend the room later. Leave enough empty space around it to keep the bed as the focal point.
A tiny library is always a tempting addition. Chivertion 1:12 Bookcase with 48 Miniature Books gives you shelves to arrange, books to stack and a lovely reason to create another reading corner.

1. Make paper patterns before cutting wood
Draw the mattress footprint first, then the taller headboard and lower footboard. As a suggested starting point at 1:12, a mattress around 16 by 12 centimeters gives you room to work, but adjust it to suit your display. Fold a paper pattern down its center and cut the two sides together for a balanced outline. Keep the flourish broad enough that it will survive handling.
Set the paper pieces upright on a temporary base. Check the view from the front corner, not only straight on. Leave clearance for the bedside table and a narrow visible strip of floor. Make a simple two-wall paper mock-up to check the window height. Resolve these proportions before committing to wood.

2. Build a square, stable frame
Transfer the patterns to suitable thin basswood, leaving delicate curls for applied decoration rather than sawing them through the main panel. Cut with the work firmly supported, sand the edges, and dry-fit the four posts, side rails and mattress platform. A plain rectangular platform provides more support than a decorative frame alone.
Use a wood adhesive appropriate to the chosen timber. Apply a thin, even layer, hold joints square with small clamps or a simple right-angle jig, and remove wet squeeze-out as the manufacturer directs. Let the assembly cure before adding pressure or sanding. If cutting curved wood is difficult, use a sturdy rectangular panel with a separate shaped card crest.

3. Add relief in readable layers
Lay the headboard flat and mark a light centerline. Arrange paired leaf and scroll shapes before attaching anything. Thin wooden appliqués give the strongest carved impression; neatly cut layers of card offer an easier painted alternative. Keep relief shallow enough that it follows the panel rather than looking like jewelry glued to a wall.
Attach the largest curves first, then the smaller leaf accents. Leave clear spaces between them so a shadow can describe each shape. Echo the pattern on the footboard with fewer pieces. Allow every glued layer to set before handling the next, and gently smooth rough edges. A restrained pattern looks more convincing than a crowded one with clogged gaps.

4. Develop the warm wood finish
Test the finish on an offcut with the same relief materials. For a painted wood effect, start with a warm medium brown, then draw a few fine darker grain lines along the direction of the panel. Use a nearly dry brush to catch raised edges with a lighter brown. Keep the strongest contrast in the carving recesses, not across the whole bed.
Let each paint layer dry according to its label. Apply a compatible satin finish only after the color is ready; avoid filling the relief with heavy coats. If you add metallic accents to a picture frame elsewhere in the room, test them separately and keep the bed itself predominantly brown. Its warmth already does plenty of work.

For more control over grain and sheen, explore my miniature wood finishes guide. A metallic finishing wax can provide an optional accent on a separate frame. Check the product’s substrate and handling instructions, and keep it away from fabric until the finish is ready to handle.
A small touch of gold can make a tiny detail feel like a treasure. AMACO Rub ’n Buff Antique Gold is a lovely finishing choice for raised ornament, picture frames and decorative accents.

5. Give the bedding believable weight
Cut a thin mattress from firm padding, wrap it in plain cotton and keep bulky seams underneath. Make pillows from two small fabric rectangles with a little filling; a heavily stuffed pillow will look more like a sofa cushion. Test the coverlet over the mattress before hemming. Fine weave and small motifs matter more than an elaborate stitch count.
Use a floral print for an accessible version, or add a small embroidered motif to one cushion. Finish the coverlet with narrow lace, keeping adhesive away from the visible edge if you glue rather than sew. Arrange gentle folds around the mattress corners. Let any adhesive dry with the fabric supported in its intended position, and keep the headboard visible above the pillows.

6. Build a room corner with a quiet background
Make the floor and two walls from suitable rigid board. Fit a simple window opening before attaching wallpaper, and use thin stripwood for trim. Lay floorboards with staggered joints, varying their brown tones slightly. Dry-fit everything around the bed so the window, chest and bedside table fit without squeezing the room.
Use a small-scale floral paper with enough cream space to balance the bedspread. Apply adhesive evenly and press from the center outward; test a scrap first to see whether the paper wrinkles or the ink runs. Let the wall panels dry flat before assembly. Add trim over raw edges, then attach the walls square to the base.

7. Add ceramics, lamps and a little breathing room
Group a few small pots on the shelves, keeping their rims and handles proportionate to the furniture. Paint tiny blossoms with dots and short strokes rather than trying to reproduce a full-size floral painting. A compatible clear gloss can suggest glazed ceramic on these accessories; it belongs on the pots, not all over the cloth or wallpaper.
Make a lampshade from thin pleated paper around a small former, or choose a ready-made miniature lamp. If it lights up, use a complete low-voltage battery unit and follow its instructions; keep the battery compartment accessible and never bury it in fabric. A nonworking lamp is perfectly effective in a daylight scene. Let all finishes cure before placing accessories beside the bedding.

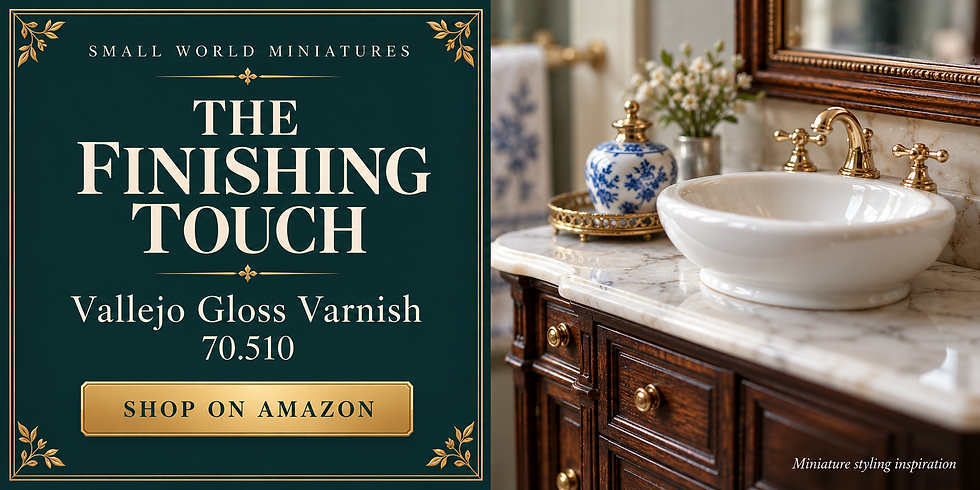
A little shine brings tiny details to life. Vallejo Gloss Varnish 70.510 adds that polished finishing touch to painted pots, decorative vessels and other glossy accents.
A tiny tea break deserves beautiful china. Odoria Blue Lotus 1:12 Porcelain Tea Set brings blue-and-white floral charm to a dollhouse table, dresser or carefully arranged tea-time vignette.

8. Style the room and photograph its best corner
Place the bed first, then the chest and bedside table. Add the rug, basket and a few books last. Leave small patches of visible floor so the furniture feels usable. Keep one lamp slightly behind the leading edge of the bed, and avoid lining every accessory up along the front of the display.
Photograph from close to mattress height with a soft light to the window side and a white card opposite to lift shadows. Use a plain backdrop beyond the open side. Keep the camera supported, move closer for the carving and textiles, and check bright reflections on the finish before taking the final shot. A small change in camera angle often reveals more relief than another light.

For the final setup, give the model enough space from the backdrop to avoid a hard shadow. Keep fabric, paper and lamps clear of hot equipment, and use cool lighting. Check the image edges for the craft table, stray tools and oversized background objects before you call the photograph finished.

Small problems, manageable fixes
If the bed rocks, check the base and leg lengths before adding decorative feet; use a flat reference surface and adjust the actual uneven point. If relief disappears under paint, use thinner layers and remove excess from recesses before it dries. If bedding looks stiff, choose a finer cloth and reduce the filling rather than forcing large folds. If wallpaper bubbles, test a smaller amount of suitable adhesive on a spare piece and let it dry flat. If the room feels crowded, remove one accessory group and give the bed a little more floor around it.
Closing — Until Next Time in the Small World
I love how this room lets elaborate carving and ordinary domestic objects share the same small space. The basket is as important as the crest of the headboard: one gives the room its grandeur, the other suggests somebody actually lives there.
Would you keep the floral coverlet, or choose quieter bedding and let the woodwork take over? Tell me which detail you would make first, and share your own miniature rooms with #smallworldminiatures. There’s more inspiration in the Small World Miniatures shop and newsletter when you’re ready for another project. For now, I suggest following Leonor’s example and putting the basket down.








Comments