



A Lantern for Lost Spells: A Miniature Witch Cottage Build Guide

First Impressions in Miniature
Some houses look as though they were drawn with a ruler. This miniature witch cottage looks as though the ruler was politely dismissed before lunch. Its roof dips and rises over a teal front door, while candy-colored spirals bloom on the trees and a crescent moon hangs above the clearing. I love how welcoming it feels. The pumpkins have teeth, certainly, but somebody has also taken the trouble to put flowers in the window boxes.
The scene mixes a woodland cottage with the visible language of paper craft: folded evergreen shapes, curled branches, layered shingles and a moon that seems assembled from little facets. Those ideas translate beautifully into a practical tabletop project. Below, you can build a simpler version from card, paper, stripwood and a few carefully chosen details. The trick is to give the cottage a sound structure while letting its decoration misbehave.
The purchased alternatives below use Amazon affiliate links; if you buy through them, it helps fund this tiny world. As an Amazon Associate I earn from qualifying purchases.

A separate cottage kit can be a useful alternative if you enjoy decorating more than constructing walls. For the scratch-built version here, keep the sloping roofline, warm doorway and spiral trees as the three features that carry the story. Everything else can be simplified without evicting the witch.
Miniature Backstory — The Tiny Tale
On the evening before the Lantern Walk, the cottage lost its front-door spell.
It was a small spell, responsible for opening the latch when the owner arrived with both arms full of pumpkins. Unfortunately, it had learned the word “freedom” from a visiting dictionary and slipped out through the round window.
Inside, the kettle rang its lid against the stove. The broom searched behind the blue bottles. Outside, every pumpkin along the path began opening and closing its mouth, testing whether the missing spell had taken up residence there.
“Absolutely not,” said the largest pumpkin. “I already have a job.”
The cottage tried its hinges. Nothing. It tried its chimney, which produced a magnificent curl of smoke but no useful answer. At last the little brass lantern beside the fence blinked three times. High in the left-hand tree, a spiral flower was turning like a tiny wheel.

The spell had climbed up to see the moon. From the doorway, the world had always been a procession of muddy boots and grocery baskets. Up here there were stars, striped roofs and a pond reflecting an orange sky.
The cottage considered this. Then it promised to leave the round window open for one hour every evening, provided the spell returned before the pumpkin deliveries.
The flower stopped turning. The latch clicked. Every lantern in the clearing glowed a little brighter.
By the time the first visitors reached the gate, the front door stood welcomingly ajar. The largest pumpkin refused to explain why it looked so relieved. Beside the fence, the little lantern kept its warm cross of light, quietly pleased that nobody had asked the broom to negotiate.

That doorway is a lovely place to concentrate the personality of a woodland scene. An optional fairy-door accessory offers another route for a separate garden project; for this cottage, the handmade teal door becomes the anchor that holds all the surrounding curls and colors together.
A Guided Tour of the Build
The front entrance is framed by dark timbers and a small roof that echoes the larger sweep above. The teal boards sit behind a wreath of orange and red, and the round window adds a softer shape beside them. Warm light makes that compact entrance feel occupied without requiring a visible interior. Look at how the pale path gives the doorway breathing room among the plants.

Up on the roof, short overlapping shingles shift between blue-gray, muted red and weathered teal. Their rhythm gives the large roof surface texture without erasing its silhouette. The tall stone-like chimney provides a straight vertical note, then releases a wonderfully improbable spiral. I would keep that combination of disciplined chimney and unruly smoke in even the smallest version.

At the edge of the clearing, slender trees carry flat spiral ornaments in orange, yellow, red and green. They feel like flowers, sweets and curled paper all at once. The foreground pond, pointed fence, potion bottles and pumpkins form smaller discoveries below. These are generous details, but the path remains readable, which keeps the cottage from disappearing into its own decorating enthusiasm.

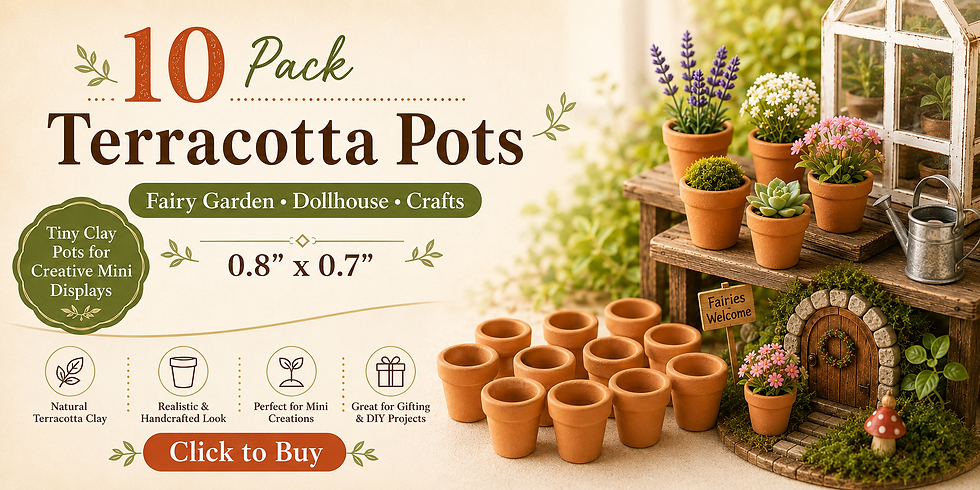
Small planting containers can help you make similarly deliberate groups around a doorway. If you choose ready-made mini pots, check their dimensions against your chosen scale before ordering; a useful garden accessory becomes an enormous municipal planter surprisingly quickly in a small scene.
Inspirations — From the Big World to the Small
This is a fantasy cottage rather than a reconstruction of one regional building. I would borrow its sheltered doorway and dense planting from the cottage-garden tradition, then let the roof and trees wander into storybook territory. The National Trust’s photographs of Hill Top, Beatrix Potter’s house, offer a useful real-world reminder of how climbing plants, a modest entrance and a garden can make a small building feel deeply settled into its surroundings. The comparison is about atmosphere, not a claim that this cottage depicts Hill Top.
Paper scenery offers a second useful reference. The V&A’s paper peepshows create depth with successive cut-out layers. You can borrow that principle for the forest: taller simple trees at the back, the cottage in the middle, and a lower fence and pumpkins at the front. The layers do the storytelling without demanding a forest of individually detailed branches.

Artist Tips — Make Your Own Magic
These AI-generated illustrations are inspiration, not photographs of a tested step-by-step build. The guide offers practical ways to interpret the design, and results will vary with your materials and patience. Your roof is allowed to have character; your glue joints should still have a plan.
Planning a miniature witch cottage
Try an approximate 1:24 scale for a manageable first version, using a door about 75–85 mm tall as your consistent reference. Those are suggested design choices, not measurements taken from the image. A base roughly 250 × 250 mm leaves room for a cottage and a short approach. This is an intermediate paper-and-card project because the layered roof, small openings and freestanding trees demand careful cutting. Simplify the pond and lighting if you would rather concentrate on the cottage.
Supplies
• Structure: clean cereal-box card for templates and decorative layers; flat packaging board for laminating a base; purchased craft chipboard or basswood where greater stiffness is needed. Keep food-stained or warped packaging out of the build.
• Surfaces: colored paper scraps, plain thin card, clean wooden coffee stirrers, acrylic paint and brushes. Use paper rather than heavy timber for small shingles.
• Details: paper strips for coils, soft non-electrical craft wire for tree armatures, air-dry clay for pumpkins, clean clear packaging for glazing and small beads for closed decorative bottles.
• Assembly: PVA craft glue+white+craft+glue&search-alias=aps&tag=smallworldmin-20&linkCode=osi) for porous card and paper, a compatible clear glazing adhesive if needed, scissors, a sharp hobby knife, tweezers, a protected cutting surface and a blunt scoring tool. Cut away from fingers with light passes.
• Optional scenery: fine foliage, preserved craft moss used sparingly, miniature pots and a matched plug-and-play low-voltage lighting kit. Avoid candles and improvised mains wiring.

Keep the material substitutions honest. Air-dry clay is useful for pumpkins that can dry separately; it is not interchangeable with oven-bake polymer clay. A bottle made from beads is a solid decoration, not a vessel for liquid. For the pond, painted card beneath a compatible clear glossy finish is enough to suggest water without introducing a deep resin pour.
1. Plan the silhouette and sturdy shell
Draw a front elevation on scrap paper and cut a plain test doorway first. Set it beside a paper tree and a pumpkin-sized ball to establish scale before committing to walls. Make the main cottage a simple rectangular box with a pitched gable, then add a shallow entrance projection. The roof edges can curve or extend unevenly while the wall corners remain square and dependable.
Laminate the base from flat board with thin, even PVA layers, and keep it flat under a clean protective sheet while the adhesive dries according to its label. Cut wall openings before assembly. Add internal card tabs at corners and test-fit the roof without gluing it down. Leave a removable rear panel if you plan lighting. A reliable shell is what makes later crookedness look charming instead of accidental.

2. Add timber, teal doors and glowing-looking windows
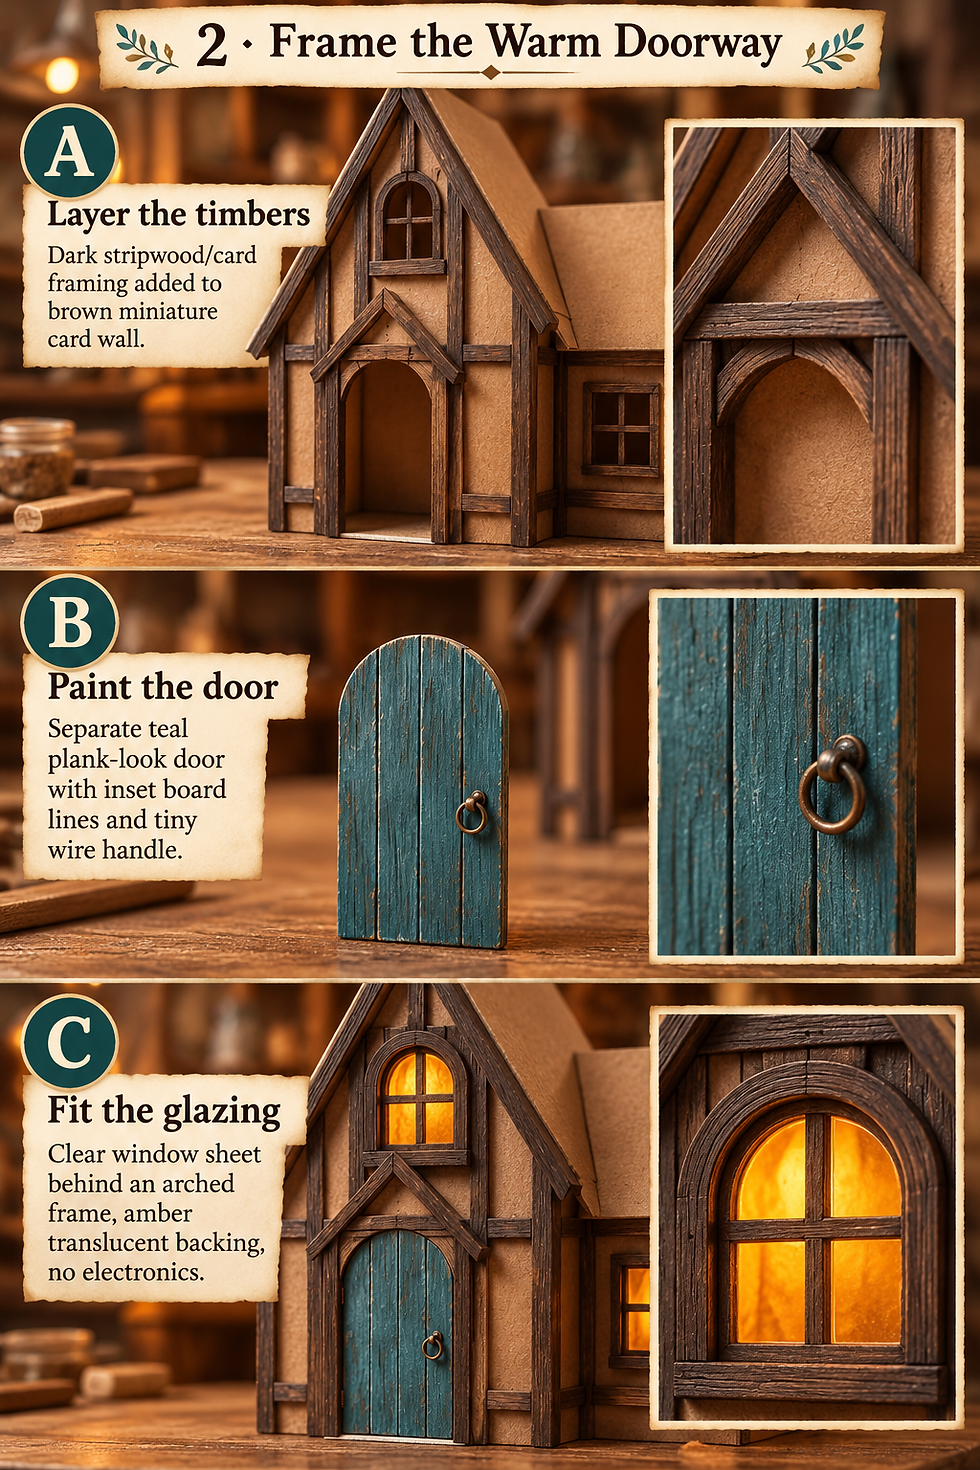
Apply narrow strips of plain card or thin stripwood over the wall faces to suggest dark framing. Keep trim away from the edges that must still meet the removable roof. Paint the wall recesses brown, let them dry, then dry-brush the raised strips with a lighter brown so the grain-like texture remains readable.
Build the door as a separate card insert with shallow scored board lines. Paint it muted teal and add a tiny bent-wire handle with its cut ends turned inward. For glazing, trim clean clear packaging larger than each opening and fix it behind the frame with an adhesive compatible with that plastic. Test first on an offcut. Amber paper behind the clear sheet gives a warm suggestion of light even without electronics. Keep paint and glue out of the visible window area.
A magnifying work light can make those small frame joints easier to see. It belongs on your workbench, not inside the miniature; pause between detailed cuts rather than trying to finish a whole façade with tired eyes.

3. Layer the shingled roof and chimney
Build roof panels from thin stiff card and check their fit on the shell. Use a separate curved card fascia at the eaves for the exaggerated storybook sweep, rather than forcing the entire roof panel into a twist. Cut strips of shingles with rounded lower ends, leaving their upper edge joined. Paint several strips in related blue-gray, teal and muted red tones before fitting.
Work from the eaves upward so each row overlaps the one below. Stagger the joints and keep the exposed depth broadly consistent. Allow each area to settle before adding pressure elsewhere. Make the chimney from a small card box with thin card rectangles for stone faces; paint the joints dark and lightly brush the raised faces gray. A removable paper curl can suggest smoke. Keep it clearly decorative, with no heat source or actual smoke.

4. Paint age into the surfaces
Use thin acrylic layers rather than one heavy coat that fills every seam. Begin with the darker base colors, then brush lighter paint across raised edges after the base is dry. Vary a few shingles subtly; the roof needs a family of colors, not a competition between every tile. Test washes on scrap card because excess water can warp paperboard.
Add small green-brown patches where the roof meets a wall and where the chimney interrupts the shingles. Keep the brightest teal around the entrance so it remains easy to find. Finish any protective coating according to its product directions and test compatibility first. Let painted components dry fully before adding foliage or glazing. A restrained finish usually reads more convincingly than covering every surface with the same dark wash.

A wet palette is an optional aid for organizing acrylic mixtures while you work. Keep your chosen blue-gray, teal, brown and red together so the house remains coherent even when its shingles are cheerfully mismatched.

5. Grow the spiral trees and folded forest
Twist a small tree armature from soft craft wire, securing the cut ends inside the base or wrapping them so no sharp points remain exposed. Cover the trunk with narrow paper strips and PVA, building texture without flooding it. Let this dry before painting. Keep the branches sturdy enough for their ornaments rather than reproducing every delicate twig.
For the spiral flowers, roll narrow colored paper strips around a smooth thin tool, slide them off, allow a small amount of relaxation and secure the end with a tiny dab of glue. Attach the dry coils to card circles or directly to broad branch tips. Make the background evergreens from folded card cones or stacked folded triangular layers. Use fewer colors behind the house so the bright spiral trees remain the main attraction. Glue the trees into prepared base holes only after their shapes and sightlines are checked.
For a more natural-looking companion tree, the miniature autumn trees guide explores branching, scale and foliage. Keep the coiled trees here as the deliberately fanciful foreground.

6. Make pumpkins, bottles and a tiny fence
Roll small air-dry-clay balls, flatten their bases and press shallow grooves from top to bottom with a blunt tool. Add a short stem and leave the pieces to dry according to the clay’s instructions before painting. Painted black eyes and a smile give a jack-o’-lantern effect without hollowing a fragile little pumpkin. Vary the sizes while keeping them believable beside the doorway.
Build potion bottles from stacked beads or shaped solid blanks, with small card disks as stoppers. Paint them jewel colors and add a restrained gloss only after the color dries; they remain sealed decorative props. Cut the fence from card or clean stirrer pieces, blunt any sharp tips and attach the rails on the rear. Dry-fit everything first. A handful of well-placed objects tells a clearer story than filling every spare patch with another pumpkin.

7. Set the path, pond and lantern light
Arrange thin irregular card pieces along the approach to suggest paving. Leave a narrow, consistent gap, paint the ground beneath dark and dry-brush the stones pale once fixed. Make the small pond as a recessed-looking painted patch: dark blue-green in the center, lighter edges, then a compatible glossy clear finish applied to its label. Test it on the painted card first and allow it to cure before adding neighboring scenery.
If you want working light, use a complete low-voltage miniature kit with its matched power source and connectors. Follow that kit’s instructions, test it before closing the cottage and keep the switch and battery compartment accessible. Do not bury connections in wet glue. For hanging lanterns, beads with painted amber centers are a simpler unlit alternative. Suspend the paper moon and stars from a separate display support rather than fragile tree tips.

8. Plant the edges and leave room for the story
Place small foliage clumps around the house corners, fence posts and tree bases, leaving the path open. Use preserved moss sparingly, trimming it to a scale-appropriate texture; broad strands can overwhelm a tiny doorstep. A few commercial grass tufts can soften the border between stones and soil, but keep them distinct from the finer foliage and flower shapes.
Dry-fit the bottles, wreath and pumpkins before gluing. Check the view from the front and both corners so the round window and teal door remain visible. Add a little paper wreath, tiny flower dots and the lantern beside the fence. Let all adhesives dry before lifting the base. Stop while there are still quiet areas. Those small pauses help the spirals, warm windows and crooked roof feel like discoveries rather than a crowded display shelf.

Grass tufts are useful at path edges where a few upright strands suggest neglected ground. Choose their height against your doorway and keep the tallest clumps away from the pond, where they can hide the reflective surface you just worked to create.

Photograph the lantern clearing
Set the finished scene against a plain dark or warm neutral backdrop. Use one large soft light from the side and a white card opposite to lift the shadows. If the windows are lit, reduce the room light gradually instead of plunging everything into darkness. Keep the camera or phone near doorway height for the main view, then take closer pictures of the roof, entrance and spiral branches. Move the light or viewpoint to control glare on bottles and the pond; do not hide every reflection, because a little sheen helps those materials read.

Small problems, sensible fixes
• Curled card walls: reduce wet paint and glue, reinforce the inside with flat braces and let components dry before assembly.
• Roof rows drifting upward: test a short strip first and use the previous row as a visual guide; correct early rather than forcing the last row.
• Paper coils opening: glue the outer end, allow it to set and mount the coil on a small backing disk.
• Harsh window glare: add a diffuser appropriate to the lighting kit without touching or enclosing components against its instructions; painted amber glazing is the unlit option.
• A cluttered doorway: remove one object group and restore a clear strip of path. The witch still needs somewhere to put the shopping.
Closing — Until Next Time in the Small World
I would happily spend an evening arranging those spiral trees, then spend another deciding which pumpkin deserves the best view of the moon. The lantern beside the fence has earned its spot. Which detail would you build first: the shingled roof, the teal doorway or that wonderfully unreasonable forest?
Share your own interpretation with #smallworldminiatures. You can find more tiny-world inspiration and the newsletter at Small World Miniatures, and browse the online shop when you want to bring a little of that atmosphere home. Leave the front-door spell a window to look through. Even a very small job deserves a decent view.








Comments