


Where the Garden Comes In: A Miniature Glasshouse Kitchen

My Vision for This Small World
This is my dream kitchen. Gardening is my second love after miniatures, and I love bringing the outdoors inside. My miniature glasshouse kitchen combines both beneath a glass roof, with plants reaching above pale cabinets and spilling from shelves. Dark roof bars give the light a clear framework, while the island leaves a welcoming place to gather. Four stools fit around it, although the greenery already seems quite comfortable with the idea of taking another seat.
Some links earn me a commission from qualifying purchases and help keep this tiny world growing. As an Amazon Associate I earn from qualifying purchases.
The iLAND Luxury Kitchen brings a beautifully furnished heart to a 1:12 dollhouse. It is a lovely addition to a growing collection, ready for tiny cookware, a favorite tea set and all the little details that make a kitchen feel lived in.

Miniature Backstory — The Tiny Tale

If you want to tuck Ben and Ruth’s story into your miniature, add a handwritten recipe card and a little bowl of tomato soup beside the island. These would be imagined additions to the scene—a small reminder of a familiar meal carried into a new home.
Rolife’s Happy Meals Kitchen celebrates the cozy little details that make a kitchen inviting. It is a delightful project for a miniature collector who loves dressing a room right down to the last countertop accessory.

A Guided Tour of the Build
A roof that gives the room its character
The pitched glass-like roof is the first architectural feature I notice. Its dark grid leads toward the center ridge, with the garden visible through and beyond it. Light falls across the interior without the heavy visual lid a solid roof would create. The open front keeps the structure legible as a displayed miniature room.
The side walls give that airy roof something solid to sit on. Brick-like surfaces and pale corner supports create a framework around the greenery. On the left, the tall gridded window repeats the roof’s dark lines. That repetition makes the room feel composed even before you start noticing all the individual pots.

An island for making and sharing
The island sits in the foreground with a pale worktop, a darker paneled base, and four round wooden seats on slim dark legs. Small dishes and a shallow produce box suggest activity without covering the whole top. I like being able to imagine setting something down here. It makes the beautiful room feel usable.
Behind it, a broad pale range hood anchors the back wall. Warm light picks out the tiled-looking backsplash and the utensils hanging beneath the hood. The pale cabinetry keeps this central working area calm, while the shelves and plants provide the more complicated edges. The result is a room where your eye knows where to rest.

A garden arranged at several heights
Pots occupy the floor, counters, shelves, and upper ledges. Fern-like fronds and trailing greenery soften the top of the room; smaller rounded plants fill spaces closer to the work surfaces. At the right, long leaves and orange flowers add a taller silhouette beside the silver-colored refrigerator.
There is also a cushioned bench with a pale throw, a wooden storage piece, and shelves of small bowls. Those domestic details matter. They make the planting feel part of daily life, with a place to sit nearby, rather than a collection arranged solely for display. I would almost certainly put my coffee down there and spend the next ten minutes looking at leaves.

Inspirations — From the Big World to the Small
The appeal of a miniature glasshouse kitchen
Kew’s Palm House offers one useful reference for the pleasure of being surrounded by plants beneath glass. The glasshouse opened in 1848, and Kew describes its interior as a living rainforest. This kitchen echoes that feeling of foliage occupying the height of a light-filled structure, although its domestic scale and pitched form are its own interpretation.
For a different connection, Philip Johnson’s Glass House is described by its official site as a pavilion for viewing the landscape. Completed in 1949, it uses transparent walls to make the surroundings part of the experience of being indoors. Here, the dark framing and visible garden produce a related pleasure: the room has a boundary, but your view continues beyond it.

Those references offer two ideas worth separating when you design a miniature. One is bringing plants into the room. The other is arranging the room so you can see out. You can explore either on a modest base. A single tall gridded window with a leafy backdrop may suggest the second idea more effectively than a complicated roof that hides the interior.
My French Country Conservatory Kitchen in Miniature explores another version of the same attraction. The scene here has a stronger industrial-looking frame and a more open island arrangement. I enjoy seeing how the basic wish for a kitchen close to the garden can lead to quite different little rooms.
The pleasure of a miniature kitchen is in those familiar little rituals: cups waiting for coffee, a counter ready for baking and chairs pulled up for a chat. A few thoughtfully chosen pieces can give your collection a whole new room to love.
The ROKR Moving Dream Coffee Factory is a lovely gift idea for someone who enjoys coffee and intricate little builds. Its miniature machinery gives you plenty to admire long after the last piece is in place.

Artist Tips — Make Your Own Magic
AI-assisted imagination helped this garden-filled kitchen grow. Bring it to your workbench one welcoming shape at a time: a room box, a dark grid, a gathering island and plants at several heights.
You can leave the front open and make the roof removable. That gives you access for arranging details and makes photography easier. A single roof panel or an open framework is also a reasonable starting point if a complete pitched glazed roof feels too ambitious. The garden feeling can survive a practical simplification.
Supplies
For the shell, start with a sturdy clean box, packaging card, and spare paper. Mount board or suitable thin wood sheet are purchased alternatives. Use a rigid base that stays flat when the back and side walls are attached. Paper printed with a suitably small brick pattern can supply texture without adding many separate pieces.
For glazing and framing, save flat, clear packaging with smooth, manageable edges. Acetate sheet offers another option. Use narrow card strips for the dark grid, or choose suitable stripwood if you prefer a sturdier frame. Select adhesive for the actual plastic and test an offcut before attaching any large panels.

For furniture, gather small clean boxes, card, and thin wooden stirrers. Basswood strips, ready-made miniature cabinets, or a kitchen furniture set are alternatives. Choose your planning scale before mixing purchased chairs, counters, and accessories. The island should look comfortable beside the surrounding kitchen rather than merely fit in the remaining gap.
For planting and softness, begin with green paper, paper-covered stems, fabric scraps, and small clean lids or rolled-card pots. Miniature plant pots, scenic foliage, and fine fabric are alternatives. Use different leaf shapes to suggest variety. You do not need to identify or reproduce every plant in the reference.
For finishing, keep acrylic paints, paper adhesive, appropriate craft glue, brushes, scissors, tweezers, and a cutting mat nearby. Make controlled knife cuts away from your hand. Follow adhesive and finish labels for ventilation and drying. Keep all plants in this project decorative and dry; the room box is not designed as a watered growing space.
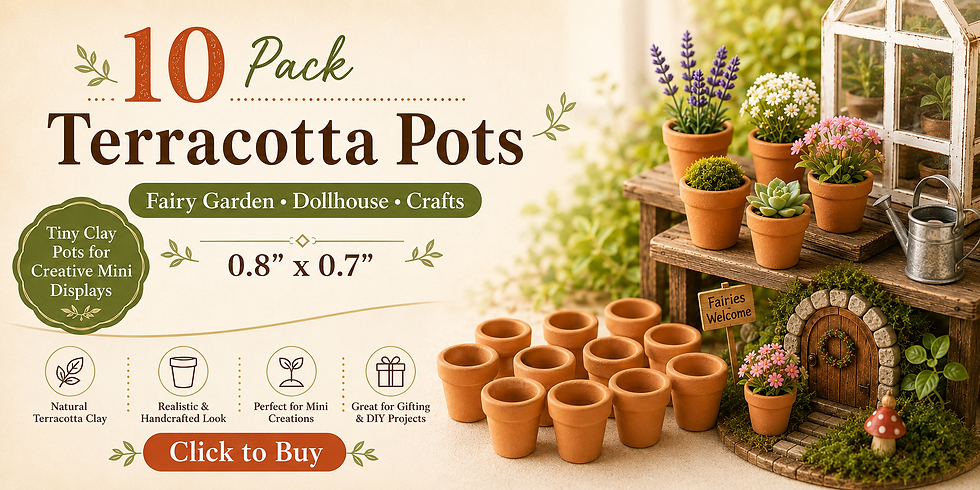
A few tiny terracotta pots can make a miniature garden feel wonderfully lived in. Gather them on a doorstep, tuck them beside a bench or fill a shelf with your favorite little plants.
1. Plan the room around the island
Set out the back wall, side walls, and base without gluing them. Use folded card blocks for the cabinets and island. Decide where the refrigerator shape will sit and leave a visible route between it and the island. Check the arrangement from the open front.
Use a paper stool silhouette to compare counter height and seat height before cutting final pieces. If you are working with a purchased set, plan the shell around its measured footprint. Keep the rear cooking area visible above the island, and reserve a few spaces for taller plants.

Mark the furniture positions lightly on the floor. A photograph of the dry arrangement helps you return pieces to the same place later. Leave the roof aside until the wall positions are settled; it is easier to fit a roof to a stable box than persuade a completed roof to match shifting walls.
2. Finish the walls before closing the box
Cover the interior faces with brick-pattern paper or paint a simple brick-like texture. Use a small pattern whose repeated units remain believable beside the cabinets. Apply paper adhesive evenly and sparingly, then let the surface dry flat according to the adhesive instructions.
Paint the corner supports and lower cabinets in a quiet pale color. A wood-toned floor made from printed paper or narrow card strips can warm the room without competing with the walls. Keep the strip widths consistent and stagger the apparent joints if you want a boarded effect.

Assemble the shell against square supports and allow the joints to set. Check it from above before adding anything fragile. If a wall leans inward, correct it now; the roof grid will make even a small twist much more visible. A plain back wall remains a good option if the brick pattern feels too busy.
Individual miniature red bricks bring satisfying texture to tiny walls, paths and garden borders. They are a lovely detail to have on hand when your next little building calls for some character.

3. Build a dark grid in manageable panels
Draw the glazing layout on scrap paper and assemble each frame flat over that guide. Use repeated lengths of card or stripwood so the spaces feel consistent. Paint the grid pieces before fitting the clear sheet, then let the paint dry fully enough that handling does not mark it.
Attach the glazing only with a material-compatible adhesive tested on an offcut. Keep it away from the most visible central areas. A removable roof can rest on discreet ledges at the tops of the side walls. Test that fit without forcing the frame, and keep the ridge joint simple.

If you prefer an easier build, make a large gridded side window and leave the top open. You will still get the dark lines, visible foliage, and light-filled mood. Avoid permanently closing any panel until you can reach the shelves and furniture beneath it. Future you will appreciate being able to rescue a fallen flowerpot.
4. Give the island a clear silhouette
Build the island from a small card box, checking its height against the cabinet mockups. Add narrow strips to suggest paneling and a separate worktop with a slight overhang. A pale painted top is enough; elaborate stone effects are optional and can easily dominate a small piece.
Make the stools as a matching group, using simple seats and stable leg arrangements suited to your materials. Ready-made miniature stools are an alternative if repeated furniture construction feels fiddly. Test each one on a flat surface before painting, and allow the joints to set before positioning it under the worktop.

Keep most of the counter visible. One bowl, a small board, and a shallow box will suggest cooking and sharing without turning the island into a storage shelf. Arrange the loose accessories before fixing them. View the scene at eye level to make sure they do not hide the rear cooking area.
Bring a little baking-day charm to your dollhouse with SAMCAMI Baking Accessories. A few carefully placed pieces can make a tiny kitchen feel as though something delicious is about to happen.

5. Fill the cabinets, then add the plants
Use shallow boxes for lower cabinets and simple horizontal shelves for dishes. Layer small paper rectangles for door panels and use restrained dots or short strips for handles. A tapered card shape can suggest the range hood. Paint these larger forms before adding the tiny objects around them.
Make a few distinct plant shapes from paper: broad pointed leaves, smaller rounded pairs, and trailing strands. Fix them in rolled-card pots or suitable miniature containers. Let each plant assembly dry before moving it into the kitchen, so a whole shelf does not become one wet, unstable arrangement.

Place the tallest plants toward a corner and use smaller ones on counters and shelves. Leave gaps around the cooking area and refrigerator. The room should look welcoming to a person as well as to a fern. If you add purchased foliage, compare its texture with the paper plants and use it selectively where the two sit comfortably together.
Bring a little lushness to your miniature landscapes with Woodland Scenics Light Green Foliage F51. Soft greenery around flowers, walls and garden edges can make a tiny scene feel wonderfully established.

6. Add a few signs of supper and photograph
Finish with a folded fabric throw, a small group of dishes, and perhaps the imaginary seed packets from the story. Position them where their purpose is easy to understand. A packet beside a bowl reads as an evening in progress; ten unrelated tiny objects can become visual noise.
Use soft light from one side and a pale reflector on the other. Place a leafy backdrop behind the glazing if you want the room to feel connected to a garden. Move the light until strong reflections leave the important window areas, then check that the roof still reads clearly against the background.
Take a straight-on room view, a closer island view, and a detail of plants beside the dark window grid. If the roof hides too much, lift the camera slightly or remove the roof for a separate interior photograph. Show the full open-front box in at least one image so the miniature’s boundaries remain part of its appeal.

Small adjustments that help
If the roof feels heavy, use fewer grid divisions or slimmer-looking strips. Try the change on a paper mockup before rebuilding a finished panel.
If the plants disappear into one green mass, vary leaf size and leave small spaces between pots. A few clear silhouettes are easier to enjoy than a dense wall of texture.
If glazing looks cloudy, check for adhesive residue and test a fresh offcut. Do not assume a stronger cleaner is safe for the plastic or paint.
If the room feels crowded, clear the island first. It is the main breathing space in the composition, and restoring that surface often settles the whole view.
Boutigem’s miniature coffee tools bring a café-loving touch to a tiny kitchen or shop counter. They are just the sort of small details that turn a furnished room into a place with its own daily rituals.

Closing — Until Next Time in the Small World
I keep coming back to the roof, the greenery, and the invitation of those four stools. This kitchen combines the two things I love most about a miniature room: the pleasure of looking closely and the immediate wish to spend time there. The garden has come indoors, and somebody has sensibly provided a place for coffee.
I would be happy with a stool by the island, a bowl of Ruth’s soup and a good view of the plants.
Would your dream miniature kitchen have a glass roof, a wall of plants, or one enormous island for friends to gather around? Tell me in the comments, and share your own garden-filled rooms with #smallworldminiatures. Visit the Small World Miniatures shop for more tiny-world inspiration, and join the newsletter for the next scene and its story.








Comments