


Cat Café Oasis: A Retrofuturistic Miniature with Curves, Color and Cat Ears

My Vision for This Small World
With my cats Chuckie and Angelica in mind (yes named after those two. If you know know - you know!), I’ve given my miniature cat café a pair of illuminated ears above the roof. A sweeping pink arch, teal panels and bright roof bands shape Cat Café Oasis, while flowers soften its retrofuturistic curves. The cheerful little building announces its feline character from a distance, long before anyone reaches the door to inspect the menu.


Some links earn me a commission from qualifying purchases and help keep this tiny world growing. As an Amazon Associate I earn from qualifying purchases.
The ROKR Moving Dream Coffee Factory is a lovely gift idea for someone who enjoys coffee and intricate little builds. Its miniature machinery gives you plenty to admire long after the last piece is in place.

Miniature Backstory — The Tiny Tale

The CUTEBEE Bread Factory Bakery Model Kit brings the charm of a little bakery to your collection. It is a delightful choice for anyone who loves miniature shops and counters full of tiny details.

A Guided Tour of the Build
The upstairs arch draws my eye first. Its broad pink surround curves around dark window bars, with silver-colored edges catching the evening light. Behind the glass-like opening are tables, shelving and hanging lamps. The rail across the front gives the opening a sense of depth without closing it off. Warm light turns the interior into a little stage, and the dark frame keeps all that glow legible.

Look next at the right-hand circular window. A thick, rounded border makes it feel like a porthole set into a friendly appliance. Above it, a smaller amber-centered circle repeats the shape. The teal side panel carries fine seams and little metallic-looking fasteners, enough mechanical detail to suggest an assembled shell. A little metallic paint around the edges could bring that cheerful space-age character to your own café.

Low planters overlap in front of the façade, mixing broad green leaves with rounded flowering mounds. The cream cat figure stands at the left among the planting. Shallow entrance steps and thin amber light lines hold the garden together. Keeping that small open route to the doors is important: the flowers frame a destination rather than swallowing it.

Above those details, the roof’s yellow and green curves tuck behind the teal crown and its cat-ear ornament. Pink, teal and yellow are allowed to be bright because the dark frames and silver-like borders give them boundaries. The planting repeats the pink at a softer scale. That repetition is a useful design lesson before you even pick up a brush.
Give a 1:12 room a splash of color with iLAND’s turquoise velvet sofa. The rich upholstery and matching pillows make an inviting centerpiece for a little lounge you will want to keep admiring.

Inspirations — From the Big World to the Small
I read this scene as retrofuturism: a present-day fantasy of the friendly, rounded future imagined in mid-century design. The LAX Theme Building is a useful real-world comparison. The Los Angeles Conservancy records its completion in 1961 and describes its restaurant suspended between crossed arches. Our café shares the pleasure of a bold curved silhouette, though the shapes and structure differ. In miniature, the transferable idea is to make the big outline clear before adding surface detail.
Matti Suuronen’s Futuro house offers another reference. The City of Espoo describes its elliptical plastic shell as an expression of late-1960s space-age design. I see a related appetite for rounded openings and an enveloping exterior here, especially around the café’s side window. You can explore another interpretation of rounded architecture in The Little Saucer That Came Home, where a quieter shell meets a planted setting.
For the interiors, I would borrow the relaxed layering of a conservatory café: warm shelves, a few small tables, and greenery close to the windows. The Greenhouse Café on this site takes that relationship much further, with a central coffee counter surrounded by plants. Here, the brighter exterior already supplies the drama. A restrained interior lets the café feel occupied without competing with the pink arch or the round window.

Artist Tips — Make Your Own Magic
AI-assisted imagination shaped the café and its supporting illustrations; the photographs of Chuckie and Angelica are the real furry deal. Adapt the guide to your materials, and keep your real cats safely away from loose pieces, wet finishes and the work area.
Planning your miniature cat café
A shallow 1:24 display is a suggested starting point, not the confirmed scale. Try a 30 cm wide, 22 cm deep base and a café about 25 cm high, adjusted to your shelf. Keep doors, chairs and cats in scale. The main techniques are layered card, curved skins, clear-plastic glazing, metallic painting and planted containers. Expect intermediate difficulty because the arch needs careful fitting; a single-story façade is a friendlier first attempt.
The Odoria Blue Lotus porcelain tea set brings blue-and-white charm to a 1:12 table. Set out a tiny cup beside a favorite chair, and suddenly the room feels ready for a leisurely afternoon.

Supplies: the essentials and optional extras
Structure and openings: start with clean, dry cereal-box card for templates and curved skins, plus sound packaging board for trials. For the permanent frame, bookboard or thin plywood provides firmer support. Add cardstock for trim, basswood strips for straight supports and clear acetate for glazing. Clean, uncreased transparent packaging is a useful free alternative. Avoid brittle plastic with sharp broken edges.
Color and assembly: use existing acrylic paints in pink, teal, yellow, green, cream and charcoal, with silver-colored metallic acrylic for trim. PVA suits the card joints; wood glue suits compatible wooden joints. A glazing adhesive intended for clear plastic is a separate useful purchase. Reuse clean containers as palettes. Essential tools are scissors, a craft knife, a protected cutting surface, fine brushes, tweezers and small clips. Cut away from your fingers and make several controlled passes rather than forcing a blade through thick board.
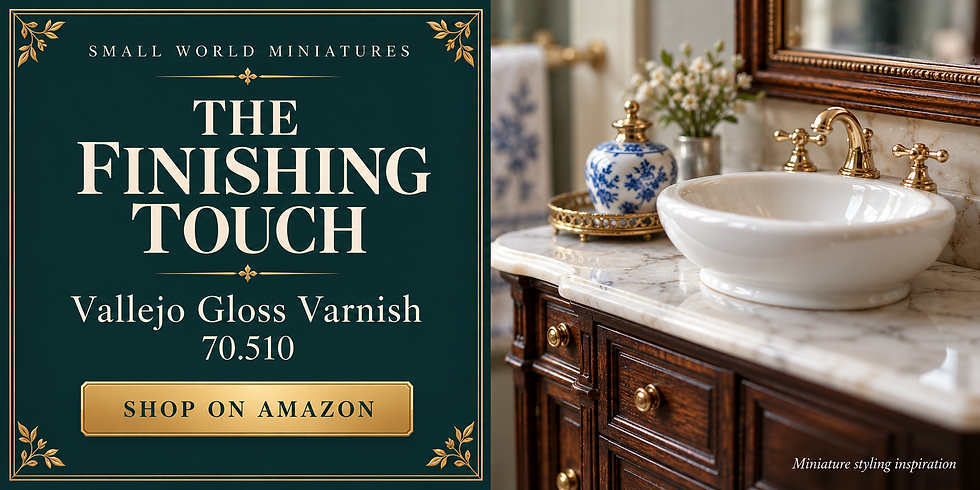
A touch of shine can make a tiny object catch the light beautifully. Vallejo Gloss Varnish 70.510 is a useful finishing addition for miniature painters who enjoy bringing out those small, polished details.
Furnishings and garden: save clean card offcuts for tables, rolled paper for cups and small packaging caps for planter forms. Optional purchases include air-dry clay, miniature furniture, fine model foliage and paper-covered floral wire. Choose non-fraying cotton scraps for cushions. Air-dry clay dries without baking; it is not interchangeable with oven-cured polymer clay. Follow the chosen clay’s drying and finishing instructions before painting.
Optional lighting: an intact, ready-made low-voltage miniature LED set can supply the warm glow. Use its matched power source and manufacturer-approved accessories. An external lamp behind the model is the simpler unpowered alternative. You do not need resin, mains wiring, heated plastic shaping or a spray booth for this interpretation. Keep the power switch reachable, and protect batteries and tiny parts from pets and children.

1. Plan the silhouette and build a steady base
Draw a front elevation on plain paper: broad arched upper opening, centered double entrance and circular side window. Make one paper doorway and a chair silhouette at your chosen scale; use them to check that the interior height makes sense. Mark the garden and front steps on the base, leaving a visible path to the entrance. These are planning shapes, so change them now rather than negotiating with a glued wall later.
Cut the base and upright rear support from bookboard or suitable thin plywood. Add simple side braces and a floor shelf for the upper room. Keep the back open for access. For a card version, laminate thin layers with sparing PVA and dry them flat under a clean weight before assembly. For wood, use an appropriate wood glue and let the joints cure as directed before loading them with the façade.
Make two or three matching arched ribs from sturdy card to support the curved front and roof skin. Dry-fit them square to the base, then attach them without glazing or paint. The finished skeleton should stand without twisting when you lift the base. If the arch feels ambitious, keep the central building rectangular and apply a layered curved front: the main silhouette still carries the idea.

2. Wrap the curves and fit the window frames
Test the bend of a scrap of cereal-box card around a clean cylindrical container, without heating it. Cut the skin so its easier bending direction follows the arch. Dry-wrap it over the ribs, trim overlapping edges and fix it in short sections with a thin film of PVA. Hold the curve with low-tack tape or clips cushioned by scraps, then leave the adhesive to dry before removing the supports. Several thin layers behave better than one stubborn thick sheet.
Build the pink arch surround as stacked card rings, each slightly wider than the opening. Shape the side-window rim the same way using circles. Cut openings while the pieces lie flat on a protected surface. Paint the narrow inner frame charcoal separately, and use thin strips for mullions. Lay those strips over a paper guide so the spacing looks deliberate. A shallow fixed door is easier to keep straight than a tiny working hinge.
Dry-fit clear acetate behind the frames, but leave it removable until the paint has dried. Later, attach it with small amounts of a compatible clear-glazing adhesive applied around the hidden perimeter. The manufacturer of Glue ’n’ Glaze identifies it for bonding canopies and many plastics; test your actual glazing offcut first. Do not try to form the café’s large window from a film of liquid glue. A clean sheet gives this opening the support it needs.

3. Paint the candy-colored shell and metallic borders
Seal and prime the card with products compatible with your acrylic paints, using light applications so the surface does not become soaked. Let each coat dry according to its label. Paint a test strip before committing: warm pink for the main arch, teal for the side, yellow and green for the rear roof bands. Keep the entrance surround dark gray. The reference uses glossy-looking surfaces, but a smoother satin finish is often easier to photograph.
Paint separate trim strips with silver-colored metallic acrylic, then attach them around the main color areas after drying. Use slightly darker gray on the lower edges to suggest depth without drawing a black outline around everything. Tiny dots of dimensional acrylic can suggest fasteners if you test their size on scrap first. Keep them sparse. A stud the size of a dinner plate turns the building into a very expensive handbag.
Make the roof ears from laminated card with softened corners, and paint a dark outer shape with warm yellow inner panels. A painted yellow panel is enough; it need not light up. Test any optional clear finish on the same painted card before using it. Let the paint and coating fully cure as directed before fixing the glazing, so a tacky edge cannot leave a permanent fingerprint on the window.

4. Arrange the café and add gentle light
Build a shallow counter from card blocks with a smooth cardstock top. Add open shelves to the rear wall and a few paper cups, small jars or purchased miniature café accessories. Make table tops from card circles on stable supports; use simple stools if curved café chairs exceed your patience. Paint some pieces teal and others warm coral, repeating the exterior palette in smaller doses. Dry-fit the furniture from the front viewing angle before gluing it down.
Boutigem’s miniature coffee tools bring a café-loving touch to a tiny kitchen or shop counter. They are just the sort of small details that turn a furnished room into a place with its own daily rituals.

Create the upstairs room as a small stage behind the arched window. Give it a warm cream back wall, one seating group and a few shelf objects rather than a complete unseen floor plan. A narrow dark railing made from card strips can sit in front of the arch. Check that its top rail stays below the strongest part of the view. Let furniture paint and assembly glue dry before handling the shelf as one unit.
If you choose lighting, test the complete ready-made set before installation. Route it through the accessible back and hide lights above the window line so viewers see illuminated surfaces rather than bare points. Follow the manufacturer’s clearance and covering instructions; do not pack bulbs in paper, foam or foliage. Leave the battery compartment accessible and switch the set off when unattended. Without internal LEDs, a warm external light aimed through the open back can still give you a convincing evening photograph.

5. Plant the entrance and give the cats a place
Build the low planters from layered card around small clean caps or simple card boxes. Paint their outside faces a muted stone gray, keeping the texture fine. Form raised steps from stacked board, and dry-fit the whole arrangement before adding greenery. Leave a clear central route and enough open paving to show the building’s footprint. Allow the painted containers to dry before planting, especially along the rims where wet glue tends to pull color.
Make broad leaves from painted paper on short, paper-covered floral-wire stems, bending each stem before fixing it into the planter. Trim and tuck sharp wire ends inside the base. Add model foliage in small groups for rounded shrubs, then use tiny pink and white paper flower dots to echo the reference. Woodland Scenics describes stretching foliage to the desired density and securing it with scenic adhesive. Follow the actual product instructions and allow the planting to set before moving the model.
Bring a little lushness to your miniature landscapes with Woodland Scenics Light Green Foliage F51. Soft greenery around flowers, walls and garden edges can make a tiny scene feel wonderfully established.

For the cream cat figure, shape a small seated body, separate head and ears in air-dry clay, or choose a purchased figure matched to your scale. Keep the silhouette simple and let the clay dry fully before paint. Place it near the left planter where it stays visible against dark leaves. Add an optional little padded basket or serving trolley inside as a nod to Marmalade’s preferred transport.

Photograph the café at its own eye level
Set the finished model on a table with a plain, gently curved backdrop well behind it. Place a diffused light to one side and a white bounce card opposite. Keep hot lights away from the miniature and use a purpose-made diffuser rather than covering a lamp. Lower the camera to the front-door height for the main view; then move closer for the arch, side porthole and garden. A slightly elevated frame can show the roof colors without losing the entrance.
Watch the windows before shooting. Shift the camera or light until reflections move away from the interior, and clean the glazing with a material-compatible method. Photograph with the café lights both off and on, keeping enough ambient light to retain the shell colors. Use a stable camera support or phone rest and a timer. Aim for warm miniature depth rather than white glowing holes.

Troubleshooting the little oasis
A rippled shell: use thinner card, a gentler bend and less wet adhesive. Dry a new test curve before replacing the affected panel. A crooked arch: compare the rib templates against one another and correct the dry-fit frame before adding trim. A huge window is very honest about a lopsided surround.
Clouded glazing: test the adhesive on an offcut, keep it behind the frame and replace a damaged pane rather than hiding it beneath more glue. Overwhelming metallic paint: reserve silver for borders and fittings, letting the colored panels remain the larger shapes. A crowded garden: remove one cluster at a time until the entrance steps become visible again.
Tiny leaves bring an entire season to a miniature scene. Scatter a few Warmtree scenic leaves along a path or gather them beneath a tree for the kind of small detail that makes you lean in closer.

Harsh lighting: hide the source above the opening, follow the kit’s approved adjustment options and add ambient light. Never improvise a heat-trapping cover. If the setup still looks patchy, illuminate an unlit display from outside. Good composition survives without a single wire.
Closing — Until Next Time in the Small World
I am happy to leave Nell finding room for more chairs while Marmalade takes another slow lap of the café. This miniature has the same cheerful balance: glowing cat ears above a practical place to sit. Chuckie and Angelica give me a personal way into the scene; the shapes and colors invite everyone to imagine a café of their own.
Which detail would you keep: the pink arch, the circular side window or the planted entrance? Tell me in the comments, and share your own creations with #smallworldminiatures. You can find more tiny-world tours through the newsletter and browse the online shop for another spark of inspiration. If your fictional café has a serving trolley, leave room for one unexpected passenger.








Comments