


A Hearth for the Snow: A Hungarian-Inspired Winter Miniature

My Vision for This Small World
My Hungarian-inspired winter miniature gathers a cozy room around a stone-like hearth and a round window. Timber, pale walls and knitted textures keep the setting warm against the blue evening outside. I’ve included snowy edges within this storybook concept, where winter reaches a little farther indoors than sensible housekeeping would recommend. The armchair and small tea table bring the scene back to an inviting scale, with the hearth giving every jug and candle a warm neighbor.
Some links earn me a commission from qualifying purchases and help keep this tiny world growing. As an Amazon Associate I earn from qualifying purchases.
If cozy kitchens are your weakness, take a look at Rolife Farmhouse Kitchen DIY Miniature Kit. It is a delightful little domestic world to add to your collection or give to a fellow miniature enthusiast.

Miniature Backstory — The Tiny Tale

Make room for a little literary atmosphere with MiniCity Hemingway House Book Nook. It is an inviting project for anyone who loves miniature interiors and a bookshelf with a story to tell.

A Guided Tour of the Build
Start at the hearth and its round window. Rounded gray forms make a broad arch around the warm center; the mantel above is crowded with little vessels and trailing greenery. The window’s dark spokes and circular frame gather those details into a single composition. Its cool blue light makes the orange glow feel richer. The evergreen wreath belongs comfortably to winter, without requiring us to assign the scene a specific holiday.

On the left, the armchair changes the pace. Its brown upholstery has a soft-looking nap, with a pale knitted throw spilling over one arm and a patterned cushion tucked against the back. A narrow table and the shelves behind it add domestic scale. I like how the chair overlaps those straighter furniture lines. That rounded silhouette gives your eye somewhere to rest after counting all the little mantel objects.

The right-hand tea table is more upright and orderly: turned-looking legs, wooden chairs, a lidded pot and small cups. Across the foreground, uneven-looking floorboards lead toward a rust-red round rug and the stump table. Snow collects at the exposed edges of the room box and continues into the snowy village backdrop. The visible boundary matters. We can enjoy an intimate interior and still see that it is a small constructed world.

Inspirations — From the Big World to the Small
For a grounded Hungarian reference, I would begin with the old village of Hollókő. UNESCO describes its Palóc houses with stone bases, whitewashed roughcast walls and wooden galleries. The useful parallel here is the combination of pale textured surfaces and visibly warm wood. The miniature’s open stone hearth and circular window carry those materials into an imagined winter retreat, with plenty of room for a warm chair and a cup of tea.
The Hungarian Open Air Museum, Skanzen, offers another direction through everyday household objects. Its House from Baglad presents kitchen practices and food preservation. That makes the modest vessels in this scene worth a second look: a pot, jar or cup can suggest repeated daily use more effectively than an extravagant ornament. In a miniature version, keep a few recognizable containers at different heights and leave enough breathing room to understand each silhouette.
A tiny tea break deserves beautiful china. Odoria Blue Lotus 1:12 Porcelain Tea Set brings blue-and-white floral charm to a dollhouse table, dresser or carefully arranged tea-time vignette.

Skanzen’s textile workshop in the Merchant’s House from Mád explores fabrics used for clothing, bedding and tablecloths in peasant households, including repair and reuse techniques. I take that as a prompt to look through fabric scraps before shopping. A fine woven remnant, a little frayed edge and a restrained red pattern can bring warmth to your room. Let those textile traditions inspire a little pattern of your own, sized for the chair and the room you are making.
My palette board would pair chalky cream, warm brown and muted brick red with a small piece of charcoal-gray stone and a cool blue paint swatch. Keep the blue mostly in the background and windows. Let the warmer colors belong to things the imagined residents touch. You can make that same distinction in a very simple room box, even if you choose a rectangular window and skip the elaborate mantel entirely. For a more decorative nighttime interpretation, explore the Hungarian Halloween miniature cottage and its glowing windows.

Artist Tips — Make Your Own Magic
AI-assisted imagination lit this winter hearth. Start your version with one inviting chair and the contrast between winter blue and lamplight. Let the shelves fill up once the room feels welcoming.
Plan your Hungarian-inspired winter miniature
A suggested planning scale is 1:12, with a room base around 30 × 24 cm and walls roughly 22 cm high; these are starting dimensions, not measurements of the supplied image. Treat this as an intermediate project because curved openings, layered textures and a tidy lighting route take care. The essential tools are a craft knife, scissors, tweezers, fine brushes and sanding paper. A simpler unlit version with a rectangular window is a perfectly good first build.
Supplies worth gathering
Structure and woodwork: begin with clean, dry packaging card, an unwanted rigid box and smooth wooden coffee stirrers. For a more controlled shell, use bookboard or thin plywood with basswood strips. Keep a separate scrap for testing finishes. PVA or wood glue can join suitable porous materials; choose the adhesive for the actual surfaces and allow it to dry according to its label before loading the joint.
For the little details that give a scene its woodland character, BYHER Rustic Bark-Covered Craft Wood brings real bark texture to log piles, garden edging and rustic decorative accents.

Surface and color: use torn unprinted card for stone shapes and saved paper for texture trials. Purchasable options include air-dry clay for separate hearth stones, acrylic paints in cream, gray, brown, red and blue, and an appropriate matte finish. Air-dry clay is not oven-bake polymer clay. For this small project, avoid resin casting, solvent effects and real plaster mixing unless you already have a product-specific method you understand.
Soft furnishings and accessories: rescue fine cotton, a worn knitted scrap, thread, a little thin padding and tiny clean beads. Purchased dollhouse fabric, miniature crockery and furniture can replace the fiddlier scratch-built pieces. A shallow plastic packaging panel can become glazing if it is clear, clean and suitable for hand cutting. Optional greenery, scenic snow and a ready-made low-voltage model-lighting kit provide finishing touches. Keep the lighting and its accessible power supply separate from loose fibers and scenic material.
Tools and safe setup: protect your work surface, use a sharp craft knife with controlled light passes, and keep the other hand out of its path. Work on stable material rather than cutting a loose shape in the air. Keep small pieces and coin-cell batteries away from children and pets. Check each coating, adhesive and scenic product’s instructions for ventilation, compatibility and drying; the project has no universal cure time.

1. Build a shell that leaves room to breathe
Draw a full-size paper floor plan for your proposed miniature. Mark the fireplace, armchair and tea table as simple shapes, then leave a clear strip of floor between them. Make a paper wall mock-up before cutting the stronger material. The round window should sit comfortably above the mantel, with enough wall around it to remain sturdy. If that opening feels cramped, reduce the hearth or raise the wall rather than squeezing everything together.
Cut the base and three walls from layered card or suitable thin wood, using the appropriate hand tools and stable support. Score repeated light cuts instead of forcing one heavy pass through board. Test the joints square, add triangular card braces behind hidden corners, and glue the shell. Let the joints set fully before handling. Keep the front open and the ceiling removable, so you can still reach the back wall and replace lighting later.
Dry-fit the future furniture using paper blocks. This early pause is useful: the picture’s room is densely furnished, but your hands need access during assembly. For an easier version, build only a back wall and two short side returns. You still get the framed-room effect, with less cutting and fewer shadowy corners to manage. Finish this stage with a plain, stable structure; save snow, curtains and little cups for later.

2. Layer the timber, plaster and window
Add narrow card strips or basswood strips as floorboards and exposed beams. Stagger floor joints and vary the spacing slightly, without creating gaps large enough to swallow a chair leg. Brush on thin brown acrylic layers, letting each dry before adding lighter streaks along the grain. Keep the deepest brown in seams and beneath beams. Heavy black outlines can make small woodwork look cartoonishly separated, so begin with a softer dark brown.
For the pale walls, stipple small amounts of thick acrylic paint onto a test scrap, then repeat the texture lightly on the shell. Keep it shallow enough that the window trim still lies flat. Paint warm cream once the texture is ready for overpainting. A little muted gray near corners creates depth; large cracks would imply damage the reference does not need. Let everything dry before fitting glazing or cloth.
A small touch of gold can make a tiny detail feel like a treasure. AMACO Rub ’n Buff Antique Gold is a lovely finishing choice for raised ornament, picture frames and decorative accents.

Build the circular window from stacked card rings, checking that the inner edges line up. Add slender card spokes and a clear packaging panel behind the frame, testing your adhesive on an offcut first. Paint a few restrained frost marks around the outside edge rather than covering the view. The easiest alternative is a purchased miniature window with a dark frame. Fit curtains only after the surrounding paint and glue have dried.

3. Give the hearth weight and a gentle glow
Create a shallow fireplace surround from a card support and individual rounded card stones, or make small air-dry clay stones separately. Keep the pieces irregular but similar enough in size to read as one masonry surface. Let clay dry fully according to its packaging before gluing or painting. Arrange the arch on paper first, then attach the stones with an adhesive suited to both stone substitute and backing. Leave the firebox dark and recessed.
Paint the stones in closely related gray-browns. After the base is dry, brush a lighter shade across raised surfaces with very little paint on the bristles. Darken the recesses selectively. A separate narrow timber strip becomes the mantel. Before attaching it, check that it can hold a few lightweight vessels without sagging. You can skip individual stones by layering torn card into a rough arch and treating it with the same restrained color variation. The William Morris-inspired fireplace offers another way to make a hearth the center of a miniature.
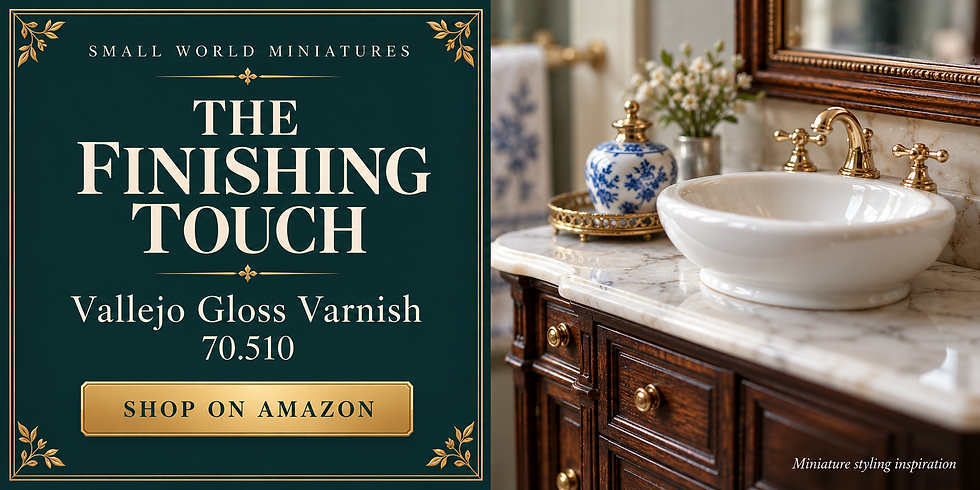
A little shine brings tiny details to life. Vallejo Gloss Varnish 70.510 adds that polished finishing touch to painted pots, decorative vessels and other glossy accents.
For light, use a complete, ready-made low-voltage model fire effect or LED kit with its specified compatible power source. Follow the supplier’s wiring and placement instructions, test it before installation and leave the switch and battery compartment accessible. Conceal the light behind a fixed log arrangement without coating components or crowding them with loose fibers. Never use real candles or flame. An unlit firebox painted in warm orange and brown is the simpler alternative.

4. Make the chair and tea table feel inhabited
Begin with the furniture silhouettes. A purchased dollhouse armchair is the easiest route; for a scratch-built version, join a card seat, back and curved side supports, then cover thin padding with fine fabric. Turn raw edges underneath and use small amounts of suitable fabric adhesive. Let each section bond before pulling on the next. Check that the chair fits beneath the window and still leaves the path to the hearth open.
Build the tea table from a card or wood top and four simple legs, adding crosspieces where useful for stability. Paint the pieces before final assembly if that gives cleaner access. Use a small cloth offcut for the throw, and fold it around the chair instead of forcing a bulky full-size knit into place. The round rug can be patterned paper backed with fine fabric. Trim its edge neatly and keep the printed pattern small.
Set the scene for a miniature baking day with SAMCAMI 1:12 Baking Accessories. The little mixer, bowl and baking tools make a kitchen counter feel ready for something delicious.

Arrange a teapot and cups at the table, a few vessels across the mantel and one mug on the stump-like coffee table. Leave distinct spaces between objects so their shapes remain legible. For the stump, wrap a small card cylinder with bark-textured paper and add a flat circular top. Glue the furniture only after viewing the room at eye level. Let accessory joints dry before moving on to the scenic finish.

5. Let winter gather at the edges
Twist a small loop of paper-covered floral wire into a wreath and cover it sparingly with suitable miniature foliage, keeping cut wire ends turned inward. A few red-painted beads can supply a winter accent. Hang the wreath where it leaves the round window’s structure visible. Use shorter, looser greenery along the mantel. Let these assemblies dry away from the model before fixing them in place, so stray adhesive does not mark the finished walls.
A touch of soft greenery can make a miniature feel wonderfully settled. Woodland Scenics Light Green Foliage F51 adds leafy texture to little gardens, shaded corners and the bases of your favorite buildings.

For a dry, low-mess snow alternative, use painted white card shapes along the exterior base and ceiling edge. For finer texture, choose a dedicated scenic snow system and test it on your painted scrap first. Woodland Scenics’ Soft Flake Snow instructions specify Scenic Cement, snow sprinkled into the adhesive, and a sealing spray. Follow the current label and protect finished glazing, textiles and electronics from overspray. Let the finish dry before brushing away loose material.
Keep most snow outside, on exposed edges and window ledges. If you love the reference’s impossible indoor dusting, add it sparingly as a deliberate storybook flourish. Preserve the dark floorboards and red rug so winter does not flatten the composition into one white surface. Finish by checking the scene from the front: you should notice the hearth first, the chair second, and the smaller household objects only when you lean closer.

Photograph the warm room against a cold evening
Place the completed miniature on a tabletop with a curved blue-gray backdrop behind it. Use a diffused light from one side and a white card opposite to soften shadows; keep both outside the room. If you fitted lights, lower the surrounding illumination gradually rather than making the whole room dark. Photograph at chair-seat height for an inviting interior view, then pull back enough to include the model’s front edge and snowy boundary.
Make separate closeups of the hearth, chair fabric and tea table. Move your light or viewing angle until reflections stop hiding the windows. Keep the fire effect below the point where it becomes a featureless white patch, and check that the cold backdrop still looks blue rather than fluorescent. Let all finishes cure before positioning the model for repeated shots. A stable phone support works well; elaborate camera equipment is optional.

Small fixes before the kettle boils
Warped card: reduce wet coating thickness and let layers dry flat before assembly; add hidden bracing where needed. Oversized cloth: replace it with a finer weave and fewer folds. Chalky stones: soften excessive pale dry-brushing with a thin compatible midtone glaze, tested first. Buried detail: reduce snow on furniture and keep the main drifts at the edges. Harsh lighting: reposition or diffuse the light according to the kit instructions rather than burying it in scenery.
If the room feels busy, remove a few accessories before adding anything else. I would protect the clear outline of the round window, the seat of the armchair and the open center of the rug. Those quiet patches help the detailed parts feel intentional. Take a quick photograph during this check. A small image often reveals competing shapes that were easy to miss while you were concentrating on one tiny handle.
Closing — Until Next Time in the Small World
I keep coming back to Júlia’s unexpected audience at the window. The warm hearth and inviting chairs make this miniature feel ready for a small gathering, even while snow waits at its edges. Which feature would you carry into your own version: the round window, the knitted chair or the tea table? Tell me in the comments, and share your creations with #smallworldminiatures. You can also explore the online shop or join the newsletter for more small-world inspiration. I’ll leave Júlia to play one more tune.








Comments