



Please Don’t Feed the Neighbors: A Carnivorous Plant Miniature Terrarium

First Impressions in Miniature
Some houses come with a garden. This one appears to have negotiated a temporary ceasefire with it. A warm little porch sits beneath an enormous green mouth, while smaller plants gather along the path as though the doorbell has promised them dinner.
I love the contrast in this carnivorous plant miniature terrarium: tidy gray clapboards, amber windows and a remarkably ordinary chimney, surrounded by vegetation with very unreasonable dental arrangements. The glass dome makes everything feel collectible, almost respectable. A small brass plaque could probably convince a visitor this belongs in a botanical museum.
I have a real soft spot for Little Shop of Horrors, especially the movie from the eighties. I still know all those songs by heart. Ellen Greene remains one of my favorites, and I loved her in Pushing Daisies too. So a tiny house surrounded by hungry green mouths has rather successfully found my weakness.
Look closely and the monster plants become excellent miniature-making subjects. Their fleshy rims, raised leaf veins and curved stems reward simple shapes used well. Later, we’ll build an inspired dry display, concentrating on those hungry inhabitants before giving them a house worth looming over.
The purchased alternatives below use Amazon affiliate links; if you buy through them, it helps fund this tiny world. As an Amazon Associate I earn from qualifying purchases.

Miniature Backstory — The Tiny Tale
Mrs. Nettles bought the house because the garden was described as “self-maintaining.” The agent had pronounced the final word quickly and refused to step off the pavement.
For the first week, the arrangement was excellent. No weeds. No slugs. No leaflets advertising replacement windows. Then the tallest plant developed an interest in the postman’s bicycle bell, and Mrs. Nettles decided the household needed rules.
She held a meeting on the porch. The little plants attended in a semicircle, mouths politely open. The large one leaned down from above the roof, wearing the expression of a creature who had already eaten the agenda.
“Nothing with shoes,” she announced.
A small plant spat out a bootlace.
“Nothing carrying a parcel.”
The large plant closed its mouth very slowly.
“And absolutely no nibbling the house.”
At this, every leaf turned toward the window boxes. Mrs. Nettles had planted ordinary flowers there, hoping to establish a sensible example. The flowers were doing their best.

By October, the garden had become the neighborhood’s most dependable security system. Delivery drivers left parcels by the gate. Burglars discovered urgent appointments elsewhere. Mrs. Nettles took her evening tea beside the lit window and listened to the tiny, satisfied rustle of leaves.
She did permit one indulgence: a weekly performance of the plants’ favorite song, which consisted entirely of the word “snack” sung in different keys. The neighbors called it experimental gardening.
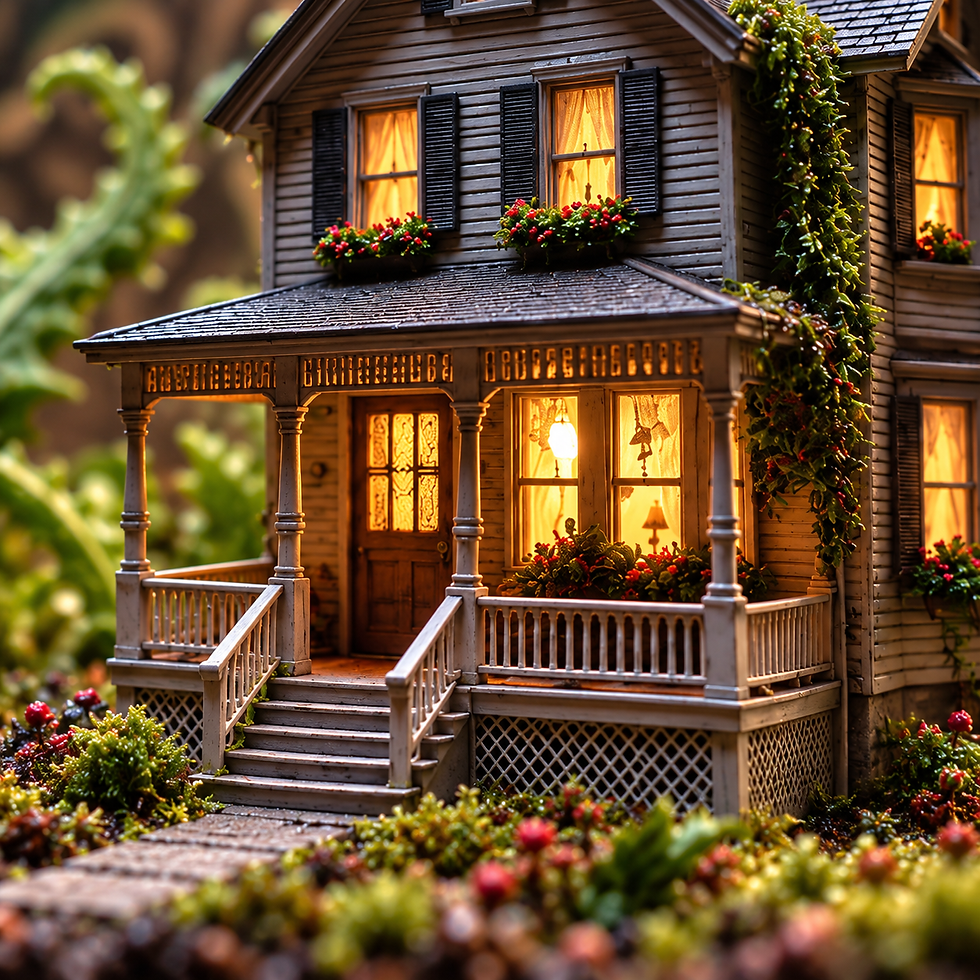
For a tiny detail to add to your own version, imagine a dropped bootlace near the path. Keep it small enough that the plants can maintain plausible innocence. In the pictured scene, the bright window-box flowers already supply the gentlest joke: even this garden has a respectable front.
A Guided Tour of the Build
The mouth above the roof
The largest plant occupies the upper left like an overenthusiastic balcony. Its green outer surface carries a pale network of raised veins, while a red rolled rim frames the dark mouth. Ivory points interrupt that red edge. I’m especially drawn to the shift in texture: the outside reads leaf-like, the interior fleshy, and the teeth smooth. Those differences make a simple open shape feel wonderfully unpleasant.

A house that insists on being cozy
The gray house gives our eyes somewhere calm to land. Horizontal siding, narrow shutters and repeated porch spindles establish a domestic rhythm. The porch steps lead toward the warm doorway rather than straight into a mouth, which seems considerate. Flower boxes repeat the green of the plants in a much smaller, friendlier register. A chimney and overlapping roof texture finish the silhouette without competing with the huge head.
The small mouths at ground level
The foreground plants vary in height and angle, keeping the soil-like surface from becoming a neat row of identical ornaments. Curling leaves rise behind the house and follow the dome’s curve. Moss-like patches, scattered stones and a narrow path bring the scene together at the base. The glass edge remains visible, so we understand the entire neighborhood has been contained. Whether the dome is protecting the plants or the furniture is open to debate.

Inspirations — From the Big World to the Small
The obvious theatrical connection is the deliciously excessive monster-plant premise of Little Shop of Horrors. I’d borrow its contrast between ordinary surroundings and impossible botany rather than try to reproduce a particular screen prop. Here the little home remains familiar enough that the oversized mouths can do the storytelling.
Real carnivorous plants offer a more precise starting point. Kew’s account of the Venus flytrap describes lobed trapping leaves, red inner surfaces and sensitive hairs. Translate that into a strong central hinge and a repeated rhythm around the mouth. Our sculpted fangs and house-sized stems are fantasy exaggerations; this guide makes ornaments, not a botanical model or a habitat for living flytraps.
The glass enclosure recalls the Wardian case. Kew documents how these glazed containers helped transport living plants during the nineteenth century. Their appeal here is compositional: glass turns a small arrangement into a self-contained world. A simple removable cloche gives us that feeling without copying a historical case’s construction or trying to maintain its moist environment.

The house adds another useful reference: vernacular Victorian domestic details such as a projecting porch, layered gables and plentiful trim. Rather than force the building into one exact architectural label, concentrate on the visible relationships. Tall windows make a compact wall feel elegant; a low porch roof gives the larger roof room to rise. The plants then break that order with curves and open mouths. For another theatrical domestic setting, visit the Halloween miniature pie shop.
Artist Tips — Make Your Own Magic
The illustrations here are AI-generated, and this guide is an invitation to make an inspired version rather than a tested plan for an exact replica. Results will vary, especially if your plants develop opinions about the porch. Keep the useful shapes, simplify freely, and let your own tiny neighborhood emerge.
Plan your carnivorous plant miniature terrarium
Choose a proposed scale around 1:48 for the house if you want a compact tabletop display. Treat the plants as deliberate giants within that setting. This is an intermediate project because the open jaws, narrow teeth and overhead stem need careful support; a closed-mouth plant and a simple house silhouette make a friendlier first version.
Build everything on a removable insert that fits inside your chosen display cover. The visible photograph does not establish real dimensions, so measure your own enclosure before drawing a plan. Leave clearance around leaves and above the tallest head. Essential techniques are card construction, small-scale sculpting, layered painting and dry scenic groundwork.
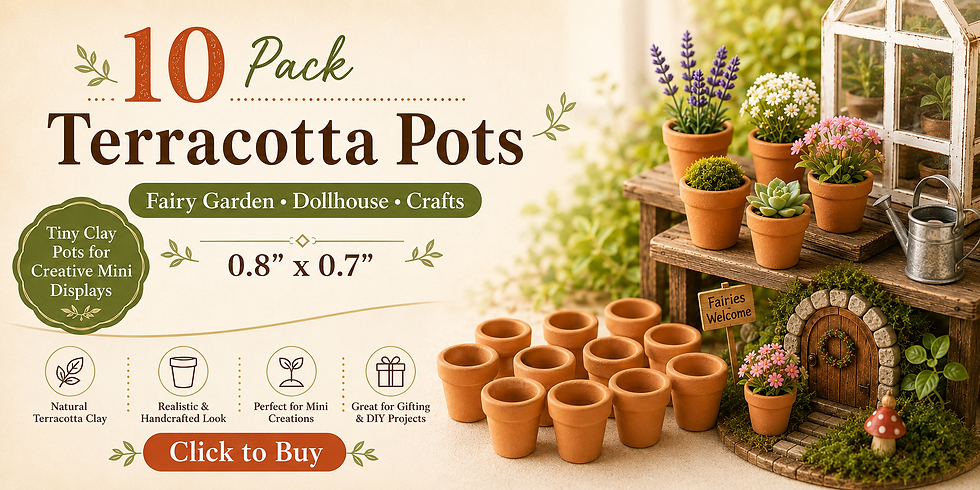
Small terracotta pots make useful optional props beside the porch, especially if you want one plant to look newly adopted. Check their dimensions first; an oversized pot can become a deliberate specimen container rather than an accidental scale error.
Supplies
• Base and house: start with clean, flat packaging card for mockups and siding. Use rigid craft chipboard or basswood for the permanent base and shell where needed. Keep clear clean packaging for glazing, or choose model glazing sheet. Add PVA craft glue suited to the chosen porous materials.
• Plants: clean aluminum foil can bulk out heads; use polymer clay for the sculpted surfaces and appropriately stiff, oven-compatible metal wire for supported stems. Keep unknown coated wire and mixed household plastics out of the oven. A simple paper plant is a no-bake alternative.
• Texture and color: use acrylic paint, fine brushes and a small amount of compatible clear gloss varnish for mouths only. Repurpose a clean ceramic dish as a paint palette, or use a wet palette for acrylic work. Keep food-use utensils separate from clay work.
• Groundwork: use torn painted paper leaves and small clean stones, with optional model foliage, static grass tufts and miniature terracotta pots. Avoid damp garden soil, living moss or loose food crumbs inside the finished display.
• Tools and optional lighting: scissors, a hobby knife, a protected cutting surface, tweezers and a blunt sculpting tool cover the basics. A ready-made low-voltage LED set is optional; use it as supplied, with an accessible battery holder or connector outside the cover.

1. Fit the world to its cover
Trace the usable footprint of the cover onto scrap paper, then cut a test insert from thin card. Lower the cover over it without forcing the edges. Mark the house position slightly right of center and reserve the left for the largest plant. A paper strip held upright can stand in for the tallest stem while you test the height.
Make rough paper mouth shapes in several sizes and arrange them around the house mockup. View the composition from the intended front, then from both sides. Leave a clear route from the foreground to the porch and avoid placing a mouth directly over every window. Transfer the accepted layout to a rigid insert, keeping your marks light. You can erase a pencil line much more easily than relocate a glued monster.

2. Build the little house shell
Cut a simple card box with front and side gables, using several light knife passes on a protected surface and keeping fingers out of the cutting path. Cut window openings while the walls are flat. Glue corner braces inside, then add the floor and a removable roof so you can reach the interior later.
Apply narrow card siding strips from the bottom upward, overlapping each row slightly. Use small offcuts for shutters and thin wood or layered card for porch posts. A porch railing can be suggested with a few well-spaced vertical strips rather than dozens of fragile spindles. Dry-fit the house on its footprint before gluing the porch steps. Let the shell and siding dry flat or square before painting; too much wet glue can pull a small wall out of shape.

3. Shape supported stems and jaws
Form the largest head around two compact foil shapes, one for each jaw, leaving a broad rear connection rather than a delicate hinge. Wrap each with a reasonably even layer of polymer clay. Build the stem around an appropriate oven-compatible metal armature, with a generous lower end for anchoring into the base later. Keep the head lightweight and the curve modest while learning.
Press the mouth interiors smooth, then add a rolled clay rim. Keep the jaws unbaked and workable for the teeth and veins in the next stage. Prepare a support suitable for holding them open during the later cure. Consult the clay maker’s guidance and follow the exact clay package’s temperature, time and thickness instructions; use an oven thermometer, ventilate as directed, and never bake the house, glazing, foliage or electrical parts. Cure only after the next stage’s details are complete, then allow the pieces to cool before handling. A closed head with a painted mouth line is an easier alternative that still reads clearly.

4. Give each plant its expression
Add short tapered clay teeth while the jaw clay is workable, pressing their broad ends securely into the rim. Favor chunky, slightly rounded points over needle-sharp projections. Alternate their lengths without making every gap identical. Shape a tongue as a low flattened form so it does not block the mouth’s opening.
For the exterior veins, press thin clay cords onto the head in an irregular branching network. Keep the main branches stronger than the small connecting lines. Make broad leaves separately, crease a central vein with a blunt tool and curl only the tips. Prepare the smaller heads with fewer details and varied tilts. Follow the clay maker’s curing guidance for these additions and assemblies, then let everything cool. Leave fragile tips unforced; a painted highlight can suggest more detail than another vulnerable sliver.

5. Paint the appetite into the plants
Once the cured surfaces are clean and ready according to the material instructions, test your acrylic paint on a spare clay piece. Begin with a dark green exterior and a deep red mouth. Let each layer dry before adding lighter green across the raised veins and muted pink-red on the rim. Keep the deepest mouth recess dark so the opening retains depth.
Paint teeth a warm ivory, with a small darker touch where they meet the gum. A bright white row can look pasted on. Add a restrained compatible gloss finish inside the mouth after the paint has dried and the coating’s compatibility test passes. Leave the outer leaves mostly matte or satin. Do not coat the entire plant in shine; the contrast between dry-looking leaves and glossy mouths does more work than an extra dozen teeth.

A wet palette is useful for the small acrylic mixtures in this stage. Keep the dark mouth color and pale tooth color in separate areas, and change rinse water before touching the ivory. These are tiny teeth; they don’t need camouflage.

6. Finish the house and test its glow
Paint the siding a muted gray, then lightly pick out its lower edges with a paler dry brush. Keep the roof dark and vary a few shingle tones rather than outlining every piece. Add warm-colored paper behind selected windows for an unlit version, or install your ready-made low-voltage lights before fitting the roof. Use compatible adhesive for the glazing, testing on an offcut to check for fogging.
Route the supplied cable through a planned rear opening without crushing it under the house or cover. Keep the power source accessible and follow the lighting maker’s clearance instructions; do not bury a battery holder in scenery. Test the glow before closing the roof. The windows should remain readable rather than glaring white. Leave the electrical system unmodified, and use painted brightness if safe access cannot be maintained.

Good close work benefits from comfortable task lighting. The magnifying lamp below is a separate bench tool, useful for checking window trim and paint edges; it does not form part of the miniature’s lighting system.

7. Plant the neighborhood and dress the ground
Dry-fit the cured plants, then anchor their stem ends into prepared holes in the rigid base with an adhesive suitable for the materials. Follow its label and allow the full required cure before testing stability. Support the tall plant while it sets. Keep a little clearance between each leaf and the house so a bump does not transfer force through several delicate pieces.
Paint the ground dark brown and glue down fine dry scenic material in small patches. Form the path from irregular card or thin cork pieces, leaving its center readable. Add tufts and moss-like model foliage around stems, with less material near the porch. A few tiny window-box flowers repeat the greenery without hiding the house. The miniature autumn trees guide offers another approach to building up scenic foliage. Finish with optional pots or an imagined bootlace, then remove every loose particle before lowering the cover. All glue, paint and coatings should be fully dry or cured first.

Use scenic foliage sparingly to soften the joins where stems meet the base. Keep it low enough that the small mouths retain their silhouettes and the path still invites the eye toward the doorway.

8. Check the dome and settle the scene
Clean the empty cover according to its material’s care instructions, then lower it slowly over the finished insert. Watch the tallest head and outward-curling leaves from the side. If anything touches, lift the cover and adjust the removable insert rather than pushing the glass against the sculpture. Never drill, cut or heat the glass for this project.
Turn the base until the largest mouth frames the house without swallowing the roofline. Check for trapped fibers, visible adhesive and stray bright spots. If the enclosure is too crowded, remove one small plant. A clear patch of ground can make the remaining mouths much more convincing. Keep this dry decorative display out of reach of children and pets, with no live flame beneath the cover and no direct-sun heat trap on a windowsill.

Low grass tufts can make the last bare areas look intentional without adding height. Choose a restrained color and avoid a perfect ring around every plant; uneven patches feel more like a miniature garden.

Photograph a contained catastrophe
Set the model on a steady table against a quiet dark backdrop. Place a diffused light to one side and a white card opposite to lift the shadows. Move the light and your viewpoint until bright reflections slide away from the main mouth and front door. A narrow highlight along the glass edge can help explain the enclosure; a large white rectangle across the house usually cannot.
Shoot one view with the cover on and, if it lifts safely, a second with it removed for clear close-ups. Keep the phone or camera supported and focus on the nearest important detail. Try a low house-level angle, then a higher view that explains the arrangement. Avoid pretending the reflections are puddles or adding wetness to the scenery for the photograph. The dry model already has plenty of atmosphere.

Troubleshooting the hungry garden
• Head droops: reduce its weight, shorten the curve or strengthen the planned armature before final assembly. Surface glue alone should not carry a heavy overhead head.
• Teeth disappear: darken the mouth behind them and simplify the row. Increasing contrast is safer than adding thinner points.
• Veins look like spaghetti: press cords more gently into the surface and vary their thickness. Paint can supply the finest branches.
• House looks flat: deepen the shadows beneath siding and porch trim, then highlight selected edges rather than the entire wall.
• Dome looks cloudy: remove it and check for residue, dust or incompletely cured materials. Clean only with a method suitable for that cover.
• Everything competes: mute the house and reduce foreground clutter, allowing the big red mouth to remain the strongest accent.
Closing — Until Next Time in the Small World
Mrs. Nettles has found a remarkably effective way to avoid unsolicited visitors. I’m less certain about the house insurance, but the window boxes are thriving in the story and the porch still looks like a lovely place for tea.
Which detail would you build first: the enormous veined head, the little mouths along the path, or the stubbornly cozy house? Tell me in the comments, and share your own hungry garden with #smallworldminiatures. You can find more tiny-world ideas through the newsletter on our website and browse the online shop for another small adventure. Please keep all shoelaces inside the vehicle.








Comments