


Lanterns Among the Leaves: A Kyoto-Inspired Miniature Plant Nursery

My Vision for This Small World
I first imagined this miniature plant nursery while working remotely in Kyoto for a month, where I fell in love with the architecture and noticed an affection for French food and design. My concept brings Japanese-inspired rooflines and latticework together with striped awnings, terracotta-colored pots and French-country garden abundance. The plants fill the spaces between those two influences, making the little shop feel generous and welcoming. Naturally, they have claimed almost every available surface.
Some links earn me a commission from qualifying purchases and help keep this tiny world growing. As an Amazon Associate I earn from qualifying purchases.
Anavrin’s Kyoto Gion book nook brings the charm of a tiny streetscape to your bookshelf. I love the idea of a miniature destination waiting between favorite books. Ready to give your shelf a tiny new adventure? Use EOUFQ5ZWKCSNGM for 10% off select Anavrin products.

Miniature Backstory — The Tiny Tale

A Guided Tour of the Build
A roofline that keeps the eye moving
The dark, tile-like roofs step across the building instead of forming one heavy lid. A broad upper gable curls over the central window, while a smaller entrance canopy repeats the gesture below. Pale wall panels give the warm wood-colored framing room to show. The moss-like green patch softens the roof, but enough dark tiling remains visible to keep its shape clear.
The ornament is concentrated around those central curves. That is a useful composition lesson: intricate details read more clearly when nearby surfaces are quieter. You can simplify the carving substantially and still keep the silhouette that makes this nursery memorable.

Windows, awnings, and a glowing plant room
Upstairs, the large fan-shaped window sits above a grid of smaller panes. Plants press close to the glazing, and the balcony rail makes a horizontal pause beneath all those stems. The warm interior glow turns the room into a destination. I want to know what is on the farthest shelf, which is precisely how a nursery gets me into trouble.
Below, cream awnings with narrow rusty-red stripes introduce a softer texture. Their repeated folds connect the separate shop windows without covering the entrance. The contrast between flexible-looking cloth and crisp wooden grids is a small detail with a large effect.

A forecourt worth lingering in
The curved fence frames a pale gravel-like courtyard. A red-leaved tree anchors one side, while a little wheeled cart and clusters of pots balance the other. Notice the clear approach to the central steps: abundance feels welcoming when you can still imagine walking through it.

Rounded topiary shapes, loose flowers, and slender leaves have different jobs. The clipped shapes give structure; the flowers interrupt it; the upright greenery draws your eye back to the windows. The blue-toned pots near the cart offer a quiet story cue. You could add a tiny chip to one of your own pots for Lucie and Emiko.
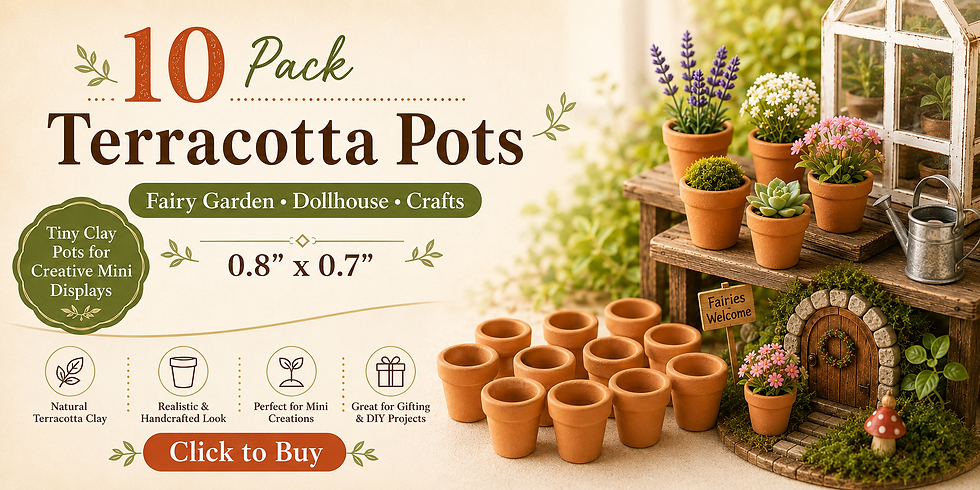
Tiny terracotta pots are the sort of detail I always want to arrange in little groups. Add them to a garden shelf, line a sunny doorstep or fill them with your favorite miniature blooms.
Inspirations — From the Big World to the Small
Kyoto rhythms, interpreted freely
Kyoto’s traditional machiya offer a useful reference for timber framing, street-facing lattice, and a close relationship between work and domestic life. This broad, decorative nursery is a fantasy rather than a strict machiya reconstruction. For your model, borrow the repeated uprights and the contrast between shaded framing and lighter infill instead of trying to combine every architectural detail you admire.
A row of slim battens can establish that rhythm more effectively than a single oversized carved panel. Repeating the same warm brown across the balcony, windows, and fence helps the entire scene belong together. Let the dark roofs provide a second family of shapes, rather than painting every surface a different color.
A French garden’s generosity
The French-country side lives in the loose planting, practical pots, striped fabric, and slightly collected-over-time feeling. Monet’s garden at Giverny is a useful real-world reference for the effect of dense planting beside architecture, particularly the way color travels in repeated patches. Here, red and pink flowers recur at different heights, linking the forecourt to the upper balcony.
For another interpretation of abundant planting and weathered shopfront details, explore the French Country floral shop. You do not need to reproduce a famous garden to borrow that principle. Repeat one flower color in three places, vary the size of the clusters, and leave breathing room around the doorway. A single plant in a convincing pot often contributes more than a solid carpet of identical green material.

Build a palette before you build a building
Put warm wood, soft ivory, charcoal, muted brick red, and several greens beside one another. Add one small blue accent for the pots. Keep these as physical scraps on your worktable: a painted card, a fabric offcut, and a little foliage sample are more useful than a dozen colors you cannot compare in the same light.
The supplied scene is wonderfully elaborate. Your interpretation can be a single shopfront with one upper window, one awning, and a narrow plant terrace. Repeating the essential shapes will carry the idea without requiring a miniature construction crew.

If tiny gardens make you linger, Rolife’s Dreamy Garden House is a lovely next project. Its enclosed greenhouse setting makes an inviting addition to a plant-filled miniature collection.

Artist Tips — Make Your Own Magic
A little AI-assisted imagination helped this tiny nursery grow. Use the guide as a creative starting point and choose the details that suit your materials. Think of the image as an enthusiastic design brief, always delighted to suggest one more flourish of roof carving.
Supplies for a miniature plant nursery
Start with a small shopfront or shallow building. A suggested 1:24 scale keeps the details manageable while leaving room for plants; this is a planning choice, not a measured scale for the reference image. Choose the size of your door first and use it to check the pots, railings, and cart.
From home: clean cereal-box card for templates and awnings; sturdy packaging card for internal braces; a scrap of smooth, rigid board for the base; clean clear packaging for windows; thin cotton scraps for fabric tests; and small offcuts of paper for leaves. Use materials that are dry, clean, and free of residue. Brittle plastic and splintered wood can go straight back out of the supply pile.

Store-bought essentials: basswood sheet and strip for visible frames; quality card for layered walls and roof shapes; PVA craft glue suitable for the materials; acrylic paints; fine brushes; and paper foliage or miniature plants. Buy fine scenic gravel rather than borrowing damp soil from the garden. For pots, choose ready-made miniature containers or air-dry clay used according to its own instructions.
Tools: a sharp craft knife, stable cutting surface, scissors, fine tweezers, and small clamps or clips with protected jaws. Cut away from your fingers and make several light passes rather than forcing a blade. Keep offcuts contained, especially if curious pets supervise your work.
Optional details: translucent paper for lantern shades, a ready-made low-voltage LED set with an accessible battery pack, decorative paper trim, and a small wooden cart. Lighting is optional; the pale windows can suggest a lit interior without working electrics. You will also want a few unglued test pieces for paint and adhesive trials.
A few flowers can make even the smallest room feel loved. These miniature flowers and vases are sweet finishing touches for shelves, tables and tiny shop displays.

1. Plan the footprint and leave a route inside
Draw a simple front elevation on paper, then make a card mock-up. Divide the building into three readable masses: a central entrance, a lower side shop, and a taller plant room. Test the shape against the base before committing to the elaborate roof. A shallow facade gives you much of the same visual effect with fewer hidden surfaces to finish.
Place paper circles where the large pots and tree will stand. Leave a clear route from the fence opening to the steps, and check that the door would have room to function if it were real. Move the cart away from that route. This little planning exercise prevents the familiar situation in which your finest plant display blocks the only entrance.
Transfer the final outline to the base and seal or paint its exposed edge with a compatible finish. Let it dry flat. Keep the roof and upper walls removable during construction so you can reach the window backs and any optional lighting. Do not glue loose landscape materials down yet.

2. Assemble pale walls and warm timber frames
Cut the wall openings before adding trim. Build each wall flat, with internal bracing where thin card could bow. A double layer of card with staggered joints is an economical alternative to a fully wooden shell. Test the assembled corners without glue, then join them with a thin, controlled adhesive layer and support them square while they dry.
Paint the light wall panels before attaching the darker strips. For a warm wood effect, start with an even brown base and add a restrained darker wash to a test piece. The aim is a readable frame, not deep artificial cracks on every beam. Let each coat dry as directed before handling or gluing. A wet palette can help you keep small acrylic mixtures workable while you repeat the same timber color across separate pieces.
Keep your favorite acrylic mixes close at hand with The Army Painter Wet Palette. It’s a useful workbench companion for those satisfying sessions spent painting one tiny detail after another.

Cut repeated window bars against the same paper template so the spacing stays consistent. Add the clear glazing from behind after painting. Keep glue away from the visible panes, and test it on a scrap of the same plastic first. A simple rectangular upper window is an entirely respectable substitute for the ornate fanlight.

3. Layer the roof without overloading it
Make the main roof as a lightweight card shell supported by ribs. Curve only the eave edges gently; avoid forcing a thick sheet into a shape that will spring apart. Start with a plain pitched roof if curved work is new to you, then add a separate decorative gable to suggest the reference’s central flourish.
Lay narrow card strips from the eaves upward so each row overlaps the one below. A few fine raised strips can suggest tile joints without sculpting every tile. Keep the same row spacing across adjoining sections, and test the fit of the lower roof before adding the upper one. Paint the roof charcoal, then lightly pick out a few edges with a softer gray.

Apply moss-like scenic material sparingly after the roof is dry. Leave the perimeter, ridge, and tile pattern readable. A few green patches give this storybook roof a lovely sense of time passing. Avoid heavy wet glue that could distort a card shell.
Bring fresh texture to your little landscapes with Woodland Scenics Light Green Foliage F51. It’s a useful addition to a scenery collection for softening garden edges and building up planted corners.

4. Add the balcony and striped awnings
Build the balcony as a separate, shallow platform with a simple rail. Use a paper spacing guide for the uprights, and check that the horizontal pieces meet the posts neatly. Attach it to solid wall structure rather than relying on delicate window bars. Support it while the adhesive cures before placing any pots on it.
For the awnings, test thin cotton and painted paper side by side. Paper is easier to control at a small scale; cotton gives a softer edge but may need careful stiffening with a suitable fabric product. Paint narrow muted-red stripes on an ivory ground, allow the paint to dry, then shape the awning over a removable card former.
Use a tiny rolled edge or shallow scallops for the valance. Keep all awnings at a consistent projection, leaving the entrance canopy visually separate. A repeated striped fabric is enough to introduce the French-inspired shopfront note, even if you simplify the rest of the facade.

5. Make the pots, plants, and nursery shelves
Arrange empty pots first. Mix a few heights, but keep their overall scale believable beside the door and balcony rail. Ready-made miniature terracotta pots save time; simple tapered containers can also be shaped from air-dry clay around a small removable former. Follow the clay maker’s drying instructions, and finish the pots only after they are dry throughout. For a ceramic-like accent, test a compatible gloss varnish on a spare painted pot and apply thin coats according to the product directions. Keep the soil and foliage matte so the little glazed container has something to contrast with.
A little shine can make a miniature detail catch the eye. Vallejo Gloss Varnish 70.510 is a handy finishing addition for painted pieces that deserve a polished touch.

Fill deep pots with a lightweight plug so you need only a shallow surface layer. Paint that surface a dark soil color, then insert paper stems or fine wire stems with carefully covered ends. Keep leaves thin, vary their angles, and use several related greens rather than one bright shade. Scenic foliage can supply a fine background texture, while loose miniature leaves work as a restrained scatter around pot groups. Match their apparent size to the plants rather than using every piece in the package. Make small flower clusters separately before planting them. Ready-made mini flowers and vases are another optional starting point; check their size against your proposed door and shelf dimensions before selecting them.
A scattering of miniature leaves can give a scene the feeling of a season. Warmtree’s scenic leaves are lovely little finishing touches for garden paths, woodland corners and the ground beneath a tiny tree.

Build nursery shelves from narrow wood strips and test the pot arrangement without glue. Set taller plants towards the back, keep the middle shelf partly visible, and repeat one flower color upstairs. Add the two blue pots as your story detail. They should feel like part of a working collection, rather than a pair of trophies.

6. Finish the courtyard, fence, and gentle glow
Paint the ground beneath the gravel a related pale earth color so gaps do not show as raw board. Apply fine scenic gravel in thin areas of suitable glue, keeping the doorway route visible. Let it set fully before tipping away loose grains. Add planting at the edges in small clusters, leaving sections of the ground open.
Construct the fence in short sections on a flat template, then curve the arrangement around the base rather than bending a finished rigid rail. Keep posts vertical and vary the plants behind them. A little cart can be a simple box with two visible wheels; the wheels only need to suggest function if the model will remain a static display.
For optional light, use a ready-made low-voltage LED system exactly as its maker directs. Test the complete set before installation, route wires through accessible channels, and keep the battery pack reachable. Do not improvise mains wiring or cover electrical parts with wet glue. Use translucent shades to soften visible points of light, without enclosing components in ways the manufacturer prohibits.

7. Photograph the miniature plant nursery
Set the model on a stable surface with a quiet backdrop behind it. A slightly raised three-quarter view shows the roof layers and courtyard while keeping the scene unmistakably miniature. Leave a small amount of space around the base; cropping every edge away can make the building harder to understand.
Place one soft light to the side and use a white card on the opposite side to lift the shadows. If you have working lanterns, lower the room light gradually rather than plunging the entire scene into darkness. Check that the ivory walls remain ivory and that the little windows retain detail instead of becoming featureless orange squares.
Take a whole-model view, then move closer for the window grid, awning, and plant shelf. Support the camera or phone, and tap or select focus on the important detail. Turn the model or adjust the light if the glazing catches a distracting reflection. A photograph will also reveal stray glue and leaning posts with an enthusiasm that feels slightly personal.

Small fixes that make a difference
Bowing walls: stop adding detail and reinforce the back with flat bracing. Use less moisture on the next panel, and test paint on the same card before coating a large area.
Cloudy windows: test adhesive and clear finish on scrap glazing. Keep paint, sprays, and glue off the visible panes; replace an affected pane before the roof closes access.
A heavy-looking roof: reduce the thickness of trim and remove some moss. A clear silhouette matters more than the number of details attached to it.
Plants that merge into one blob: separate the clusters, change leaf shapes, and allow dark gaps between pots. Repeat a few colors, but avoid making every plant identical.
Harsh lanterns: first adjust your exposure and room lighting. If the system permits it, use a suitable diffuser or a lower-brightness ready-made light rather than modifying electrical components.
Closing — Until Next Time in the Small World
I like the idea that a building can hold the memory of more than one place. This nursery brings together the Kyoto architecture I fell for, the French influence I noticed, and a quantity of plants that feels entirely reasonable to me. Lucie and Emiko have left room for one more pot; I suspect most of us would do the same.
Would you keep the striped awnings, fill the balcony with flowers, or simplify the roof and give the garden even more room? Tell me which detail you would make first, and share your own creations with #smallworldminiatures. You can join the newsletter here on the site for more tiny-world inspiration and explore the online shop for your next project.








Comments