



The House That Misplaced Its Shadows: A Surreal Halloween Miniature

First Impressions in Miniature
Some houses need a fresh coat of paint. This one appears to have released its paint into the atmosphere, where it has developed opinions. Red and gold ribbons stream from the walls, glowing windows climb through pointed arches, and tiny creatures gather outside as though the evening meeting has just become interesting.
I love the confidence of this surreal Halloween miniature. Its sober architectural framework gives all that impossible movement somewhere to land. Slate-blue walls and pale trim keep the hot pink, orange and yellow from swallowing the building. You can still follow a staircase, find a doorway and imagine stepping inside, although I would leave a forwarding address.
Below, we’ll look at the details that make the scene work, then build an inspired version using a shallow card façade, layered trim, lightweight sculpted ornaments and optional low-voltage lighting. A single doorway makes a satisfying smaller version.
A ready-made fairy door can be a starting point for a simpler fantasy portal; check its scale before designing the surrounding wall.
The purchased alternatives below use Amazon affiliate links; if you buy through them, it helps fund this tiny world. As an Amazon Associate I earn from qualifying purchases.

Miniature Backstory — The Tiny Tale
Every October, the House of Borrowed Shadows held an inspection. Its caretaker, a small red creature named Pip, checked the door hinges, counted the teaspoons and asked each shadow to stand beside its proper object. Usually, the shadows behaved. The chairs were particularly reliable.
This year, the tallest window’s shadow wanted a holiday. It slipped through a keyhole, curled into a bright ribbon and sailed across the façade. Three others followed. By sunset, the house looked as though somebody had opened a very expensive box of escaped scarves.
Pip rang the brass dinner bell. The shadows ignored him. He announced an emergency meeting. The shadows performed a complicated loop over the front steps. Finally, he put a single chair beside the door and declared that any shadow returning before supper could choose the dessert.

That brought them down immediately. Shadows, it turned out, had strong feelings about custard.
The trouble was that the house had grown rather fond of its new decorations. The highest ribbon warmed the blue wall beautifully; another made the entrance feel important. Pip considered the matter over a spoonful of dessert, then wrote a new rule: shadows could remain outdoors provided they stopped blocking the windows.
The house settled into a contented glow. Pip left the little chair outside as a permanent negotiating table. In the picture, look for the small furniture near the lower-left doorway. I like imagining that every serious discussion here begins with someone asking who brought the pudding.
A Guided Tour of the Build
A tall window with somewhere to look
The narrow pale arch near the center rises above the lower entrance, giving the eye a quiet vertical route through the busy scene. Its nested outlines create depth before you notice the little round red ornament above it. Warm color behind the opening makes the frame seem cooler and more substantial. The contrast carries more weight than another handful of decorations would.

Ribbons that refuse to sit still
The long orange and magenta forms sweep away from the architecture in different directions. Their broad bases and tapering tips make them read as sculptural ribbons rather than random wires. Some curl; others split or stretch. Darker grooves run along their lengths, helping the bright edges remain separate from the glowing windows behind them.

The doorstep brings us back to scale
At pavement level, chairs, small tables, vessels and peculiar residents make the towering building feel inhabitable. The broad gray steps give these tiny objects a stable visual platform. I especially like the pause created by the open entrance: amid all those outward-moving shapes, one dark threshold invites you inward. Keep that breathing room when arranging your own version.

A little metallic accent can distinguish a vessel rim or tiny knob from the painted wall. Antique-gold finishing wax is an optional alternative to metallic paint: test compatibility, follow its handling instructions and apply sparingly. The banner shows styling inspiration, not this project or a tested result.

Inspirations — From the Big World to the Small
Leonora Carrington’s surreal worlds offer a useful way into this scene. MoMA’s collection includes her paintings Green Tea and And Then We Saw the Daughter of the Minotaur, works in which unusual beings and dreamlike situations are treated with remarkable composure. That matter-of-fact strangeness is the connection I see here: an impossible resident can have an ordinary doorstep. This is an interpretive parallel, not a claim that Carrington designed this miniature.
The architecture also borrows a recognizable Gothic vocabulary. The V&A identifies pointed arches and richly colored glazing among the style’s characteristic features. Here, elongated openings create upward movement, while colored windows supply the glow. You can translate that relationship into card without attempting a historical reconstruction: repeat a pointed shape, recess the pane, and let the frame catch a pale edge highlight.
A third useful reference is the theatrical unity of Baroque design. The V&A describes its combination of architecture, sculpture and painting into an expressive whole. The miniature echoes that idea when wall ornament becomes a moving-looking creature and a painted curve continues into a projecting ribbon. Give the separate techniques a shared palette so they feel like one imaginative place.

For your own concept board, gather deep blue and berry paint swatches, an ivory trim sample, warm metallic accents and separate sketches of arched openings and curling silhouettes. Rust-toned model paints can add restrained age around imagined metal fittings; test them first. Borrow shapes and colors rather than tracing a museum painting onto a dollhouse wall.
Artist Tips — Make Your Own Magic
The illustrations here are AI-generated, and this guide offers practical inspiration rather than an exact, tested reproduction of the pictured scene. Results vary with your materials and experience; your house may also negotiate different dessert arrangements. Start with a small test section, then expand the techniques you enjoy.
Planning your surreal Halloween miniature
A shallow façade is a manageable choice because most of the drama happens at the front. Consider an approximate 1:48 planning scale, with a roughly 18–22 cm-wide frontage, but treat that as a suggested project size rather than a measurement of the illustration. Choose the door and chair together, then size the windows and steps around them. The fantasy shapes can exaggerate; the everyday objects need a common scale.
This is an intermediate project because delicate silhouettes, layered openings and hidden light paths require planning. The essential techniques are card construction, relief layering, small-scale painting and careful assembly. Lighting and freestanding clay creatures are optional. A simpler first version uses one tall panel, three windows and two broad ribbon ornaments.

Supplies
• Structure: reuse clean, flat packaging card for templates and small details; choose dense craft chipboard or thin basswood for a sturdier façade. Use a stable board base and small triangular corner braces.
• Decoration: reuse smooth paper and thin card for curling overlays. Polymer clay is an optional alternative for rounded ornaments, eyes and small creatures; select a clay suited to the intended thickness and follow its own instructions.
• Windows: reuse clean transparent packaging with smooth edges, or use clear craft sheet. Add tracing paper as a diffuser behind it and narrow card strips for frames.
• Color and assembly: use water-based acrylic paint, PVA craft glue for porous card joins, and an adhesive specifically compatible with any finished clay or plastic parts. A household ceramic dish can hold paint; a wet palette is optional.
• Detail and tools: reuse plain beads and clean thread for small knobs and loops. Add a hobby knife, scissors, blunt sculpting tool, tweezers and fine brushes. Protect the work surface and keep blades capped when idle.
• Optional lighting: choose a complete low-voltage miniature LED set with its matched power supply, accessible switch and battery holder. No mains wiring, real candles or heated flame effects belong in this build.

Set aside one small scrap of each material as a test strip. Try the paint, adhesive and finish on those scraps first, including clear plastic. That modest rehearsal is much easier to redo than a finished façade with a cloudy window and a permanently attached thumbprint.
1. Design the rhythm before the decoration
Draw a simple front elevation on scrap paper: a tall center panel, a lower side panel and a slightly taller offset block. Mark the door, major windows and the point where each ribbon will attach. Leave open wall areas between ornaments so the finished view has places to rest.
Cut paper silhouettes and stand them against temporary supports. Look from your intended viewing angle, not only straight down at the table. Check that the highest ribbon will fit your display space and that you can carry the base without touching its tips. Keep the first mock-up plain; decorative color can hide awkward proportions.
Trace the approved templates onto your chosen board. Make the light-access route part of the plan now if using LEDs. For an easier version, flatten the projecting ribbons into relief shapes that sit close to the wall. You still get movement, with fewer fragile parts to protect.

2. Build a shallow shell and steady steps
Cut the wall openings while each panel lies flat. Use several light passes with a sharp hobby blade on a suitable protected surface, keeping your other hand outside the cutting path. Join the walls to short side returns, then add triangular card braces inside corners. Dry-fit everything before gluing.
Keep the back removable rather than sealing it immediately. A shallow rear box gives diffusers and optional lights space to sit without demanding furnished rooms. Spread PVA sparingly on porous joins, support the assembly square, and let the adhesive dry according to its instructions before adding weight.
Build the steps from equal layers of card with consistent tread depth. Wrap exposed corrugated edges in thin paper or use dense board instead. Attach the shell and steps to the base once stable. Test the assembly with a gentle lift of the base; nothing should depend on a decorative ribbon to stay upright.

3. Layer arches and recess the windows
Make each pale arch from two or three nested card shapes rather than one thick, difficult carving. Cut the largest outline first, then smaller rings that leave a visible border when stacked. Try the pieces dry to make sure the opening stays clear. Add short straight strips beneath the curves where the design needs a column-like edge.
Paint the frames separately, allowing each coat to dry. Cut clear glazing slightly larger than the opening and attach it from behind with an adhesive intended for the chosen plastic. Keep glue away from the visible pane. Place tracing paper farther behind it as a separate diffuser; test that it does not touch the light component.
Use painted paper behind an unlit window if wiring feels unnecessary. A warm orange center surrounded by darker red can suggest depth even without illumination. For more pane treatments, see the miniature stained-glass guide.

A comfortable work light helps when aligning these small frames. A magnifying lamp is an optional bench aid, not something to install inside the model. You should be able to see a thin glue line without moving your face toward a sharp tool.

4. Shape the ribbons as separate components
For the simplest lightweight option, cut broad tapered ribbons from thin card and curve them around a smooth, unmarked handle. Layer a narrower strip along the center to suggest a raised ridge. Keep the attachment end wide and the outer tip comfortably thick. A sharply pointed silhouette can be represented with paint rather than a needle-like physical end.
For rounded forms, shape polymer clay on a manufacturer-approved work surface and bake the pieces separately from the card building. Use the exact clay package’s temperature, thickness guidance and curing instructions; different products are not interchangeable. Never put the assembled façade, unknown plastics, batteries or LEDs in an oven. Allow baked pieces to cool fully before handling or finishing.
Dry-fit the cooled ornaments against the façade and choose at least two discreet contact points for a long form where possible. Use a compatible adhesive and support the piece until that adhesive has cured. Keep the longest ribbons removable if you expect to transport the model.

5. Paint the glow and the quiet areas
Begin with matte dark blue, muted plum and warm ochre wall areas. Work on one panel at a time and let it dry before painting neighboring trim. Add a thin darker wash into recesses, wiping excess from the raised surfaces before it settles into a large stain. Test dilution on scrap rather than relying on a fixed recipe for every paint.
Paint the ribbons from a deep red or magenta base toward orange and pale yellow ridges. Keep the lightest color narrow. A white stripe everywhere will flatten the forms and compete with the windows. Add a little reflected warm color to nearby trim only where the imagined light would reach it.
Use a nearly dry brush to catch the edges of pale arches and steps. Keep most wall surfaces matte; reserve compatible satin or gloss finish for a few jewel-like eyes or vessels. Follow the paint and finish labels, and let each layer dry before masking, glazing or attaching another component.

A wet palette can help organize the small transitions between berry red, orange and yellow while you work. Keep the colors separated enough to see the progression, and close the palette when taking a break. You do not need an enormous range of premixed shades to give one ribbon convincing depth.

6. Add the peculiar residents and furniture
Give the scene a few modest scale anchors: a chair, a low table and two or three vessels. Fold a tiny chair from card strips, reinforce its underside, and leave it to dry before painting. Rolled paper sleeves with inset card bottoms make simple pots; beads can stand in for round vessels if their holes are disguised thoughtfully.
Build small fantasy creatures from simple shapes rather than attempting every limb in the reference. A curved body, a head and a broad, stable foot can carry plenty of personality. Make optional polymer-clay figures separately and cure them by their product instructions before assembly. For an easier alternative, use painted flat silhouettes attached discreetly to the background.
Arrange the figures temporarily. Keep their eyes and gestures directed toward a doorway or one another. Leave enough empty step and pavement to show the building’s scale. One slightly crooked chair can tell Pip’s whole story without filling every corner with objects.

7. Test the light, then finish the base
Test a complete low-voltage LED set before installing it and again before closing the back. Follow the supplier’s compatibility and placement instructions. Keep the battery holder accessible and protect wires from sharp edges and pinching. Do not bury the switch under scenery or alter the set’s electrical components.
Position warm lights behind the window diffusers and check from the front. Move a light or add a separate supported diffuser if a bright point is visible. Keep the exterior room light on during this test so you can see whether the miniature still reads when its glow is less dramatic.
Finish the base with painted card paving and a restrained scatter of fine model texture. Keep loose grit away from switches and light connections. Let all wet materials dry fully, then remove stray particles with a soft brush before the final arrangement. The entrance should remain a clear path, even if the residents have unusual anatomy.

8. Assemble the final silhouette
Place the tallest ornament first and check the view from both front corners. Add the shorter forms in a rhythm that leads toward the entrance. Avoid lining every tip up at the same height or allowing two bright curves to merge into one confusing shape.
Attach the lightweight pieces in stages, supporting each until its adhesive has cured. Add the small furniture last so you can still reach the main joins without knocking over a chair. Keep a removable part’s location obvious to yourself with a private diagram stored separately from the finished display.
Step away and photograph a quick test image. Look for a blocked window, a leaning wall or a large blank patch that feels accidental. Remove one unnecessary ornament before deciding to add another. The goal is a readable strange house, with enough room for the imagination to continue beyond its edges.

Photograph the house after dark, without losing it
Use a plain charcoal backdrop and a soft light from one side, then add a small white reflector opposite to recover shadow detail. Keep the model’s own lights lower than the brightest exterior highlight if you can, or adjust the surrounding light until the windows retain color rather than turning white.
Start around doorway height with a slight view of the side return and base. That angle makes the façade feel dimensional while preserving its handcrafted scale. Stabilize your phone or camera, use its timer, and compare a wider view with close-ups of the pale arch, ribbon grooves and tiny chair. Avoid artificial blur that erases the details you just made.

When the shadows misbehave
• A ribbon droops: shorten it, widen its base or change to a lighter card version. Do not ask a tiny glue spot to support a long lever.
• The walls bow: use denser board, add rear bracing and reduce excess wet adhesive. Let components dry supported before assembly.
• The windows show bright dots: reposition the LEDs and test a separate diffuser with safe clearance according to the light supplier’s guidance.
• The colors merge: restore a dark groove between neighboring shapes and reserve the palest highlight for a few raised edges.
• The scene feels crowded: remove an accessory near the entrance and leave an uninterrupted area of pavement. The eye needs a route into the story.
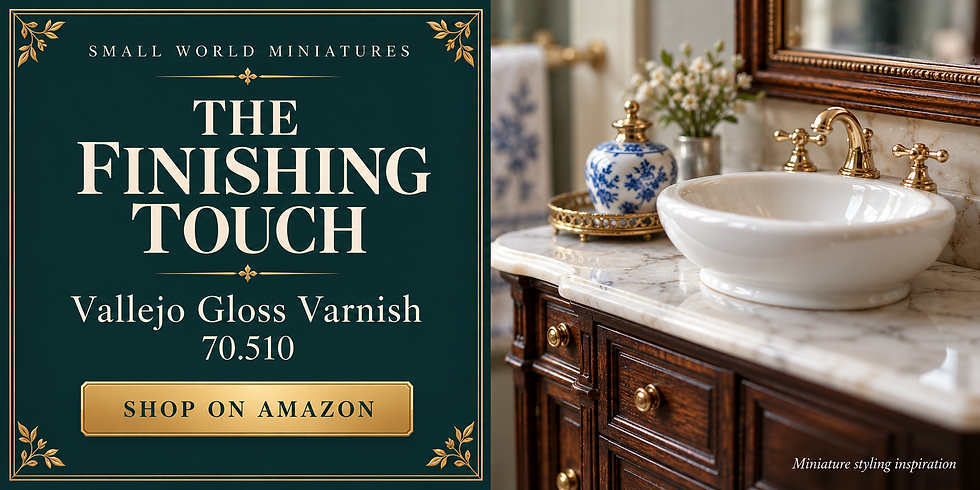
For a few glossy eyes or glazed-looking pots, use a compatible model varnish in thin coats. Keep it off most walls and test it on painted scraps first; the banner’s ceramic styling is inspiration, not a guaranteed finish.
Closing — Until Next Time in the Small World
I keep coming back to that small chair outside the door. Against all the glowing arches and runaway ribbons, it suggests someone still expects to sit down and sort things out. Pip may have lost control of the shadows, but at least he has retained control of dessert.
Which detail would you build first: the tall arch, the curling ornaments or one wonderfully odd resident? Tell me in the comments, and share your own version with #smallworldminiatures. For more tiny places and practical ideas, join the newsletter on the Small World Miniatures website and browse the online shop when you feel like adding another small curiosity to your world.








Comments