


Where the Ivy Moves: A Secret Garden Door Miniature

My Vision for This Small World
My Secret Garden door miniature gathers the whole invitation into a narrow opening between weathered green boards. Ivy softens the wall, pale roses tumble over the arch and a robin watches from nearby. I’ve pictured the entrance in a romantic, flower-filled interpretation, with warm light beyond the doorway giving the scene a gentle pull inward. The little gap leaves most of the garden hidden, which gives our imaginations quite a generous amount of room to wander.
Some links earn me a commission from qualifying purchases and help keep this tiny world growing. As an Amazon Associate I earn from qualifying purchases.
A miniature greenhouse is a lovely excuse to fill one more corner with plants. This DIY kit brings that little world under glass, ready to become a botanical favorite in your collection.

Miniature Backstory — The Tiny Tale
Mary has already found an old key in freshly disturbed earth while watching the robin. She keeps it with her, hoping it belongs to the garden that has been closed for ten years. Finding the lock proves harder. The wall is hidden behind thick ivy, and the key alone cannot tell her where to look.
The following day, after practicing with her new skipping rope, Mary stops along her favorite walk. The robin is there again. A gust of wind lifts loose ivy, and she catches sight of a round knob beneath the leaves. She pushes the trailing growth aside until her fingers find the iron lock.

The key fits. Mary needs both hands to turn it. She checks that nobody is coming, holds the ivy back and slowly pushes the door open. Then she slips inside and closes it behind her.
What waits there is quiet and wintry: brown grass, tangled rose branches and climbing stems with neither leaves nor flowers. Mary does not yet know how much is alive. The important change has happened in her: she wants to find out. The small opening in our model catches that threshold beautifully, even though its flowering plants look ahead to a more generous season.
A Guided Tour of the Build
The green door and its bright edge
The door carries the scene’s strongest contrast. Its green finish has worn into long brown streaks; dark bands and a ring handle add weight. Beside it, the narrow opening glows. I like that we cannot inspect the whole garden beyond. A small invitation often tells a better story than a complete inventory.

The stone-like arch gives the opening a firm outline against all the loose growth. Its joints and irregular surface remain legible beneath the foliage. The elaborate stone surround is a flourish of this illustration’s imagination.
Ivy, roses and the edge of the path
The planting gathers in different layers. Larger ivy leaves cling close to the wall, woody stems cross its face, and smaller flowers soften the paving. Cream and blush roses draw the eye upward, while purple-blue blossoms keep the lower edge from becoming a single green mass.

A useful detail is the amount of exposed wall. Small brick-red patches and pale stone still show between the plants. That lets us read the structure supporting the growth. The flower-filled version is lovely, but a source-literal discovery scene would need far fewer blossoms and much more bare rose wood.
The robin’s quiet corner
On the right, a robin stands beside a planted pot on a stone-like bench. The warm breast makes a tiny, clear accent against the greenery. The bench offers a horizontal pause after the arch’s upward movement. Nothing needs to leap or wave to make this corner feel occupied.

The large key leaning near the left side acts almost like a story emblem. For a believable scale build, I would make it smaller and keep its relationship to the lock sensible. You can retain the pictured emphasis if you prefer an illustrated, symbolic version—just make that a deliberate design choice.
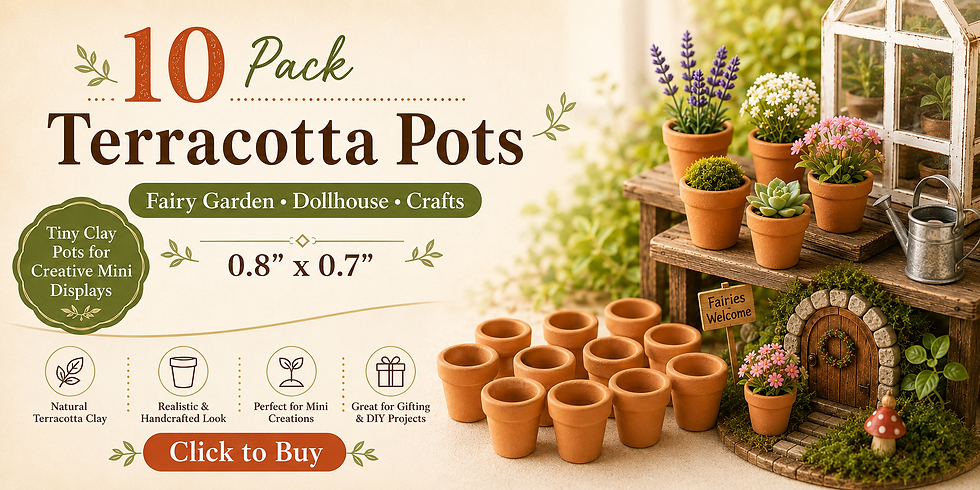
A few tiny terracotta pots can make a miniature garden feel wonderfully lived in. Gather them on a doorstep, tuck them beside a bench or fill a shelf with your favorite little plants.
Inspirations — From the Big World to the Small
The scene draws on Mary Lennox finding the hidden entrance in Chapters VII–IX of Frances Hodgson Burnett’s The Secret Garden. Its abundant flowers are a romantic interpretation: Mary’s first glimpse in the novel comes before the roses have leaves or blooms. Below, we’ll revisit that moment, examine the composition and plan an inspired tabletop build.
The novel supplies the essential design sequence: concealment, a brief reveal and a threshold crossed. Ivy matters because it hides the entrance; the robin matters because Mary’s attention follows it; the key becomes useful only when she discovers the lock. Those relationships are more important than copying a particular film set.
For a real garden connection, Great Maytham Hall is worth exploring. The National Garden Scheme describes the walled garden’s link to Burnett and notes that its original secret gate was later bricked up. The present garden is a reference for enclosure and glimpsed space, not proof of the exact doorway in the novel or this illustration.

Two other visual traditions help organize the project: the practical masonry enclosure of an English walled garden and early twentieth-century British botanical book illustration. The first gives us a substantial wall and a restricted opening. The second suggests close observation of leaf shapes, a restrained palette and enough open paper—or exposed masonry—to let intricate growth breathe. The accompanying story illustration draws on that period’s ink-and-watercolor tradition.
If your interest is really in arranging tiny blossoms, the miniature flower guide offers a broader collection of approaches. For this doorway, a limited plant vocabulary will keep the opening readable.
Blossom Florists is made for anyone who can never walk past a flower shop without looking in. Its cheerful blooms and tiny shop details make a charming addition to a miniature collection.

Artist Tips — Make Your Own Magic
AI-assisted imagination opened this little garden door. Make the scene your own with scrap tests, dry fits and a few leafy experiments before committing the whole garden to glue.
Plan your Secret Garden door miniature
A suggested starting point is a 1:12 display on a roughly 24 × 18 cm base, with a door around 7 cm wide and 16 cm tall. These are planning choices, not measurements of the image. Keep the base deep enough for the open door, a short path and a narrow planted strip behind the wall. An indoor display is the intention; none of these materials is automatically weatherproof.
This is an intermediate project because an arch, layered foliage and small hardware need patient fitting. You can simplify it by fixing the door partly open, using purchased plants and omitting the bench. Choose either the blooming interpretation shown here or the novel’s winter-to-early-spring discovery before buying flowers.
Gather your supplies
Home and reclaimed materials: clean cereal-box card for templates and brick slips; a sound scrap-wood base; plain paper for leaves and flowers; small clean packaging scraps for paint tests; thread for fine stems. Avoid damp, crumbly or unknown treated wood.
Store-bought materials: thin basswood sheets or basswood strips for the door; firm chipboard for a laminated wall; PVA craft glue and wood glue for their appropriate joints; acrylic paints; acrylic modeling paste for stone-like texture; fine craft wire; paper leaves or model foliage; optional miniature pots and a small bird figurine. Use a ready-made wooden base if your reclaimed piece is uneven.

Tools: a sharp craft knife used on a protected cutting surface, scissors, fine brushes, tweezers, small clamps, needle-nose pliers, a pin vise and fine abrasive paper. Buy only what your version needs. Keep sharp offcuts and small parts away from children and pets; cut away from fingers and follow the chosen adhesive and finish instructions.
Give a little doorway or garden wall a romantic flourish with Aorvoras miniature rose vines. I love how a trailing stem can make even a simple corner feel like it has been growing for years.

1. Make a full-size paper plan
Draw the base, wall line, arch opening, door swing and bench footprint on scrap paper at your proposed model size. Cut a separate paper door and hinge it temporarily with tape. Swing it into the space behind the wall: the visible gap should stay open without colliding with the planting.
Make a second paper wall elevation. Decide where the arch ends and where thicker piers will support it. For the easiest build, use a solid wall panel with a cut-out opening rather than trying to stack tiny stones into a working arch. Check the arrangement from slightly above and from the front before cutting structural material.

Keep a little clean border around the base. It gives your fingers somewhere to hold the model during assembly and helps the finished scene read as a deliberate object rather than a piece of wall that wandered indoors.
2. Build a stable base and wall
Laminate two or more layers of chipboard to create a rigid wall, staggering any seams. Cut each opening before gluing the layers together. Use thin, even adhesive coverage and press flat between protective sheets and flat boards while it dries according to the product instructions.
Attach the wall to the base with a broad foot or small rear braces that later planting can conceal. Dry-fit the assembly first and check that it stands square. Add narrow side returns if needed for stiffness. Do not rely on decorative ivy to hold an unsupported wall upright. Allow the structural joints to set before adding wet surface materials.

A clean base edge frames all that deliberate weathering. Mask or protect it while painting the scene, then finish it separately. The contrast between tidy presentation and old-looking masonry is part of the appeal.
3. Give the wall its masonry skin
Cut thin card slips for the brick sections, varying their placement slightly while keeping courses coherent. Leave narrow mortar gaps. Build the arch surround from separate wedge-shaped card pieces over the solid wall; these are decorative facing blocks, not a load-bearing construction exercise.
For the stone-like areas, apply a thin coat of compatible acrylic modeling paste to test pieces first, then to the facing. Stipple gently rather than making deep craters. Keep paste out of the opening and let it dry fully before painting. Start with muted gray-beige, vary a few blocks and add a restrained pale dry-brush to the raised texture.

The wall should look old without looking uniformly dirty. Concentrate darker shading under projecting stones and near the ground. Leave some cleaner faces where light catches the arch. A few restrained marks will survive close-up photography better than a heavy black wash everywhere.
Individual miniature red bricks bring satisfying texture to tiny walls, paths and garden borders. They are a lovely detail to have on hand when your next little building calls for some character.

4. Make the door and small hardware
Cut basswood strips or score a thin sheet to suggest vertical boards. Glue two horizontal braces to the back and press the door flat while it dries. Test it in the opening before paint; leave a small visible clearance all around rather than forcing a tight fit that later coatings will close.
Paint a brown wood-like base, then apply thin green layers with an almost-dry brush, leaving selected streaks exposed. Make the dark straps from thin card and the ring handle from bent wire. Fix the door partly open for the simplest reliable result. A working hinge is optional and needs a second dry-fit after paint.

For a small key, bend a wire loop and add a short stem with a tiny card bit. Trim wire ends carefully and secure them so nothing sharp projects. Keep the key near the door as a symbolic clue, or place it in the lock for a closer reference to Mary’s discovery. Do not enlarge it by accident while shrinking everything else.
5. Lay the path and add the bench
Use thin irregular card pieces for paving, allowing a narrow route toward the opening. Glue them onto a prepared flat surface and vary their gray-brown paint tones after drying. Keep the threshold low enough that the fixed door clears it. Add soil-like texture only in planned planting pockets, not across the whole walkway.
Build an optional bench from a stiff card or wood seat with two broad supports. Give it the same tested stone-like finish as the arch, and glue it firmly to the base. Leave room for the bird and pot without making the seat crowded. A small empty space can make a miniature feel more convincing than another accessory.

The novel later describes stone seats and urns in garden alcoves. Our entrance-side bench borrows that sheltered atmosphere for an imagined place to pause, with just enough room for a pot and a robin who considers it his own.
A little garden deserves somewhere to sit and admire it. This rustic fairy-garden furniture brings an inviting touch to planted displays, from a quiet bench beneath the leaves to a tiny gathering around a table.

6. Build the ivy in branching layers
Attach fine wire or twisted paper stems to the wall, beginning with the larger routes and branching into thinner offshoots. Keep each stem visibly connected to a plausible growing point. Paint the stems before adding leaves, and let that layer dry so the greenery does not pick up brown fingerprints.
Add small paper ivy leaves or suitable model foliage in uneven groups. Check the chosen scenic adhesive’s instructions and test for darkening or shine. Keep a loose-looking curtain along one edge of the opening, but fasten every actual model part securely. Leave pockets of exposed masonry and a clear strip of daylight beside the door.

Bring a little lushness to your miniature landscapes with Woodland Scenics Light Green Foliage F51. Soft greenery around flowers, walls and garden edges can make a tiny scene feel wonderfully established.

7. Choose the season and place the clues
For the pictured blooming interpretation, make small paper roses in cream and blush and group them mainly above the opening. Add a few smaller blue-violet flowers lower down. For the discovery moment as written, omit the roses in flower, expose gray-brown stems and use muted ground colors with only sparse early growth.
Set pots on stable surfaces, not among unsupported leaves. Place a suitably scaled robin figurine where its feet contact the bench or wall, then secure it with a small amount of compatible adhesive. Check the model from your intended viewing angle before fixing the final plants. The bird should reward attention without competing with the bright doorway.

A little pruning is often the final design step. Remove anything that hides the handle, closes the gap or turns the base into an uninterrupted hedge. The garden’s secret depends on the opening remaining discoverable.
8. Photograph the threshold
Place the finished model on a quiet surface with a plain warm-gray or muted green backdrop. Use broad, diffused light from one side and a white card on the other to lift deep shadows. A separate reflected patch of light behind the opening can suggest a sunny garden without installing lighting inside the model.
Keep the viewpoint slightly elevated and outside the scene so the base edge stays visible. Take one complete composition, then move closer for the worn boards, leaf layers and robin. Avoid a light aimed straight at shiny glue or metallic hardware. Adjust the light rather than burying the texture under strong editing.

Support the camera or phone securely and use its timer when possible. Check that the arch, door edge and foreground paving are sharp enough to explain the craft. A softly blurred background is welcome; an unreadable model is less helpful. Photograph the setup before packing it away so you can repeat the light later.
Troubleshooting the little entrance
Wall leaning: add a broader rear brace or side return before decorating; allow the structural adhesive to cure.
Door scraping: remove a little material from the rubbing edge and retest before touching up paint.
Leaves looking oversized: reduce their size and mix in finer texture rather than adding more large leaves.
Glue shining through foliage: test a matte-drying scenic adhesive and use smaller amounts at contact points.
Opening disappearing: pull back the nearest stem and brighten the space beyond with reflected light.
A tiny door has a way of making you imagine who lives behind it. These fairy doors and windows bring that storybook charm to a garden display, with plenty of room for your imagination to furnish the rest.

Closing — Until Next Time in the Small World
I keep coming back to the moving ivy. Such a small shift gives Mary access to an entire hidden place, and that is a lovely design lesson for a miniature: leave something for the viewer to discover.
Would you build the quiet, leafless first-discovery version or this rose-covered interpretation? Tell me which detail you would keep, and share your own tiny thresholds with #smallworldminiatures. You can find more projects and the newsletter on Small World Miniatures, or browse the online shop for your next small-world idea.








Comments