


The Definitive Guide to Miniature Tile and Mosaic

A practical starting point for miniature tile
Miniature tile can transform a plain floor, a sink backsplash or a small tabletop without rebuilding the whole scene. This guide takes you from choosing materials to planning the grid, cutting pieces, solving corners and finishing the surface. Start with one sample panel and follow the route that suits your materials. Card, clay, ceramic and glass need different handling, but all benefit from a clear layout and a little patient testing.
Anavrin’s Amélie’s Macaron Pâtisserie pairs pastel architecture with a rooftop terrace, a delightful next project when a tiny kitchen has sparked your appetite for more.
As an Anavrin Associate I earn from qualifying purchases. Enter code EOUFQ5ZWKCSNGM for a 10% discount on select products!

How to use this miniature tile guide
Start with a sample panel rather than a whole dollhouse floor. A palm-sized board can teach you how your tile, adhesive, paint and finish behave together before a hundred tiny pieces are involved. Choose one surface first: a removable floor, a backsplash, a tabletop or a decorative wall panel. Then pick the simplest material that gives the appearance you want.
The guide follows a practical sequence: choose materials, plan the layout, prepare the base, make and place the tiles, finish the joints, then adjust the sheen. The later sections offer alternatives rather than extra steps you must add to every project. A paper mosaic does not need cement grout. A card floor can look convincing with painted joints. Real ceramic or glass pieces need their own suitable tools and adhesive system.
Anavrin’s Ikseon-Dong Hanok Bakery offers a warm little shop scene full of inviting details, a lovely companion project for readers who enjoy miniature interiors.

The images are AI-assisted teaching illustrations and design inspiration, not photographs of a physically tested build. Use the written instructions and product labels as the working reference; make a test piece when materials or dimensions change. These are indoor decorative miniatures, not waterproof surfaces, working kitchen installations or toys for young children. Tiny tiles have a remarkable talent for looking like sweets to the wrong audience.
Before the first tiny cut
Protect the work surface and keep a clear cutting area. Use a sharp craft blade only with a suitable cutting mat and stable straightedge; keep fingers out of the cutting path and cut away from yourself. Several light passes are easier to control than one forceful cut. Cap or retract the blade when it leaves your hand. Adults should handle blades, heating and brittle-tile cutting.
For this guide, pre-cut glass or ceramic mosaic pieces are the easy route. Cutting those materials introduces sharp shards and potentially hazardous dust. Do not substitute a craft knife for tile tools, dry-sand unknown ceramic glaze, or improvise a grinding setup on the kitchen table. Follow the tile and tool maker's directions, use the specified eye protection and dust controls, and collect fragments immediately. If you lack the correct equipment, switch to card or polymer clay.
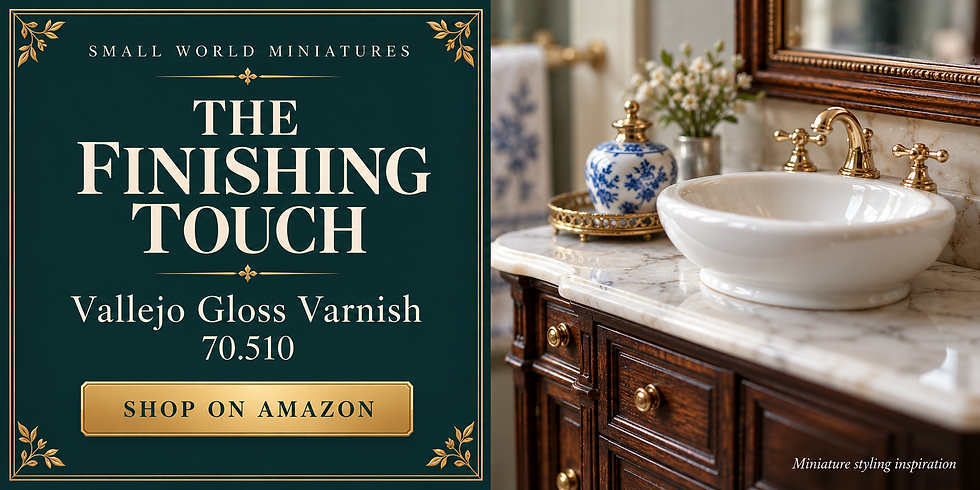
For a selective glazed effect, Vallejo Gloss Varnish 70.510 is an optional finishing product to explore. Test it on a spare tile made with your exact paint and material first.
Read adhesive, coating and grout labels before combining them. Ventilation, skin protection, mixing, curing and disposal requirements belong to the exact product, not to the attractive photograph on the bottle. Keep craft tools separate from food preparation. Do not heat a completed mixed-material assembly: paints, glue, plastic and foam may not belong in an oven. Keep pets away while working and store loose tesserae in closed containers.
Supplies for a small, sensible starting kit
For a first floor, gather a rigid removable base, scrap paper for templates, card or thin model sheet, a pencil, a cutting mat, a suitable straightedge, a craft knife, tweezers and a small flat brush. Add acrylic colors, an adhesive approved for the surfaces, and a compatible finish only if the sample needs it. Save matching offcuts for testing. A small tray keeps the tiles from touring the room. Useful comparison searches include cardstock, styrene sheets, acrylic craft and hobby paints, fine detail paintbrushes, PVA / white craft glue and gloss varnish. Links open Amazon searches; check compatibility.
For clay tiles, add polymer clay, an appropriate work surface, a roller, a clay blade and the curing equipment specified by the manufacturer. For a genuine ceramic or glass mosaic, use pre-cut pieces, a suitably rigid base and a compatible mosaic adhesive and joint treatment. These are separate material routes; there is no need to buy everything on the list.
Rolife’s Baking Kitchen gathers cabinets, a preparation island and baking details into a cheerful room-sized project.

Before ordering, check tile thickness as carefully as tile width. A beautiful floor that traps the door or raises the dining chairs above the skirting board needs a design adjustment. Allow for the base, adhesive and finish in the complete build-up. The kit suggestions throughout the guide are inspiration for furnished little scenes, while the product suggestions support specific techniques. Check each kit's actual contents before assuming that a pictured floor or tool is included.
1. Choose a tile material that suits the job
Card is a friendly starting point for indoor decorative floors. It is easy to color and cut, and its thinness helps in an already assembled room. Its weaknesses are exposed pale edges, moisture sensitivity and curling. Paint the base in the intended joint color, color the cut edges, and test every wet coating on a spare piece. Use simulated joints rather than flooding card with grout.
Thin styrene sheet offers crisp edges and consistent thickness. Select a thickness you can cut safely with the tools you have; tiny pieces should be supported while cutting. Not all glues bond plastic, and solvent products may affect paint or nearby foam. Test adhesion and surface preparation using the actual sheet and finish. Purchased embossed tile sheet can save cutting, but its fixed grid may dictate the room layout.
Rolife’s Farmhouse Kitchen brings a sink, stove and cabinetry together in a compact kitchen scene, with plenty of inspiration for coordinating a floor and backsplash.

Polymer clay gives more control over softly rounded edges, thickness and handmade variation. Make a few test tiles before producing a batch. Air-dry clay is a different material: its drying behavior and possible dimensional change depend on the product, so check the final dry size before committing to a pattern. Neither needs to imitate perfect factory ceramic.
Real ceramic and glass tesserae bring convincing weight and reflection, but may be too thick or coarse for a small scale. Reserve them for a stout tabletop, a display base or a larger-scale wall panel when appropriate. Let the material choice serve the miniature, not the other way around.

2. Draw the room before drawing the grid
Make a paper template that fits the actual room. Work around columns, an angled back wall, door openings and other fixed features. Mark the front edge and the face that points upward. Test the template in place before transferring it to a rigid base. A small asymmetry in a dollhouse room is much easier to find in paper than after the final row is glued.
Choose a proposed scale and convert the tile size deliberately. At 1:12, a 12-inch real-world tile becomes a 1-inch miniature tile; a 6-inch tile becomes half an inch. At 1:24, the 12-inch tile becomes half an inch. These are planning examples, not measurements of the cover image. Smaller tiles create a finer rhythm but add more cuts and joints.
Rolife’s Cozy Kitchen is another charming little kitchen to explore once you have found a tile palette you love.

Include the joint in the repeat. Ten tiles each 10 mm wide with nine 0.5 mm internal gaps span 104.5 mm, before any perimeter allowance. Draw both centerlines, then test two starts: a tile centered on the line and a joint centered on it. Choose the version that avoids skinny strips at important edges.
Place paper outlines of the sink, cabinets and furniture over the grid. Prioritize the exposed floor and doorway rather than centering a motif beneath a cupboard. Take a reference photo of the dry layout. The tiny planning meeting is now adjourned, and the glue may finally attend.

3. Prepare a removable, rigid foundation
A removable floor is easier to paint, tile and repair than a surface deep inside a finished room. Cut the base from a material appropriate to the scene and the proposed tile weight. Test it inside the room with the door open and closed. Leave the small clearance your particular room needs; do not wedge the insert tightly against every wall and expect paint to make it smaller.
Check flatness on a level surface. Seal or prime porous bases only with a treatment compatible with the later adhesive, and test that combination first. Coating one face of a thin board may distort it; follow the board and coating guidance rather than assuming more sealer solves every problem. A base that remains flexible is a poor partner for a brittle tile layer.
Mark the front edge underneath and transfer the centerlines to the visible face. Paint the intended joint color if you are using separated card tiles. For a grouted mosaic, prepare the base according to the selected system instead; a decorative paint layer may weaken the bond if the adhesive is not approved over it.
Build a test stack from base, glue and tile beside the door or cabinet plinth. Check its height with the furniture in position. Only then make the full panel. Keeping the substrate removable also lets you swap a cheerful summer kitchen floor for something moodier later without asking a tiny demolition crew to return.

4. Cut card tiles in repeatable batches
Start with a small batch of squares or rectangles. Mark parallel strips on the back of the card, keeping the first edge straight. Cut the strips on a suitable mat with a stable straightedge and light passes. Cross-cut each strip into tiles using the same marked spacing. Do not stack thick layers and force a blade through them: shifting layers produce a collection of almost-squares.
Compare several pieces edge to edge before cutting the whole sheet. Keep one accurately cut piece as a size reference. Sort noticeably small or skewed pieces into a separate pot for edge cuts or mosaic fragments. Minor variation can suit a rustic surface, but a formal checkerboard needs more consistency.
For paper-based tile experiments, a Scor-Buddy Eighths board can help you score repeatable parallel lines. Its grooves are spaced at one-eighth-inch intervals; it is not a cutting mat.

Color the exposed edges with a compatible paint or pencil. A white cut edge can interrupt a dark floor more than a slightly imperfect joint. Let the pieces dry flat, then test the glue and finish on a spare group. If paint makes the card curl, reduce moisture and try a different card or finish rather than pressing wet pieces straight into the finished floor.
For a printed pattern, test whether the ink smears under the proposed coating. Use licensed or original artwork, print at the planned size, and check the repeat before cutting. Decide whether the printed motif belongs to one tile or spans several. Number the layout on a separate paper map, not across the faces of the tiles.

5. Make polymer-clay tiles with quiet variation
Choose a polymer clay suitable for the desired thickness and follow its own preparation and curing directions. Condition a small amount, roll an even slab on an appropriate surface, and check consistency before cutting. The target is a family of tiles with similar thickness, not a perfectly engineered factory line. Keep a few extras for testing and replacements.
Cut the uncured slab into the planned shapes without dragging them out of square. Transfer pieces carefully to the approved baking surface and separate them as needed. A soft corner can suggest handmade ceramic; a deeply dented edge may become an unwanted pothole. Test a small batch before committing to the full floor.
Cure at the temperature and time specified for that exact clay and thickness. Sculpey's guidance calls for package instructions, an oven thermometer and ventilation; do not raise the temperature to hurry the process or use a microwave. Allow the pieces to cool before handling and painting. Do not bake the dollhouse base, glue or surrounding furnishings along with them.
Measure the cured pieces and rebuild a short dry row. The real batch, rather than the initial drawing, determines the final spacing. Use water-based acrylic paint only after a compatibility test, and choose a clay-compatible coating if a sheen is wanted. Try three related tones across the batch: the variation should read as glaze or fired color, not a tiled rainbow unless that is your plan.

6. Paint a repeat that survives tiny scale
Reduce the pattern to a few strong shapes. A blue dot, four short petals and a corner mark can become a convincing decorative tile when repeated. Test the motif at actual size, then look at it from the distance the model will normally be seen. A beautiful design under a magnifier may become a grey blur in the finished room.
Begin with a fully dry base color. Use a small pointed brush or a suitable fine paint pen after testing it on the same surface. Add the biggest shape first, then the smaller marks. Keep the amount of paint modest so the motif does not become a raised lump. Work in batches so the blue you mixed for the first row still belongs to the last row.
Arrange four tiles together before deciding the design is finished. Corner motifs can form a larger shape where the pieces meet, but only if their orientation stays consistent. Make an orientation sketch on the layout plan and keep the tiles in rows on a tray. A single rotated tile can look charmingly handmade or unmistakably wrong; decide which before the glue sets.
Keep one plain coordinating color for a border or awkward cut. It gives the eye somewhere to rest and makes finishing the perimeter easier. For a printed design, preserve the same discipline: check scale, orientation, ink stability and cut-edge color. The most elaborate pattern is not automatically the best one for a tiny kitchen.

7. Lay a straight grid without wandering rows
Dry-lay a cross through the center of the prepared base. Check the visible front edge, then inspect the opposite edge before adding adhesive. Use temporary spacers that suit the proposed joint width, and keep them consistent. The layout drawing should guide the tile grid; do not allow an irregular wall to steer every row slightly off course.
Choose an adhesive approved for the tile and base. For a porous card sample, a craft glue may be appropriate; Aleene's guidance recommends a thin coat on paper and testing first. Plastic, glass and sealed surfaces need their own compatible choice. Apply only enough for a small working area so you can position tiles without racing a drying skin.
Set the first few tiles along the reference line. Press them into an even plane without squeezing glue into all the joints. Continue in short rows, checking alignment from above and at a low angle. Remove stray adhesive while the product's instructions still permit safe cleanup. Do not push half the floor sideways to rescue one narrow gap.
After each small section, step back and compare the grid to the room template. Keep boundary cuts loose until the main field is stable. Let the adhesive reach its specified cure before grouting, coating or flexing the base. The quiet little pauses between rows are useful: they stop one tiny error from becoming a very confident diagonal.

8. Balance a checkerboard at the doorway
Choose two colors with enough contrast to read at miniature scale. Black and ivory are familiar, but navy and cream, terracotta and pale stone, or two muted greens can suit the room beautifully. Cut or select equally sized tiles and check their thickness together. A dark tile that sits higher will catch light differently and disturb the pattern.
Map the first two rows on paper. Alternate colors across the first row, then reverse the starting color in the next. Lay a small two-by-two block before extending the field. Check every new row against that block. A repeated color pair is easier to notice now than beneath a dining table in next week's photographs.
FIFIJOY’s Mediterranean Kitchen keeps the sun-washed kitchen mood going in a small framed scene.

Test both centered layouts at the main doorway. A balanced border can make unequal wall cuts less noticeable, while a strong strip across the threshold gives the floor a clear stopping point. Do not keep shrinking the joints to force a final full tile into an opening; trim the edge tile deliberately instead.
Glue in short sections, keeping the color sequence visible on the reference plan. Set aside matched spare tiles from both colors. When the floor is dry, add furniture outlines again and inspect the exposed rhythm. A small room often benefits from a simpler checkerboard than the larger pattern you originally imagined. You want the floor to welcome the furniture, not challenge it to a game.

9. Turn the grid into a diagonal floor
A diagonal arrangement can make a tiny floor feel lively, but the perimeter deserves extra planning. Draw the main centerlines first, then a diagonal reference through the chosen focal point. Dry-lay complete tiles along that line and extend a small section in both directions. Do not start cutting triangles until you have seen how the pattern meets every exposed edge.
Consider a plain border around the diagonal field. It creates a neat frame and gives the edge triangles a deliberate stopping line. Draw the inner border boundary on the base and calculate the field inside it. Keep the same tile size and joint spacing throughout; changing the spacing near a wall makes the skew more conspicuous.
Make paper templates for the perimeter pieces. Transfer each shape to the correct color or motif, preserving orientation. Cut slightly outside the line when the material permits careful final trimming, then test-fit. With brittle tile, use pre-cut shapes or appropriate tools rather than attempting knife cuts.
Lay the central field first and work toward the boundaries. Fit the edge pieces in their recorded order, then complete the border. Check the floor from the intended viewing position before fixing the final section. A diagonal design does not require a tilted camera: a straight-on photograph or an overhead planning shot is often the clearest way to show that the joints themselves are deliberate.

10. Give borders a deliberate corner
A border is a miniature picture frame for the floor. Decide its width before laying the field, and choose whether the corners will be mitred, squared or finished with a small corner block. Mixing those solutions without a plan can make the border look repaired rather than designed. A plain corner square is often the most forgiving choice.
For a card border, cut consistent strips, then make paper corner patterns. On a square corner, a mitre is commonly formed by two complementary 45-degree cuts, but an irregular room needs its actual angle copied rather than assumed. Dry-fit the two pieces and inspect both their meeting line and their alignment with the field.
If the border carries a repeating motif, plan where the repeat begins and ends. Centering the pattern along each visible side may require a deliberate plain transition at the corner. Do not stretch the printed design to make it fit. A small solid-color square can make the pause look intentional and keep the motif from being chopped into unreadable fragments.
Keep all border parts dry until the field layout is confirmed. Glue them in an order that lets you check the final corner without forcing a short piece into place. Color cut edges before installation. Finish the outside edge with a tidy strip or threshold when appropriate, while leaving any clearance needed to remove the floor insert from the room.

11. Solve awkward corners with paper first
For an alcove, column or crooked back corner, make the problem smaller before making the tile smaller. Press a scrap-paper template into the area, mark the obstructions and trim the paper until it sits comfortably. Add an arrow showing which side faces the room. Keep the original floor template nearby so a mirrored shape does not sneak into the cutting pile.
Transfer the paper shape to a spare tile and test it without glue. For a fragile L-shaped piece, consider dividing the shape into two rectangles at a natural grout line. The seam can be less conspicuous than a cracked inner corner, especially behind a cabinet leg. Where possible, put the smaller cut toward the wall and retain the strongest part at the visible edge.
For a curved object, make several small paper adjustments rather than one optimistic sweeping cut. A narrow plain infill band can sometimes bridge between the regular grid and the curve more neatly than a collection of tiny slivers. Keep the infill material and joint color consistent with the rest of the floor.
Do not force a tile against a column or use glue as a bulky filler for a badly fitting cut. Refine the fit, check the overall joint rhythm, then attach it. A skirting board may conceal a modest perimeter gap, but it should not be asked to disguise a raised tile that prevents the furniture sitting level.

12. Build a backsplash flat, then install it
A removable backsplash panel brings the work into the light. Make a paper template of the wall area between the countertop and shelf or upper cabinets. Mark the sink centerline, side boundaries and any miniature fittings. For a decorative socket or switch, mark its position before tiling; this guide does not cover functional electrical installation.
Transfer the template to a thin rigid panel and dry-fit it behind the countertop. Check the complete thickness so the panel does not push the sink or cabinets forward. Draw a level baseline and test the tile layout around the central feature. A centered motif behind the tap can be effective, but keep enough plain area for the hardware to remain readable.
Peta’s Kitchen from FIFIJOY is a cozy, detail-filled alternative for readers who would rather begin with a complete miniature kit.

Cut openings before attaching the tiles when possible. Work from the known baseline rather than the possibly uneven upper edge of a handmade countertop. Tile and finish the panel flat, keeping adhesive out of the installation edges. Let the full assembly cure before lifting it upright or fitting it into the room. For an adjoining textured wall, the miniature stucco walls guide offers a complementary finish without competing with the tile pattern.
At an inside corner, decide which panel runs through and which meets it. A consistent narrow joint or trim strip is cleaner than overlapping thick tile layers unexpectedly. Test both panels together before gluing either in place. Keep the room's verticals straight and the mosaic scale believable; tiny kitchens can be wonderfully ornate without needing a wall that appears to bend around the sink.

13. Arrange a mosaic from the center outward
Choose a small, readable design for the first mosaic: a flower, sunburst, leaf or simple geometric medallion. Sketch its outline at the final size. Limit the palette and sort the tesserae by color, size and thickness before beginning. A shallow divided tray helps prevent the warm cream pieces from disappearing into the white ones.
Dry-lay the focal shape first, then its outline, then the background. In a radial design, check the spacing around the center repeatedly rather than completing one crowded quarter and hoping the last petal fits. Rotate individual pieces to follow the curve, but keep the gaps reasonably consistent. Leave breathing room around the design so its outline stays clear.
FIFIJOY’s Santorini Sun Coffee pairs a blue-and-white café with a little outdoor space, a cheerful setting for dreaming up patterned surfaces.

For a direct method, transfer small groups from the dry layout to a compatible adhesive on the prepared base. Work in manageable areas and preserve the plan beside you. Match the top surfaces as well as the joints. Large height differences can be a deliberate texture, but they complicate cleaning and grouting.
Use pre-cut ceramic or glass tesserae where their scale suits the piece. Card and clay fragments are alternatives for a lighter decorative model, with a different joint treatment. Do not combine all those materials under one wet-grout assumption. Once the mosaic is secure, photograph it before filling the joints; the before-and-after comparison is a useful record of how much the joint color changes the pattern.

14. Make a lightweight paper mosaic
A paper mosaic is a good way to explore color without the weight or cutting demands of glass. Paint or print several sheets in related colors, let them dry, then cut small irregular shapes. Keep the shapes large enough to place comfortably with tweezers. Tiny does not have to mean every piece is the size of a speck of pepper.
Paint a rigid card backing in the intended joint color and mark a faint outline of the design. Lay the main shapes without glue, then fill around them. Use the negative space between the pieces to define the pattern. Consistent gaps make the surface read as mosaic rather than confetti, even when the fragments are intentionally irregular.
Attach the pieces with a thin application of a suitable paper adhesive, checking the sample for curling or color bleed. Work from the focal shape toward the background and keep the backing flat while it dries. Color any conspicuous pale cut edges. Do not add wet cement grout: the exposed painted backing already supplies the joint effect.
Test a compatible protective coating on an offcut before finishing. A modest sheen can suggest glazed tesserae, while a matte finish suits a faded mural. Avoid pooling finish in the gaps or hiding the shape boundaries under a thick glossy film. Frame the finished panel, add it to a tiny tabletop, or use it as a removable wall insert. It is a decorative paper interpretation, not a washable tiled surface.

15. Test real grout before touching the model
Real grout is an option for a compatible ceramic or glass mosaic, not a compulsory final step. Check that the selected product permits the tile material, substrate and actual joint width. Full-size installation products may specify joints wider than your miniature design. If the system does not fit, change the design or use a simulated joint rather than forcing the product into an unsuitable gap.
Build a separate sample with the same tile, adhesive and base. Let the adhesive cure as directed, then grout the sample using the manufacturer's mixing, working and cleanup instructions. Some sensitive surfaces can stain, dull or scratch; MAPEI specifically recommends testing suitability before grouting. A sealer is not a universal guarantee against damage.
Anavrin’s Cabin Cafe brings a warm woodland café to the worktable, with a bear-flanked sign, glowing windows and a tiny pastry counter.

For a product-approved method, press the grout into the joints in small areas and remove excess with the recommended tool. Clean on the specified schedule, using the minimum water and technique directed for that product. Wiping diagonally across the grid can help avoid following and excavating the joints, but the exact product instructions take priority. Do not soak a miniature base to chase one stubborn haze patch.
Allow the sample to reach its stated cure, then inspect it for scratches, staining, loose tiles and warping. Only use the successful combination on the model. Keep grout out of sink details, cabinet grooves and removable-panel edges. Dispose of waste as directed rather than washing a gritty slurry down a household drain.

16. Paint the joints instead of filling them
For a card floor, the simplest grout effect begins underneath the tiles. Paint the prepared base in a soft joint color and let it dry. Warm grey, muted cream or a deeper version of the tile color usually reads more gently than stark black. Test a short row; the visible gap may look stronger once the tiles are in place.
Glue the tiles with consistent spaces between them, using the dry layout as a guide. Keep the adhesive below the face so it does not create shiny patches across the painted joints. Remove stray glue promptly using a method safe for the materials. Touch up the base color only after the adhesive is secure enough that the tiles will not move.
For an embossed tile sheet, paint the recessed lines first if that suits the material, then carefully apply the tile-face color. Alternatively, use a controlled wash only after a test proves it will flow into the recesses without staining the faces. Wipe or lift excess according to the paint and surface involved; do not assume that every acrylic layer can be reactivated safely.
Keep the joint treatment subordinate to the pattern. A little irregularity can suggest an old floor, but a thick dark outline around every tiny square can resemble a cartoon grid. Leave the joints matte and add any glazed effect to the tile faces separately. That difference in reflection often does more for realism than adding more pigment.

17. Create a glazed look without losing the joints
A glazed appearance comes from controlled reflection, not simply the thickest clear coat available. Finish a test tile first and view it beside a matte sample. Decide whether the room needs a high gloss, a soft satin or only occasional glossy accents. A backsplash can carry more shine than a weathered floor while still belonging to the same color story.
Choose a coating compatible with the actual paint and tile material. Polymer clay needs a suitable clay finish; a varnish intended for acrylic paintings is not automatically suitable for every plastic. Follow the manufacturer's drying and curing guidance before handling or adding another layer. For example, Liquitex's gloss-varnish instructions favor thin coats rather than a single heavy application; that is guidance for that product, not a universal timing recipe.
FIFIJOY’s French Corner Bakery makes a bright little shopfront project for anyone tempted to carry their tile experiments into a street scene.

Use a small brush to coat the tile faces without filling the joints. Watch the lower edge for pooling and work on a horizontal panel when possible. Let each coat settle and dry as directed instead of brushing back through a partially drying surface. A thick rounded puddle can make a miniature tile resemble a boiled sweet.
After the sample cures, inspect it in raking light for cloudiness, tackiness and brush marks. If the coating remains sticky or reacts with the surface, stop and change the system. A decorative glossy finish does not turn a paper backsplash into a waterproof miniature sink surround. Keep the finished scene dry and clean it gently.

18. Repair one tile without rebuilding the room
Keep spare pieces from the original batch, along with a note of the paint colors, joint color and finish. Store them in a labeled container. A replacement made months later may differ slightly, which can be charming in an old floor but frustrating in a formal checkerboard. A few saved tiles are inexpensive insurance against the enthusiastic elbow.
Before removing a damaged tile, identify what failed. A loose tile suggests an adhesion or substrate problem; a warped base will not be cured by adding more glue to the top. If the surrounding area is sound, isolate the damaged piece carefully and lift it using a method appropriate to the material and adhesive. Avoid levering against adjacent fragile edges.
Clean the local recess without gouging the base. Dry-fit the replacement and compare its height, orientation and edge gaps. Apply a compatible adhesive in a controlled amount, seat the tile, and let it cure before touching up the joints or sheen. If the original finish changes color when recoated, test a broader blending approach on a spare section first.
For a misaligned pattern caught while the adhesive is still workable, reposition the smallest affected group rather than dragging the whole field. For a cured mistake, decide whether a deliberate replacement or a visible repair suits the scene. Old miniature rooms can wear a little history beautifully, but the story should be a choice rather than an excuse for a door that will no longer open.

Three small projects that put the techniques together
For a first project, make a removable checkerboard floor from card. Use the paper template, painted-joint base and short-row method. Finish it with a plain threshold and two saved replacement tiles. This keeps the material system simple while teaching alignment, edge cuts and color sequence.
For a second project, try a backsplash panel with one central painted motif and a plain border. Build it flat, test it behind the sink, and apply a compatible sheen to selected tile faces. Keep the cabinet and shelf positions on the template so the design stays visible after installation.
For a third project, make a framed mosaic tabletop or wall panel. Choose paper for a light decorative version or pre-cut ceramic pieces for a base that can support them. Follow the appropriate joint route rather than combining techniques at random. Each of these projects can become a sample library entry: label the materials underneath and take a clear photograph before it disappears into a furnished room.
For more kitchen-building ideas, Creating Dolls’ House Kitchens in 1/12th Scale is a relevant reference to explore alongside your tile samples.

A few useful answers before the glue lid goes on
Do miniature tiles need real grout? No. Card tiles over a painted base and embossed sheets with painted recesses can create convincing joints without wet grout. Choose the method that matches the material and the effect you want.
Can I use the same floor pattern at every scale? You can adapt the idea, but resize the tile, motif, joint and border together. Check the smallest detail at actual viewing size. A dense pattern may need fewer colors or a simpler repeat when reduced.
What if the room is not square? Keep the main field aligned to the most important visible edge and solve the perimeter with templates, planned cuts or a border. Do not gradually skew every row to chase a crooked wall.
Why are my tiles curling or lifting? Possible causes include excess moisture, an unsuitable adhesive, a flexible base or an incompatible coating. Make a small test with one variable changed at a time. More glue is not a diagnosis.
Should every tile be glossy? Only if that suits the design. Contrast between quiet matte joints and selected glossy faces can suggest ceramic beautifully. A worn floor may need much less shine than a fresh backsplash.
Which technique would you try first: a crisp checkerboard, a patterned kitchen backsplash or a tiny mosaic medallion? Share your experiments with #smallworldminiatures. I would love to see the corner of your small world that gets a little extra color.








Comments