



The Nursery That Opens at Dusk: A Gothic Miniature Herb Shop

First Impressions in Miniature
Some plant shops send you home with care instructions. This one looks as though it might send the plant home with instructions about you. I love the confidence of this Gothic miniature herb shop: stained glass overhead, tiny bottles behind the counter, and a pavement already losing its argument with the greenery.
The rounded frontage gives the whole scene a welcoming shape. Then you notice the spiky cresting and those extravagant flowers above the roofline. Apparently the nursery's idea of a hanging basket requires a very small chandelier chain. Below, we'll turn that combination into an approachable build, keeping the curved silhouette while simplifying the most delicate ornament.
The purchased alternatives below use Amazon affiliate links; if you buy through them, it helps fund this tiny world. As an Amazon Associate I earn from qualifying purchases.
A greenhouse kit offers another way into enclosed miniature gardens if you would rather begin with a prepared structure. It is a separate project, rather than the source of this shop's elaborate façade.

Miniature Backstory — The Tiny Tale
Mr. Thistlewick opened the nursery at dusk because his stock disliked being rushed. The lavender needed a quiet hour to gather its thoughts. The climbing vine refused to climb before tea. The small fern in the hanging globe had recently requested a larger view.
On Tuesday, a customer asked for something easy to care for. Thistlewick considered the display, then lifted a perfectly ordinary empty pot.
“This one has an excellent temperament.”
The customer looked disappointed. Behind the counter, something leafy cleared its throat. A tray of seedlings shuffled toward the edge, while the fern revolved slowly in its globe, hoping to appear interesting from every angle.
Thistlewick selected a modest sprig from the lowest shelf. It sat quite still until the customer admired the stained glass. Then it turned every leaf toward the compliment.

The customer bought it immediately, together with the empty pot. On the way out, she asked whether it needed much attention.
“Only the usual amount,” Thistlewick replied. “A little water, some indirect light, and a sincere remark about its posture.”
By closing time the fern had stopped rotating. Thistlewick moved its globe one hook to the left, where it could see the lamp. Everyone agreed this was a promotion. Those suspended globes beneath the front arches are the detail to watch here: a whole nursery, with a few unusually ambitious tenants.
For a different miniature retail project, an existing florist-shop kit can provide a ready-made route into arranging shelves and flowers. Its own design remains separate from the layered Gothic stall shown above.

A Guided Tour of the Build
A crown of small windows
The upper band is wonderfully busy without becoming a solid wall. Oval stained-glass panels sit inside dark frames, with warm light behind them. Planting follows the ledge below, while slim finials and curling ornaments break the skyline. I would keep this upper tier in any simplified version; it makes the stall recognizable from across a room.

The garden hangs in the air
Under the projecting canopy, round glass-like globes hang among the supporting columns. Their little gardens leave daylight around themselves instead of filling the entire opening. Behind them, bottle shelves provide a finer, denser pattern. That contrast gives your eye somewhere to settle before it moves into the back of the shop.

An untidy invitation
The front counter curves around the display, with sloping plant trays and pottery gathered close to the ground. Lavender-like spikes repeat the purples in the glazing. The small entrance stays open at the right, reached by stone-like steps, and a large ornate lamp frames that side of the view. The clutter feels abundant because its heights vary, not because every surface is full.

Purchased miniature flowers in small vases can become an optional display detail if their proportions suit your chosen scale. Keep a few clear spaces around them so the counter's curved outline remains visible.

Inspirations — From the Big World to the Small
The flowing ornament recalls the natural forms discussed in the V&A's account of Art Nouveau: flowers, leaves and sinuous lines became part of structure as well as decoration. Here, the arch supports almost seem to grow into the canopy. A miniature translation can use a repeated leaf-shaped bracket rather than copying every curl.
Kew's Palm House offers a useful parallel for the relationship between plants and an airy glazed enclosure. What carries across is the pleasure of seeing vegetation framed by a visible structure, with glimpses through several layers rather than one flat display.
Guillermo del Toro's collected objects, notebooks and films were brought together in LACMA's At Home with Monsters. That idea of surrounding a story with carefully chosen objects suits this little nursery. I read its crowded shelves and peculiar plants as affectionate dark fantasy.

The mood board gathers those ideas into practical decisions: dark branching supports, amber and rose glazing, mossy greens, a little lavender, and worn paving. Choose one strong silhouette and a restrained palette before adding the smaller surprises. The larger forms should still make sense when the lights are off.
Artist Tips — Make Your Own Magic
The illustrations are AI-generated, and this guide is an inspired route rather than a tested set of measured plans. Your results will vary, especially if your fern starts negotiating its accommodation. Use the supplied scene for composition, then adapt the details to your tools and patience.
Planning your Gothic miniature herb shop
Treat this as an intermediate scenic build because the curved counter, repeated arches and glazing need careful alignment. A proposed 1:24 scale keeps the display manageable; it is not a verified measurement of the pictured model. Choose your pots first, then size the counter and openings around them. A smaller, well-aligned shop will usually read more clearly than a larger structure with fragile ornament everywhere.
Supplies: start with what you have
Structure: clean cereal-box card works for templates and thin trim. Use heavier bookboard or basswood for the base and shelves where stiffness matters. Keep the material choices consistent within each part rather than making a supporting column from soft packaging by accident.
Glazing and globes: clean clear packaging can supply flat window inserts. Transparent colored craft film is a purchasable option; choose the intended clear or tinted material for each window. For the hanging gardens, use small clear craft domes or matching halves that already have a suitable hanging point; do not cut ordinary glass ornaments.

Surface and planting: paper offcuts become paving, leaves and flower petals. Fine wire provides optional stems, while small beads or air-dry clay can suggest pots. Use purchased miniature pots when consistency matters. Match the adhesive to both surfaces and follow its label.
Tools and color: use scissors, a sharp craft knife on a stable cutting surface, tweezers, a pin vise where appropriate, and small brushes. Add water-based acrylics in charcoal, warm brown, ochre, moss green, lavender and muted rose. Lighting is optional: a ready-made low-voltage miniature LED set is simpler than wiring individual components.
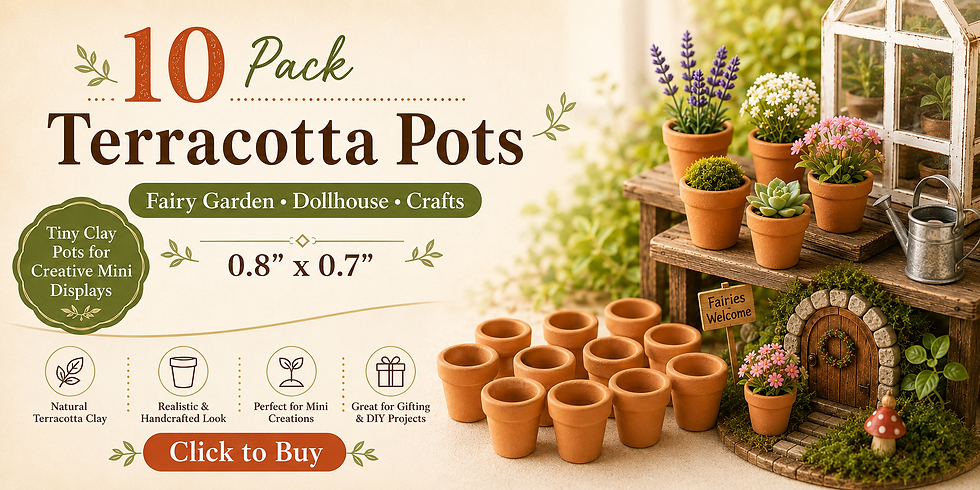
Miniature terracotta pots are a practical bought alternative to shaping every container. Check their actual dimensions before you design the trays, and mix a few sizes rather than treating one large pot as a universal answer.
1. Draw the footprint and test the view
Begin with a paper plan showing a rounded front counter, a straighter shelving wall behind, and an entrance at the right. Sketch the canopy as a broad curve above the counter, with a narrower upper glazing band. These two horizontal levels are the main organizing lines; retain both even if you reduce the number of windows.
Stand folded card silhouettes for columns, shelves and pots on the plan. Look from the low front angle of the reference. Check that the entrance can still be seen and that the upper band does not hide the rear shelves. Mark the hanging-globe positions between columns, leaving enough room for them to move without touching a plant tray.

Use one paper front elevation as a master pattern. Fold it through the center to compare the two sides, then deliberately leave the right entrance different. Keep this template beside the build so later ornament does not gradually change the shop into a different building.
2. Make the base, paving and curved counter
Cut a stiff base large enough for the shop, pots and a clear strip of foreground paving. Laminate thinner card in alternating directions if necessary, weighting it flat while the adhesive dries. Add the right-hand steps as stacked card platforms with broad, even treads. They should lead into the opening rather than end against the counter.
Build the curved counter from a top and bottom profile joined by short internal spacers. Wrap the front with thin card in manageable sections, keeping the seams aligned with future panel divisions. Dry-fit everything before gluing. An easier version uses three or five shallow facets; their corners become useful locations for vertical trim.

Cut irregular paving pieces from thin card, rounding only a few corners. Glue them with narrow, varied joints rather than a checkerboard rhythm. Let the base and counter dry fully before checking them on a flat surface. Correct a rocking base now, before the upper structure makes adjustment awkward.
3. Raise the columns and layered canopy
Make a spacing jig from the master elevation. Build each column from a straight core with small card collars, keeping all supporting columns the same height. Glue the rear shelving carcass first, then use temporary braces to hold the front posts vertical. The shelf back can provide much of the stiffness that the decorative arches appear to supply.
Cut the canopy from two matching card profiles with spacers between them. Keep its overhang shallow enough to remain stable. Add the upper band as a low curved wall, leaving the oval window openings empty. A separate narrow top rim carries the finials later; it does not need a steep pitched roof.

Test-fit the whole upper assembly before attaching it permanently. Sight across the front edge and check that the canopy has not twisted. Add simplified leaf brackets beneath it, using repeated cutouts so the pattern looks intentional. Let each structural joint dry before removing its temporary brace.
4. Fit the stained glass and ornamental skin
Trace each opening onto paper, adding a small hidden margin for its glazing insert. Build the visible dark tracery as a separate thin card overlay, then test it against the clear film. Color the insert with a medium explicitly compatible with that film, using amber, soft pink and muted green. Allow it to dry according to its instructions before sandwiching the layers.
Keep the oval upper windows distinct from the lower fan-shaped arch panels. This difference matters more than a very elaborate lead pattern. Use a few broad color cells so light can pass through; dense opaque marks will turn the openings into dark patches.

Paint the frame and counter charcoal-brown, then pick out selected edges with a warm bronze-like acrylic color. Leave recesses dark. Avoid coating every raised line equally: a few highlighted curves will explain the shape without making the shop look plated. Test your paint and adhesive on glazing offcuts before using them near finished windows.
Miniature botanical tiles offer another decorative route for a counter panel or a small border in an adapted version. Keep such additions subordinate to the reference's stained glass, and check the tile dimensions before buying or cutting a recess.

5. Stock the shelves and make hanging gardens
Build shallow shelves from card or thin wood, using a spacer to repeat the gaps. Leave a little height above each row of bottles. Small clear beads with neat caps can suggest jars; tiny painted wood shapes offer a simpler opaque alternative. Group colors loosely, with some empty spaces between clusters, rather than filling every shelf with the same bright bottle.
Prepare the hanging gardens separately. Place a tiny scrap of dark painted card inside each clear dome as a soil base, then add a restrained tuft of paper greenery. Join the dome parts using the manufacturer's recommended method. Keep the hanging connection mechanical where possible, rather than trusting a large blob of glue on a smooth surface.

Hang three prominent globes across the left and center openings, echoing the reference's varied lengths. Test clearance before fixing their cords. Leave the right entrance clear. No real soil, water or live plant is necessary; a dry scenic version avoids moisture inside the model.
6. Grow the trays, pots and roofline flowers
Make the sloping display trays as shallow boxes with a raised back. Paint their interiors dark before adding plants. Cut narrow paper leaves in a few repeated shapes, curl them gently around a smooth tool, and attach them in clusters. Use shorter foliage near the front so the taller stems behind remain visible.
For additional petal and leaf methods, the miniature flower guide explores several useful paper techniques. For lavender-like spikes, group tiny paper fragments along a slender stem instead of making one thick purple cone. Vary the height and leave some green showing. Surround the entrance with pots, but keep the step treads readable. The nursery should look generous without preventing its owner from reaching the counter.

Reserve the largest fantasy flowers for the roofline, using a light paper construction so they do not pull on the upper band. Shape the petals before attaching them and build only a few spectacular blooms. Let the plant clusters dry off the model where possible, then move them into position with tweezers.
7. Add lamps and a controlled evening glow
Plan lighting access before fixing the shelves and canopy permanently. Use a ready-made low-voltage LED kit with its matching power supply, following its instructions. Keep the switch and battery holder accessible beneath or behind the display. Do not introduce mains wiring, and keep electrical parts separate from wet paint or adhesive.
Concentrate the warm glow behind the upper windows and under the canopy. Test it in a dim room while there is still time to reposition the lights. If one point is harsh, move it farther from the glazing or use a compatible diffuser that the lighting instructions permit. A painted warm window is a perfectly good unlit alternative.

The tall right lamp is a framing element, so make its silhouette clear. A purchased miniature lamp can simplify this difficult shape; otherwise use a sturdy nonworking post with a lightweight card lantern. Keep the smaller left lamps lower so they do not compete with the upper windows.
8. Settle the shop into its cobbled corner
Dry-place the finished structure, then arrange pots in uneven groups along the front. Put the highest planting near the sides, with lower trays in the middle. Repeat a small amount of purple at the left and right to connect the composition. Leave an irregular path through the cobbles so the display still feels like a place someone could enter.
Add a few fine painted cracks and restrained moss-like patches in the paving joints. Use thin layers and allow them to dry between passes. Keep the counter edge clean enough to read against the plants. Finish the top rim with a small number of well-spaced finials and the distinctive curled central ornament.

Walk around the model at eye level, checking for visible glue, tilted posts and loose hanging pieces. Remove anything that hides the entrance or makes the roofline confusing. A garden furniture set can furnish a separate pavement extension if you choose to enlarge the scene; it is optional and not a substitute for the shop's central counter.

Photographing the nursery at closing time
Place the model against a plain muted blue-gray backdrop, well behind the highest flowers. Start with a low front three-quarter viewpoint that shows the curved counter and right steps together. Use a soft side light and a white reflector opposite it, then turn on any model lighting at a restrained level.
Take one frame for the whole structure and separate close-ups for the upper glazing, hanging globes and front trays. Shift the camera slightly if a globe reflects the light source directly. Keep enough depth of field to explain each chosen detail; blur belongs mainly behind it, rather than across the important front arches.

When the nursery gets temperamental
• A canopy twists: remove it before adding more decoration, check the spacers, and rebuild the uneven section on a flat surface.
• Glazing looks muddy: simplify the dark tracery and leave larger clear color areas rather than adding brighter paint over opaque marks.
• Globes swing into plants: shorten their cords or move the hooks while keeping the right entrance open.
• Pots disappear into the counter: lighten a few rims and vary the plant heights instead of outlining every object.
• Lights overwhelm the windows: reduce brightness through the kit's supported controls or reposition the source; do not improvise electrical modifications.
Closing — Until Next Time in the Small World
I keep returning to the hanging gardens. They make a dense shop feel unexpectedly airy, and give Mr. Thistlewick several opportunities for staff promotion without changing the payroll. Which would you build first: the stained-glass crown or one tiny globe with a very demanding fern?
Share your own creation with #smallworldminiatures, explore the online shop, and join the newsletter through the Small World Miniatures website. There is always room for one more pot, provided it has an excellent temperament.








Comments