



A Little Morning Ceremony: An Edwardian-Inspired Miniature Bathroom

First Impressions in Miniature
Some miniature rooms suggest a whole life before you notice the furniture. This Edwardian-inspired miniature bathroom suggests someone who folds the guest towels beautifully, polishes the taps, and then refuses to let anyone use either. I would absolutely be the guest standing there with wet hands, trying to identify the unofficial towel.
The carved vanity makes the first impression: warm brown wood tones, a generous oval mirror, and a pale countertop that catches the light. Around it, muted teal wallpaper, cream paneling, patterned tiles and a lace curtain turn an everyday washroom into a small domestic ceremony. There is enough ornament to reward a close look, with enough pale space to keep the room comfortable.
I’m calling this Edwardian-inspired because it blends an early-twentieth-century mood with more exuberant inherited furniture and contemporary-looking bathroom accessories. That freedom is part of its charm. We can enjoy the atmosphere, then borrow its strongest ideas for an achievable roombox: a layered vanity, convincing finishes, restrained lighting and a few objects that suggest a resident has just stepped away.
The purchased alternatives below use Amazon affiliate links; if you buy through them, it helps fund this tiny world. As an Amazon Associate I earn from qualifying purchases.
For a neighboring bedroom, the iLAND Classical Bedroom Set offers a period-inspired starting point. Check its dimensions against your chosen scale.

Miniature Backstory — The Tiny Tale
In the household of Mabel Thistledown, a very particular mouse, the bathroom had three rules. The brass must shine. The lace must hang straight. The decorative towels were for looking at.
Her nephew Pip accepted the first two rules. The third troubled him. He had washed his paws, which seemed a reasonable thing to do in a bathroom, and now stood beside the vanity dripping onto the expensive-looking floor.
“Those are the visiting towels,” Mabel explained.
“I am visiting,” said Pip.
“Yes, but informally.”
The trouble had begun when Mabel prepared the room for the annual inspection by the Extremely Small Household Society. She had polished each drawer pull, arranged the blue-and-white bottles by height, and adjusted the curtain until the morning light made a flattering stripe across the counter. Pip had been invited to help, which chiefly meant being told where he mustn’t stand.
After a thoughtful pause, he offered to dry his paws on his waistcoat. Mabel looked horrified. The waistcoat, she explained, was also decorative.

They negotiated. One towel could become a working towel, provided Pip folded it afterward and promised never to mention the arrangement to the Society. Mabel selected the lower towel with the gravity of someone choosing a cabinet minister.
By the time the inspector arrived, everything looked immaculate. The brass shone, the lace hung straight, and Pip’s paws were dry. Mabel announced that the room balanced beauty with practicality, a principle she had always supported.
If you look at the folded towels on the left-hand table, you can decide which one has just been promoted to active service.
A Guided Tour of the Build
The vanity and its miniature architecture
The central vanity behaves almost like a building façade. Tall columns flank the mirror, a curved crest rises above it, and the lower cabinet has its own rhythm of drawers and paired doors. The warm finish makes the carved-looking details readable without outlining every curl. A white, marble-like top interrupts all that brown at exactly the right height, while the brass-colored taps repeat the smaller drawer pulls below. The mirror’s softened reflection supplies depth without competing with the frame.

Pattern, paneling and the floor beneath them
The wall treatment does a surprising amount of organizing. Botanical wallpaper fills the upper space, while pale vertical paneling gives the eye a quieter lower register. Narrow trim draws a level line around the room. Below, black diamonds punctuate a cream geometric floor, contained by a dark border. Each pattern has a different job: foliage creates atmosphere, paneling establishes order, and the floor leads you toward the vanity. Keeping those visual scales distinct prevents the room from dissolving into decoration.

The useful little things
On the left, folded towels sit beside blue-and-white vessels and a small green dish. On the right, the lace curtain softens the window above a narrow cabinet and shallow white bowl. A partially visible toilet makes the room’s function clear, although it wisely avoids competing for attention. Matching shaded sconces add warm pools of light. I particularly like the contrast between the crisp counter edge and the loose curtain hem: one looks carefully fitted, the other seems ready to move with a passing breeze.

Inspirations — From the Big World to the Small
Edwardian-inspired miniature bathroom design
Historical interiors give us useful reference points without requiring this room to belong to one exact year. The National Trust describes Lanhydrock as a strong example of Victorian and Edwardian upstairs-and-downstairs life. Its mixture of domestic spaces and modern technologies is a reminder to think about how a room is used alongside how it is decorated. For our miniature, the basin, towel storage and convenient little side table provide that everyday logic beneath the ornament.
For the wallpaper, William Morris is a helpful design reference rather than a claimed attribution, as in A Garden in the Grain. The V&A explains how his closely observed natural forms became structured repeating patterns. The foliage here recalls that conversation between growing things and an orderly surface. Translate the idea by choosing a small botanical repeat with two or three quiet colors. Oversized flowers can become miniature cabbages.

Standen offers another useful comparison. Designed by Philip Webb and furnished by Morris & Co., it combines patterned surfaces with a carefully considered domestic setting. The National Trust also notes that it had electric lighting from the beginning. That supports looking beyond a simple “old house equals candlelight” formula. In this inspired build, small shaded electric-style sconces can sit comfortably beside traditional woodwork. The miniature’s carving is more lavish than Standen’s generally simpler woodwork; the connection is the layering of pattern, craft and useful comfort.
If you enjoy comparing bathroom personalities, the site's Boho Glow vanity uses a looser mixture of planting and pattern. Where Gold Learns to Glow explores a more theatrical, gilded fantasy. This room falls somewhere quieter between them, with warm wood doing much of the decorative work.
Blue-and-white ceramics can link adjoining rooms. The Odoria Blue Lotus tea set is an optional companion for a sitting room, rather than a substitute for bathroom fittings.

Artist Tips — Make Your Own Magic
You can build an interpretation of this room without carving a microscopic stately home. The illustrations are AI-generated, and this guide offers inspiration rather than an exact, tested reproduction of the pictured model. Results will vary. Start with the large shapes and let the details earn their place.
Supplies for your small morning room
Structure: reuse clean, flat packaging card for mock-ups and small cabinet parts; choose sturdy bookboard or basswood for a more durable shell. Add narrow wood strips for the paneling and trim. Keep the base rigid enough to resist warping.
Surface treatments: use leftover matte paper for trial wallpaper, then a small-repeat decorative paper or your own printed botanical pattern. Acrylic paints in cream, muted teal, warm brown, dark brown and soft gray cover the main palette. A fine brush and a small flat brush handle most finishes.
Furniture and fixtures: clean card offcuts, small beads and short lengths of craft wire can become drawers, feet and taps. An unfinished dollhouse dresser is an easier starting point. Reflective packaging can suggest a mirror; mirrored card gives a more predictable craft surface. Neither behaves exactly like glass.
Soft details: wash and reuse a fine cotton scrap for towels and delicate lace for the curtain. Look for a weave that makes sense beside your planned furniture. Small air-dry-clay shapes or suitable plain beads can become bottles and bowls.

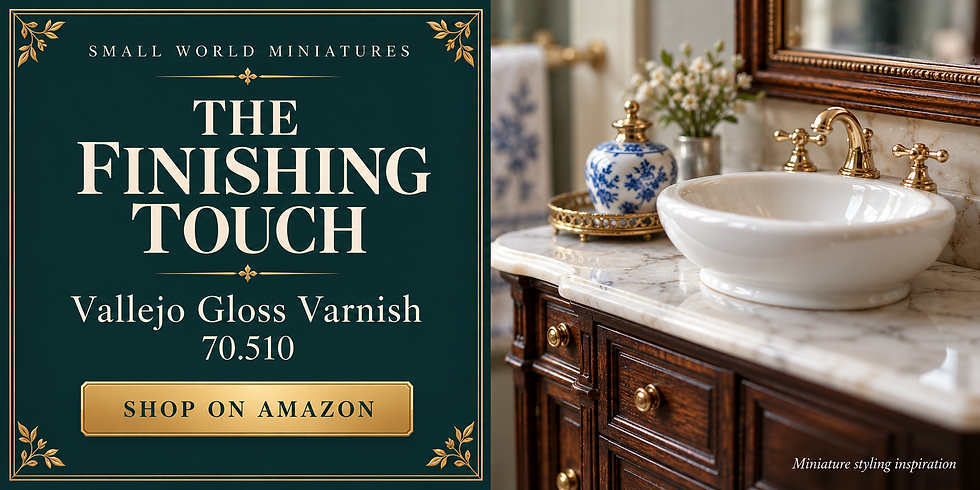
Adhesives and finishes: use a paper-appropriate PVA sparingly and a wood adhesive for wood-to-wood joints. Choose finishes compatible with your paint. Vallejo Gloss Varnish 70.510 is one optional product to investigate for small glossy details; AMACO Rub ’n Buff Antique Gold is an optional metallic wax for selected raised accents. Follow each label, test the whole finish combination on a spare piece, and keep wax away from surfaces that still need gluing.
Tools and optional light: scissors, tweezers, a craft knife, a protected cutting surface and sanding supplies are enough for a simple version. A ready-made low-voltage miniature lighting kit is optional. Use its matching power source and instructions; this project needs no household mains wiring.
1. Plan the room around the vanity
Choose one working scale and use it throughout. For a proposed 1:12 version, divide each imagined full-size dimension by twelve; an imagined 36-inch-wide cabinet becomes three inches wide. This is a planning example, not a measurement of the reference image. Make paper silhouettes of the vanity, side table and window before cutting good material.
Arrange the vanity on the back wall, with space for the curtain and side cabinet at right. Keep the front open so the floor remains visible. A shallow room works if the furniture stays shallow too. Check the viewpoint through a phone camera; an impressive crest can disappear when the top edge of the box is too low.
Mark the window and lighting routes while the walls lie flat. Leave the parts loose until the proportions feel balanced.

2. Build the shell and a calm lower wall
Cut the walls and base from suitable rigid stock, making several controlled passes with a sharp blade rather than forcing one deep cut. Keep your free hand out of the blade path and use a proper protective cutting surface. Dry-fit the joints, then glue the shell square and support it while the adhesive sets according to its instructions.
For the paneling, glue narrow strips onto a thin backing sheet, or score vertical lines into smooth card without cutting through it. Add a baseboard and a slightly wider top rail. Paint the assembly a warm cream before fitting it to the wall. Thin coats preserve the grooves; allow each coat to dry before handling.
Test-fit the wallpaper above the rail. Apply a restrained, even layer of paper adhesive and smooth from the center outward. Let a sample dry first to check for ink bleeding or wrinkling. Keep the pattern upright across the corner, then cover the join neatly with trim.

3. Lay a geometric floor and frame the window
Draw a simple repeating tile pattern on a separate floor insert. A printed pattern is the easiest route; individually cut cream card tiles with tiny dark diamond inserts provide more texture. Begin from a centerline so any awkward partial tiles end up at the edges rather than directly in front of the vanity.
Keep the dark border narrow. Too much black can pull attention downward and make the floor look heavy. Glue the finished insert flat, protecting it from pressure marks while it dries. If you seal it, first test the chosen coating on the printed ink or paint you used.

Frame the window with slender strips and paint them before adding clear plastic glazing. Clean packaging plastic is a useful reuse option when it is transparent and unscratched. Attach it with a compatible adhesive tested on an offcut. For a simpler display, leave the window open and place a softly lit neutral backdrop outside it.

4. Give the vanity a grand silhouette
Build a plain cabinet box, then layer thin card rectangles on the front to suggest drawer fronts and doors. Working drawers are optional; fixed fronts make this project much easier. Add paired vertical strips at the corners, beads or bought miniature feet below, and a shaped card apron along the bottom.
Make the mirror surround separately. Start with an oval opening in layered card and add straight side columns. Suggest the curved crest with a few broad shapes, checking the silhouette before adding smaller curls. Shallow paper scrolls or suitably scaled ready-made decorative trim can suggest carving. Leave clear spaces between details so paint will not turn them into one lump.

Once the glue is dry, paint a warm brown base. Add darker color sparingly in recesses, then lightly brush a warmer brown over raised edges. Keep the brush strokes aligned where wood grain would run. A satin effect suits the furniture; excessive gloss can make every surface look plastic.

5. Add the pale counter, basin and reflective center
Cut the counter from smooth card or thin sheet stock and soften the front corners. Paint it an off-white. With a fine brush, add a few broken gray veins, changing their direction and pressure rather than drawing a network of equal lines. Soften some while leaving broad quiet areas. Let the paint dry fully before applying a compatible protective finish.
A shallow bought miniature basin gives the cleanest shortcut. Alternatively, model a small oval bowl in air-dry clay, leaving an even rim and following that clay’s drying instructions. Sand only when permitted and fully dry, controlling dust. Paint the basin white and test a gloss finish for the ceramic-like effect.
Cut mirrored card to fit behind the oval frame and keep adhesive away from the visible surface. Install it late, after dusty work is finished. Check the reflection from the intended viewing angle before fixing the vanity in place.

6. Make restrained brass details and shaded sconces
Bend short pieces of suitable craft wire into simple tap shapes with pliers, keeping cut ends controlled and away from fingers. Small beads can suggest handles. Work on the fixtures separately so you can paint them cleanly, then attach them to the counter after their finish is ready for handling.
For drawer pulls, a small loop and two attachment points communicate the idea without copying every flourish. Metallic acrylic paint is a straightforward option. If you use Antique Gold metallic wax instead, apply it only as directed to a compatible, dry surface, with the label’s ventilation and handling precautions. Test it before committing to your finished cabinet.

Make the sconces as a matching pair: shallow backplates, curved arms and small pleated paper shades. Unlit sconces are entirely convincing. For working lights, use a ready-made low-voltage kit suited to enclosed miniature fixtures and follow its clearance instructions. Test it before closing access, keep the power switch reachable, and avoid trapping hot components against paper or fabric.

7. Dress the room without hiding the work
Fold fine cotton into small towels, pressing the folds and trimming bulky seams. Try the stack on the side table before securing it. A tiny spot of fabric-compatible adhesive can hold a fold. Keep one corner gently rounded.
Hang a narrow lace panel from a fine rod, allowing it to fall beside the window rather than covering the entire opening. Choose a small pattern with delicate edges. If the lace is stiff, try a thinner fabric before adding more glue. The room needs that loose curve to balance its rigid furniture.
Paint a few small bottles cream, pale green and blue-and-white. Suggest the blue decoration with sparse dots or short strokes instead of elaborate lettering. Add a shallow dish, a bowl on the right cabinet, and perhaps a tiny soap. Let all finishes dry before arranging them. Leave some countertop visible; the resident should still have somewhere to wash their paws.

8. Balance the light and finish the composition
Set the vanity in place and look at the room from its final viewing height. Repeat the same warm brown on the side furniture, but let the main piece carry the strongest contrast. If you include the toilet, keep its profile simple and its placement subordinate to the central composition.
Check the sconces against the window light. A soft daylight source at the right and restrained warm lamps can produce depth without turning the cream walls yellow. Move the external light farther away or diffuse it with a purpose-made photography diffuser if highlights become harsh. Keep fabric and paper clear of hot lamps.
Remove stray glue, straighten the rail and adjust the towel stack. Take a quick photograph, then inspect it enlarged for oversized seams or crooked hardware. Fix the few details that draw the eye first.

Photograph the room as a miniature interior
Place the roombox on a stable table with a plain backdrop behind the window and open edges. Position your camera or phone near vanity height, then move a little off-center if the mirror catches the lens. Use a tripod or steady support, and try a timer to avoid shaking the setup.
Bounce gentle light from the left with white card while the main light enters at right. Keep the light sources consistent enough that the wood stays warm and the paneling stays cream. Capture the full room first, then the carving, wallpaper-to-paneling junction and towel arrangement. A close view with a soft background is lovely, but keep the specific detail you are explaining sharp.

Small problems, practical fixes
Wallpaper overwhelms the room: reduce the repeat size or lower its contrast before fitting it. A sample behind the unfinished vanity is more useful than a sample viewed by itself.
The carving disappears: remove excess wash from broad surfaces and add a restrained highlight to the highest edges. More black paint rarely solves muddy detail.
The counter looks like striped candy: paint over some veins, then reintroduce fewer, broken marks with varied widths.
Lace looks like a fishing net: choose a finer fabric or use only a narrow strip where the edge matters most.
Gloss turns cloudy or tacky: stop adding coats. Consult the finish instructions, check compatibility and curing conditions, and remake the small test piece before treating the model again.
Closing — Until Next Time in the Small World
What keeps me looking at this room is the balance between ceremony and ordinary life. The vanity makes an entrance, but the towels, bowl and curtain persuade me that someone belongs here. You can capture that feeling with a simpler cabinet, a carefully chosen paper and a few well-placed objects.
Which detail would you build first: the carved-looking mirror frame, the geometric floor or Mabel’s highly regulated towel collection? Tell me in the comments, and share your own interpretation with #smallworldminiatures. You can also join the newsletter for more miniature worlds and browse the online shop for a little inspiration between projects.
And if a guest asks which towel to use, perhaps designate one before they arrive. Pip would appreciate it.








Comments