


Deco the Halls: An Art Deco Christmas Miniature Street of Snow and Golden Windows

My Vision for This Small World
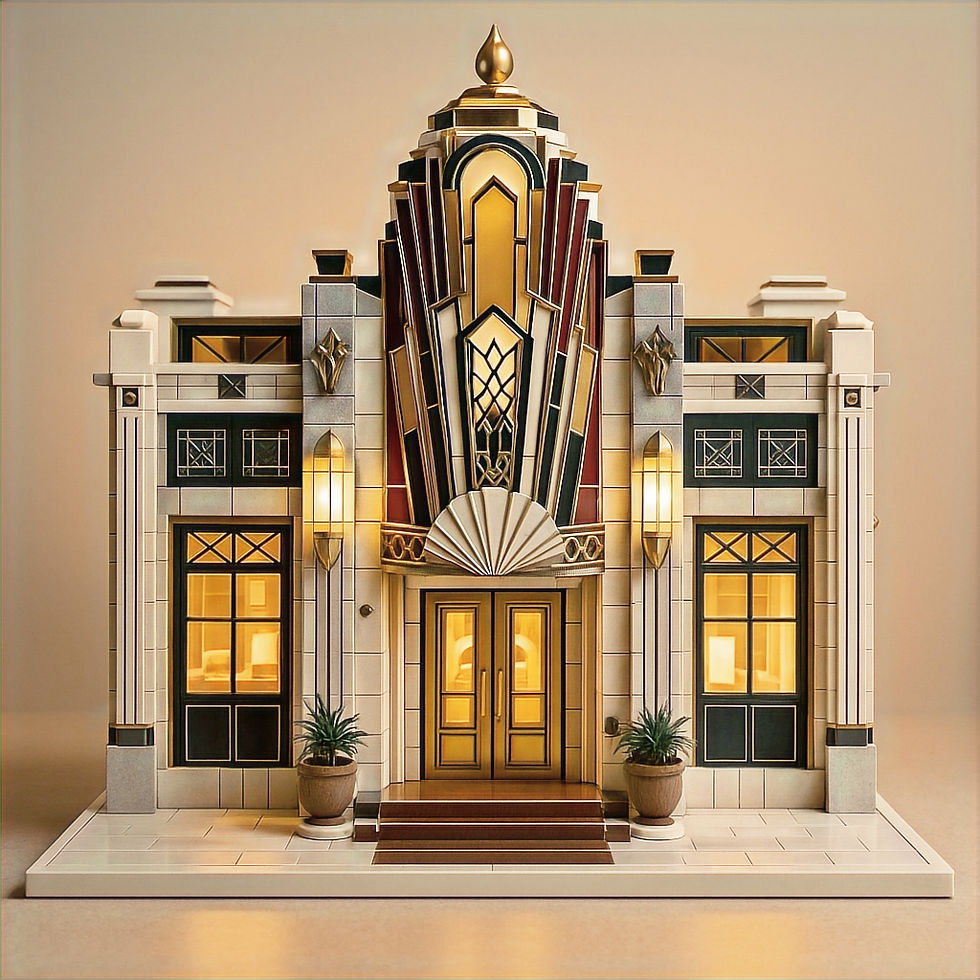
For my Art Deco Christmas miniature, I brought a row of glowing shopfronts into a snowy city evening. Pale facades and dark windows frame the golden fan-shaped ornament, with jewel-like color adding small festive accents. The central building has enough flourish to hold the street together, while snow softens its crisp edges. I like how the distant skyline expands the setting without taking attention from the tiny doors, trees and inviting windows close at hand.
Some links earn me a commission from qualifying purchases and help keep this tiny world growing. As an Amazon Associate I earn from qualifying purchases.
The LORENOOK Magic Clock Tower pairs ornamental architecture with warmly lit windows. It’s a lovely book-nook choice for anyone drawn to a tiny street with a little mystery.

Miniature Backstory — The Tiny Tale
Bellwether Arcade opened on Juniper Street, New York, in 1928. Its founder, Ada Bell, insisted that every shop keep one light burning for anyone still finding their way home.

CUTEBEE’s Bread Factory brings the charm of a miniature bakery to your collection. If you always stop at the shop with the inviting window, this little build is hard to resist.

A Guided Tour of the Art Deco Christmas miniature
A crown that conducts the whole street
The tallest feature is the central fan, built visually from overlapping arcs and radiating ribs. Pale edges catch the cool light, while the recesses stay dark enough to preserve the pattern. Snow settles over the curves without flattening them. Below, columns frame the entrance and a short flight of steps brings the eye down to street level.

Windows with their own evening weather
The right-hand shop is almost a lantern. Its tall upper windows carry fine geometric ornament, while the larger pane below reveals a crowded display of small objects. The dark frame holds all that amber light in place. Across the row, a striped awning introduces a softer horizontal rhythm beneath the more formal upper windows.

A pavement worth slowing down for
Trees of different heights interrupt the long frontage. Some are simple snowy cones; others carry tiny ornaments. Rounded teal and gold objects near the entrance echo the richer colours inside the shops. The lamps make pools of warmth over the snow, while the darker strip of road gives the whole display a clean lower edge.

Inspirations — From the Big World to the Small
I read this scene as an imaginative Art Deco Christmas, with a generous helping of theatrical shop-window design. The fan forms and strong verticals do most of the architectural work. A miniature can borrow those recognisable rhythms without trying to compress an entire skyscraper into a storefront.
New York City's description of the Chrysler Building identifies its steel sunburst crown. That is a useful visual parallel for the arcade’s nested fans, although the scene is not a replica of the building. Translate the idea into a small number of clear arcs and radiating strips. The gaps between them matter as much as the raised pieces.
The Empire State Building’s architecture offers another useful contrast: pale stone, metallic trim and a disciplined vertical emphasis. Here those qualities soften into cream-grey walls and bright window edges. Keep metallic accents concentrated around the crown and frames so the shopfronts retain their depth. For another interpretation of the same architectural language, explore the fanburst facade in Starburst on Fifth.

Sarah Walkley’s The World of Miniatures: From Simple Cabins to Ornate Palaces is an invitation to linger over small architectural worlds. A lovely book for the miniature enthusiast whose next idea is never far away.

Artist Tips — Make Your Own Magic
A little AI-generated imagination lit up this snowy street. Start with a simple version and let clean construction carry the detail, with room for the occasional tiny strip of card to suggest a curve of its own.

As a planning choice, try 1:24 scale and a shallow street frontage rather than complete rooms. A base around 36 × 20 cm can accommodate a compact three-shop composition, but treat that as a starting suggestion, not a measurement taken from the image. Test the layout with paper rectangles before cutting your good material. This is an intermediate project because repeated window openings, layered fans and accessible lighting need careful planning; the individual techniques are straightforward.
Supplies for a small winter arcade
Structure: begin with clean, flat packaging card, a sturdy reused display board and saved wooden coffee stirrers. For more predictable thickness, use chipboard sheets and basswood strips. Avoid warped or greasy packaging. Keep a craft knife, cutting mat, metal straightedge, scissors, tweezers and small clamps nearby.
Windows and ornament: a clean clear packaging panel can become glazing after an adhesive test. Purchased clear acetate sheets, fine card and thin paper give you repeatable windows, fan layers and awning stripes. Use a suitable clear-drying adhesive for the glazing and PVA for compatible card-and-wood joints.
Colour and snow: use paints you already own in warm grey, ivory, dark green, teal and a little metallic gold or silver. Acrylic craft paints are a practical purchased equivalent. White paper can make simple removable snow caps; scenic snow offers a textured alternative. Follow the actual snow product’s instructions rather than mixing an improvised powder recipe.

Details and light: reuse tiny clean boxes, paper scraps and spare beads for shop goods. Optional bottlebrush trees, thin red ribbon and a ready-made low-voltage lighting set add Christmas. Check every purchased detail against your chosen scale. Keep the supplied battery holder and switch accessible, and never build mains wiring into the model.
Neat folds make tiny boxes and awnings feel beautifully finished. The Scor-Buddy scoring board is a useful workbench companion for all those small paper details.

1. Plan the arcade and build a square shell
Draw three shop bays with one shared pavement line. Give the middle bay the tallest outline and leave space for steps in front. Keep upper-window heads aligned across the side buildings so their repetition feels deliberate. Set a paper door beside each opening and compare the proportions before committing to a scale.
Cut the base and wall pieces from firm card. Use several gentle passes with a sharp craft knife on a cutting mat, keeping your free hand out of the cutting path. Cut openings while each wall is flat. Add short basswood braces inside the corners, checking the assembly against a square object before the adhesive sets.
Make the back removable or leave it open behind the display. You will need access to window trays, light positions and the battery holder later. Let the shell dry supported and square; adding ornament to a leaning wall simply gives the lean better jewellery. For an easier version, make a single shop bay and retain the central fan as its defining feature.

2. Build the fan-shaped crown in layers
Sketch one symmetrical fan on paper, fold the paper along its centre line, and trim the outline so the halves match. Transfer it to card. Make two smaller arcs that sit in front of the largest backing, leaving enough exposed space for the radiating pattern to remain visible.
Cut thin strips for the rays and arrange them dry before gluing. Work outward from the middle, alternating sides so the spacing stays balanced. A simpler fan with fewer clean rays is more convincing than a crowded one whose strips collide. Use tweezers to place the pieces and a small amount of adhesive to avoid swelling the card.
Let each layer dry flat beneath a protective sheet before adding the next. Attach the finished ornament above the central entrance with support behind its widest section. Narrow vertical strips can extend the rhythm down the facade. Keep the upper edges accessible; later they will receive small ledges of snow without filling the dark spaces between the rays.

3. Paint the stone-like walls and crisp shopfronts
Test your paint and any sealer on an offcut first. Apply thin coats so the card keeps its shape and the layered detail remains sharp. A warm grey base on the upper walls leaves room for ivory highlights, while a darker grey in the fan’s recesses makes the relief readable. Let each coat dry according to the product directions.
Paint the lower shopframes dark green or nearly black. Once dry, brush a restrained metallic highlight across selected raised edges, wiping most paint from the brush first. Keep the finish imperfectly varied at a very small scale, without suggesting heavy rust on an elegant maintained frontage.
Make the striped awning as a separate folded-card piece. Paint or glue alternating narrow teal and ivory strips onto it before attaching the support tabs. A shallow downward slope should suggest shelter over the window. Leave it to dry independently so its weight cannot pull a newly painted frame crooked. Keep all glazing out until paint and coatings have cured sufficiently for handling.

4. Glaze the windows without losing the pattern
Cut the clear panes slightly larger than their openings. Build the visible grille from a few repeated arches and narrow straight strips, simplifying the most intricate curves. Lay the grille flat against its pane and apply tiny amounts of compatible adhesive around concealed contact points. Test first: some adhesives can haze or distort clear plastics.
Allow the assemblies to dry flat before fitting them from behind. Keep glue away from the centre of the glazing, where a tiny smear becomes a very large fog bank in close-up. Peel any protective film only when the surrounding work is clean. Fit a removable pale translucent backing behind the upper windows if you want a soft glow rather than visible individual light points.
Check the facade with a light temporarily behind it, then remove the light again while you continue working. Keep backing materials clear of the light source and follow its instructions for ventilation and clearance. A version without electronics can use warm translucent paper behind the panes and rely on external lighting for photographs.

5. Give the shops something worth looking at
Fold shallow card trays that slide behind the lower windows. Add small plinths at different heights so the goods can be read through the frame. A few paper books, wrapped parcels and rounded beads can suggest a busy little shop while giving each tiny treasure room to be seen. Keep tall objects toward the back and leave a little visible floor at the front.
You can make a bakery window with paper plates and small painted card shapes rather than introducing a whole new sculpting technique. Let each glued stack dry before placing it on its tray. Test the display through the glazing from street height; what looks spacious from above may disappear behind a window bar.

Angie Scarr’s Making Miniature Food & Market Stalls is a tempting addition to a miniature maker’s bookshelf. Just the thing for anyone who enjoys filling tiny shop windows with character.

6. Dress the street for Christmas
Make wreaths on small card rings, covering them with clipped green paper and a narrow red bow. Keep the decoration light enough for the window frame to support. Build several together, then compare their sizes against the doors before attaching them. Let the individual pieces dry so they remain circular when handled.
Set bottlebrush trees in stable little planters or weighted boxes. Use different heights, with the tallest tree away from the central doorway. Add only a few beads or painted dots so the tree’s outline survives. Fold tiny parcels from paper scraps, then group them where they do not obstruct steps or hide the lamp bases.

Give your miniature evenings a welcoming glow with iLAND miniature string lights. Warm windows are one of those details that make a little house feel ready for someone to come home.

7. Bring in settled snow and a gentle glow
Apply snow only after the painted structures and decorations are secure. Place small caps on horizontal ledges and build shallow drifts where the pavement meets the walls. Leave the fan’s fine channels and the door opening visible. The winter-bright Kinkaku-ji miniature offers a different example of snow preserving an architectural silhouette. If you prefer removable scenery, cut soft irregular shapes from white paper and fit them over the ledges without covering every surface.
For a textured finish, follow the chosen scenic product’s directions. Woodland Scenics describes spreading its Flex Paste with a craft stick and adding Soft Flake Snow while wet. That is guidance for those products, not a universal recipe. Avoid breathing loose scenic particles, follow label precautions and let wet finishes dry fully before connecting lights.
Install a ready-made low-voltage set without modifying its electrical components. Secure wires along the rear so they cannot catch beneath the removable back, and keep the battery compartment reachable. Position light sources behind the upper window backing rather than directly against it. Check in a dim room and move an overly bright source farther from its pane where space permits. Real candles belong only to the fiction; use no flame in the miniature.

Photograph the street at window height
Set a dark blue or charcoal background behind the model, leaving space between them. Support your camera or phone near pavement height and aim slightly across the row so the right-hand corner gives the buildings depth. Use a soft external light from one side and a white reflector card opposite to reveal the pale relief without erasing its shadows.
Turn the model lights on and lower the exposure until the windows retain colour. Move the key light or camera slightly if reflections obscure a display. Take one wide composition, then close views of the fan, shop window and snowy pavement. Keep the backdrop simple enough that the architecture remains the subject, and keep the camera equipment outside the finished photograph.

Small problems, workable fixes
Bowing walls: use thinner coats of paint and adhesive, test on spare card, and let pieces dry flat before assembly. Add an internal brace instead of forcing the wall straight with more wet glue.
Uneven fan rays: mark a centre line and arrange strips dry in alternating pairs. Remove a crowded strip before the glue sets; fewer well-spaced rays still convey the motif.
Cloudy glazing: switch to a compatible adhesive after an offcut test and use less of it at concealed edges. Replace a badly marked pane rather than trying to polish an uncertain plastic with solvents.
Featureless white snow: vary the depth and preserve dark gaps under ledges. A restrained cool shadow at the edge of a dry drift can separate it from a pale wall.
Bright dots behind windows: adjust the light position and test a suitable diffuser while retaining the manufacturer’s clearances. Keep the rear accessible until the glow looks even.
Until Next Time in the Small World
I like the idea that the finest thing in Bellwether Arcade is a window kept bright for someone still on the way home. You can bring that feeling to a single storefront, even if your fan has fewer rays and your snow comes from a sheet of white paper. Leave a little space for the brass mouse if he decides to visit.
Which detail would you make first: the sculptural crown, the striped awning or the glowing shop window? Tell me in the comments, and share your own tiny winter street with #smallworldminiatures. You can browse the shop and join the newsletter through the home page for more small worlds to explore.







Comments